Uploading a Blueprint
As a first step a blueprint should be uploaded to the Cloudify Manager. Deployment services and deployment environments are spinned up from uploaded blueprints.
The blueprint can be uploaded to the Cloudify Manager with Cloudify CLI, Cloudify Management Console, or Cloudify API.
The blueprint can be provided as an archive, or a link to github site, or just a YAML file.
Single blueprint YAML file can be uploaded without packaging them through the Cloudify Management Console.
Uploading a blueprint from Blueprints marketplace
- On the Blueprints page click Upload button and choose Upload from Marketplace option.
- On the Marketplace select a blueprint and click to the “Upload blueprint” button. After this the blueprint will be uploaded and the service create wizard will be opened.
Uploading a Blueprint using the Cloudify Management Console
Supported archive formats: TAR, TAR.GZ, TAR.BZ2, ZIP
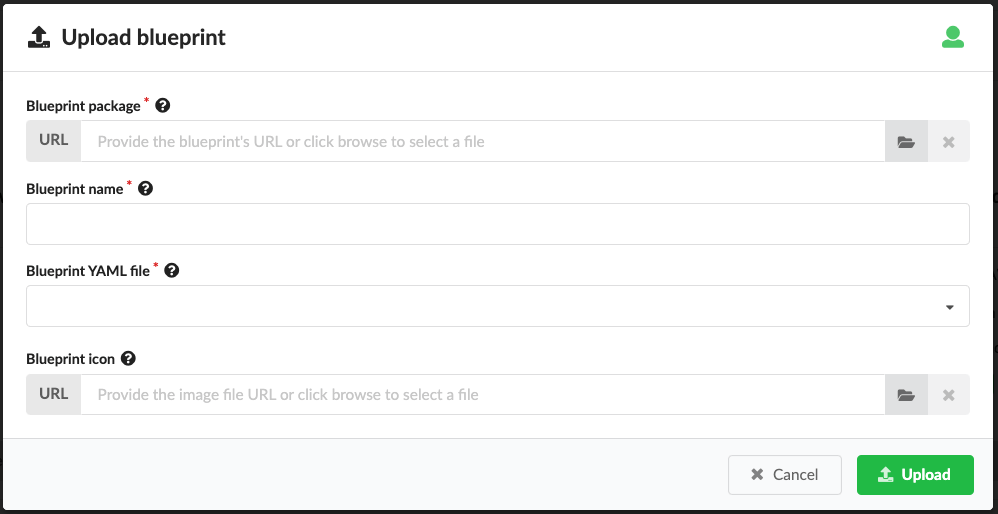
- On the Blueprints page click Upload button and choose Upload a blueprint package option.
- Select a blueprint package from a local folder or providing URL to the archive.
- Enter an unique name for the blueprint.
For example, you can upload one instance of the blueprint as
blueprint-templateand another instance as ablueprint-with-input. - Select the YAML filename of the blueprint. This field refers to the .yaml file that contains the application topology.
- Click Upload to upload the blueprint package.
Uploading a Blueprint using the Cloudify CLI
The Cloudify CLI allows to upload packaged blueprints and unpackaged blueprints.
The blueprint uploading command examples
The packaged blueprint:
cfy blueprints upload -b BLUEPRINT_ID -n BLUEPRINT_FILENAME PATH_OR_URL_OF_BLUEPRINT_PACKAGE
The unpackaged blueprint:
cfy blueprint upload -b BLUEPRINT_ID BLUEPRINT_FILENAME
Additional examples:
The cloudify-nodecellar-example from GitHub:
- Download the cloudify-nodecellar-example as a ZIP file.
- Enter the command for your IaaS:
OpenStack
cfy blueprints upload -b nodecellar -n openstack-blueprint.yaml PATH_OR_URL_OF_BLUEPRINT_ARCHIVE
SoftLayer
cfy blueprints upload -b nodecellar -n softlayer-blueprint.yaml PATH_OR_URL_OF_BLUEPRINT_ARCHIVE
Amazon Web Service
cfy blueprints upload -b nodecellar -n aws-ec2-blueprint.yaml PATH_OR_URL_OF_BLUEPRINT_ARCHIVE
vCloud
cfy blueprints upload -b nodecellar -n vcloud-blueprint.yaml PATH_OR_URL_OF_BLUEPRINT_ARCHIVE
The -b flag assigns a unique name to the blueprint on Cloudify Manager.
You can navigate to the Cloudify Manager URL and see the nodecellar blueprint in your list of blueprints.
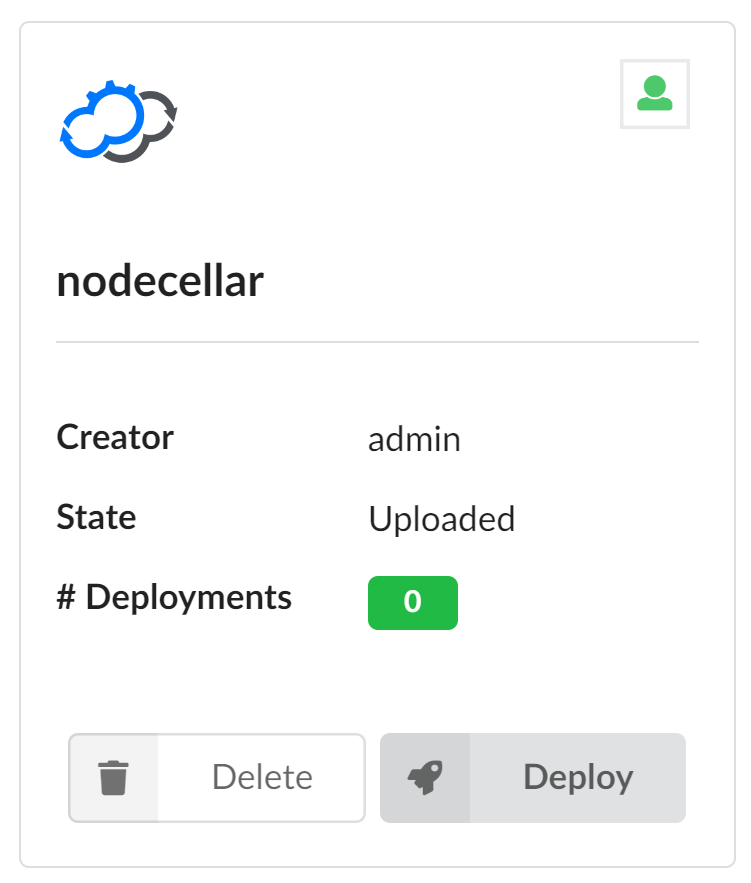
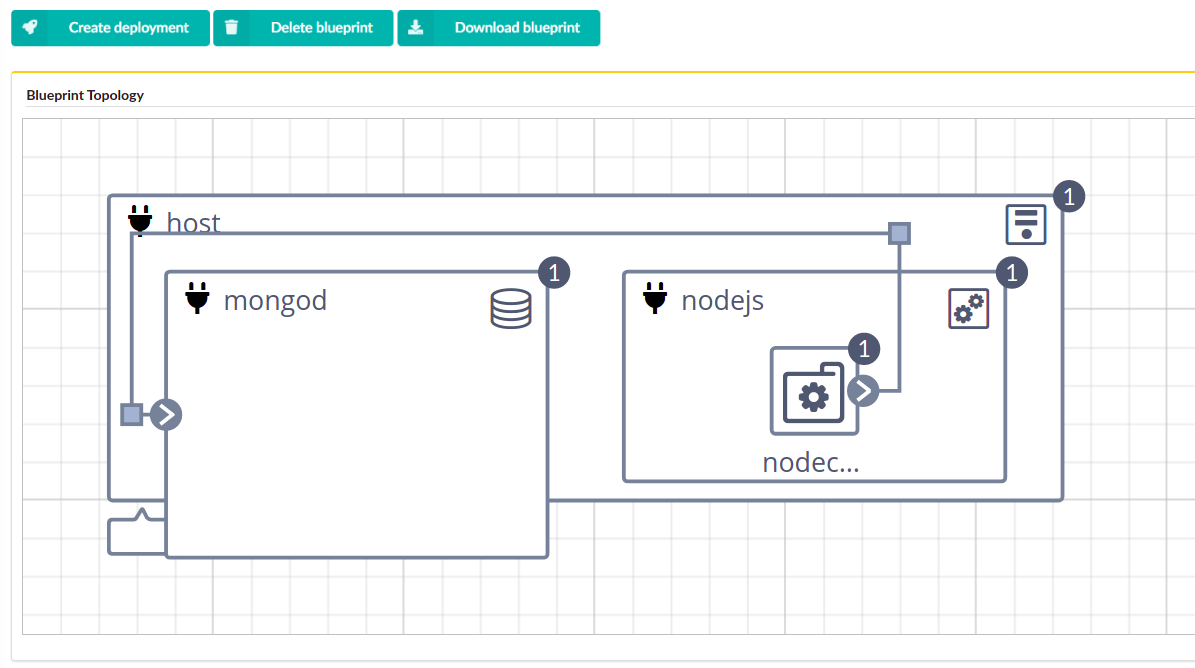
Click the blueprint to view its topology. A topology consists of elements called nodes. The nodecellar example, includes these nodes:
- Two VMs (one for MongoDB and one for Node.js)
- A Node.js server
- A MongoDB database
- A Node.js application called nodecellar (A sample Node.js application)
Next Steps
You can now deploy your blueprint.