User Management
Displays the list of users and enables their management.
This widget is only available to admin users.
Features
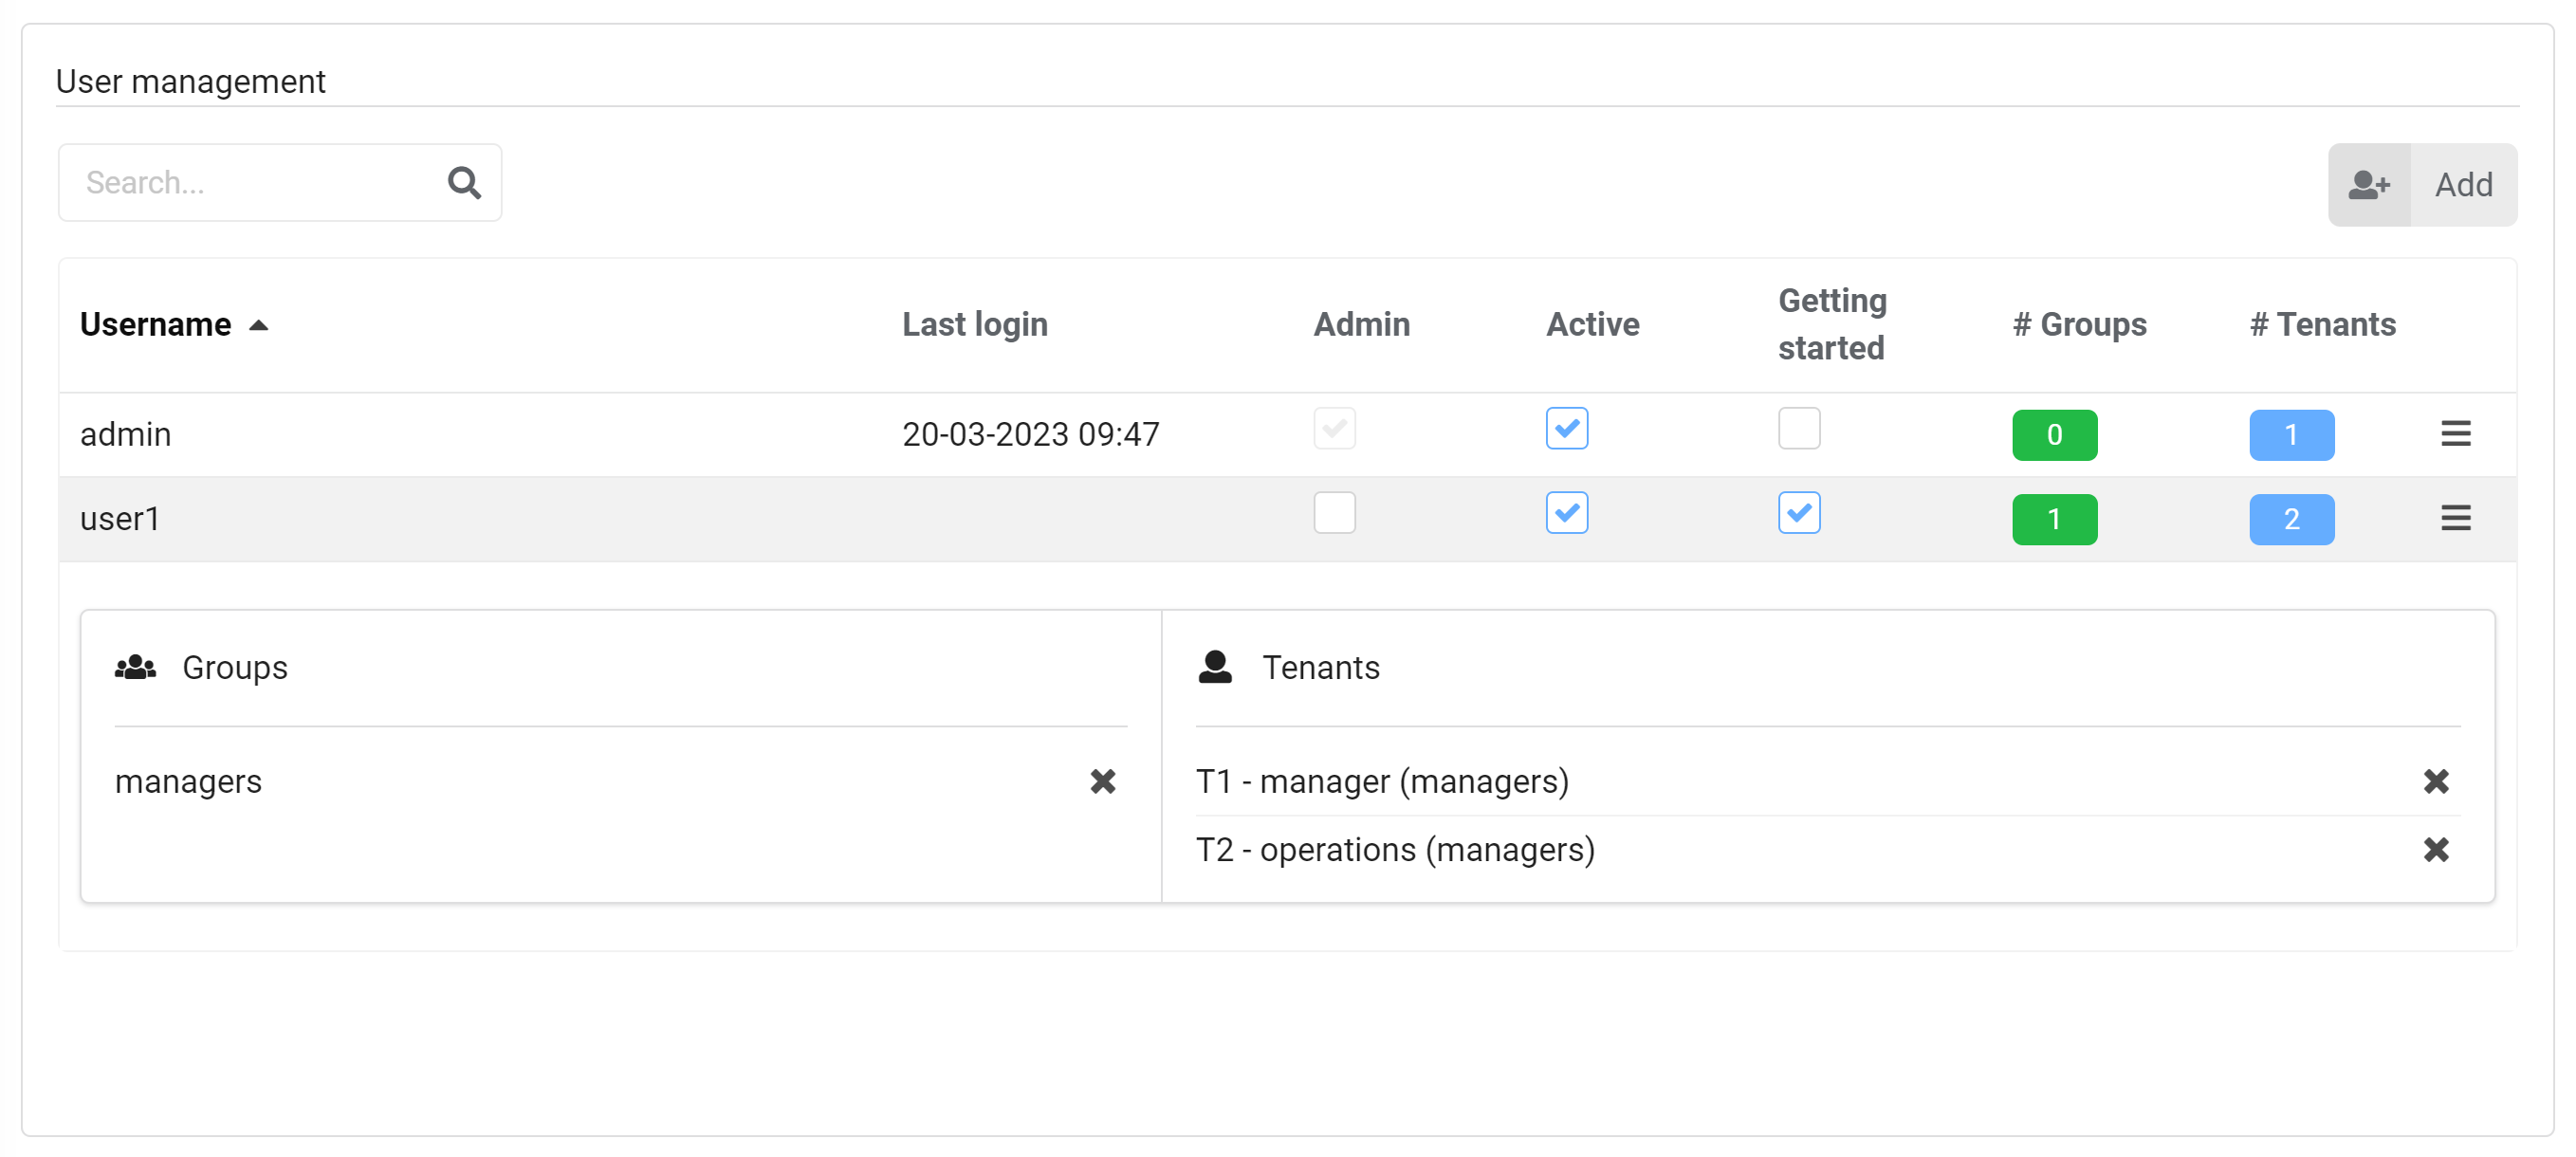
Users information
The widget displays the following information regarding each of the user groups:
- Username
- Last login timestamp
- Admin - whether or not the user is sys admin on the Cloudify Manager (you can check and uncheck this filed to make changes)
- Active - whether or not the user is active (you can check and uncheck this field to make changes)
- # Groups - number of groups the user is a member of
- # Tenants - number of tenants the user is assigned with
Users actions
The hamburger menu on the right of every tenant allows performing the following operations:
- Setting the user’s password
- Adding/removing the user to/from user groups
- Assigning/Unassigning the user with/from the tenant
- Deleting the user - possible only if the user does not belong to any groups, assigned to any tenants and is the creator of any resources on the manager.
Also, using the “Add” button on the right top corner of the widget, you will be able to create new users. Please notice that if you choose to use external authentication for users (e.g. LDAP), creation or deletion of local users, as well as assignments of local users with groups are not allowed to prevent conflicts between the two systems which might cause security problems.
Adding Users
- Click Add button in the widget.
- Specify a name for the user.
The name must contain at least five alphanumeric characters and begin with a letter. It can also include the following characters:-,_or.. - Specify a password for the user, then confirm it.
The password must contain at least five alphanumeric characters and begin with a letter. It can also include the following characters:-,_or.. - Check Admin checkbox to assign the user administrator privileges. In order to have access to specific tenants in the system, the user will also need to be explicitly assigned with those tenants, and have a tenant-specific role for each of them. For more information about the roles and the differences between them, see Roles-Management section.
- Select tenant(s) from Tenants list and assign a tenant-specific role(s) for the user.
- Click Add.
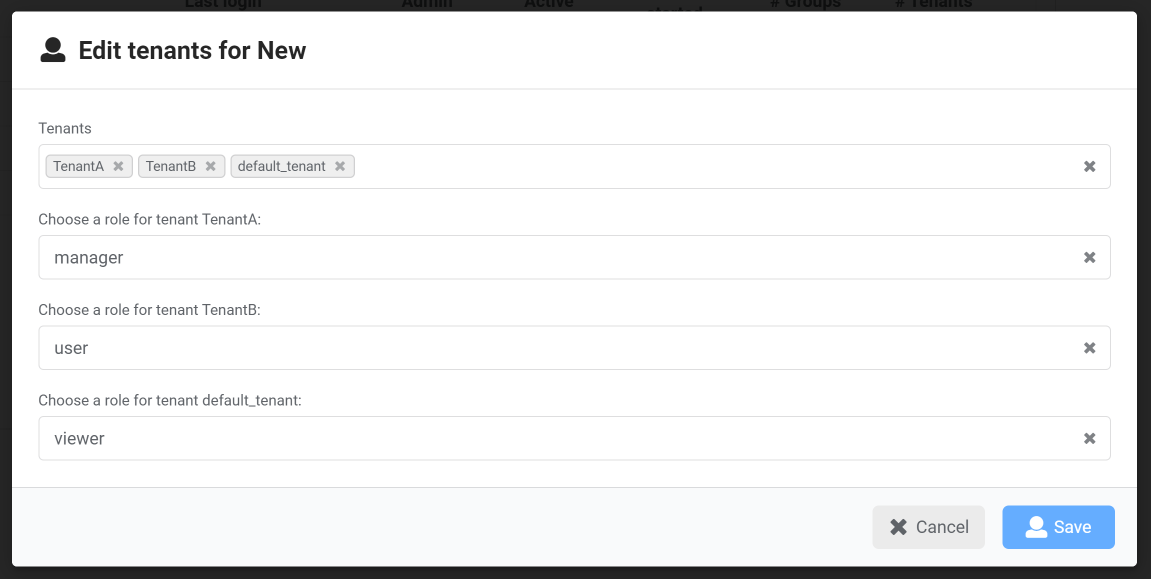
Assigning Users to Tenants
Users must be assigned to tenants with a specific role for each tenant. The roles are sets of permissions defining what actions the users can perform in the context of the tenant. Users can have different roles in different tenants, and as long as at least one of those roles allows them to perform an action in the tenant, they will be able to perform it. The available tenant-roles are: viewer, user, operations and manager. For more information regarding each role and the differences between them, see Roles Management section.
- Click the List icon
 on the far right of the user entry in the table that you want to add to a tenant.
 - Click Edit user’s tenants.
- Select one or more tenants from the dropdown list.
- Select role for each tenant.
- Click Save.
The user is added to the specified tenants.
Unless the users have a deactivated status, they can perform actions on the tenant according to the specified role.
Removing a User from a Group or Tenant
You can remove a user from a group or a tenant, without deleting them from the system.
- Click the List icon for the user that you want to remove.
- Select Edit user’s groups or Edit user’s Tenants.
- Remove the desired groups/tenants from the user’s list.
- Click Save.
If a user is a member of one or more user groups that are still assigned to a tenant, that user remains active on the tenant.
Deleting Users
Users can only be deleted from the system if they are not assigned to a group or to a tenant, and if they do not own resources in the system.
- Click the List icon on the far right of the entry and select the entity to delete.
- Click Delete.
Settings
Refresh time interval- The time interval in which the widget’s data will be refreshed, in seconds. Default: 30 seconds.