Official Plugins
Overview
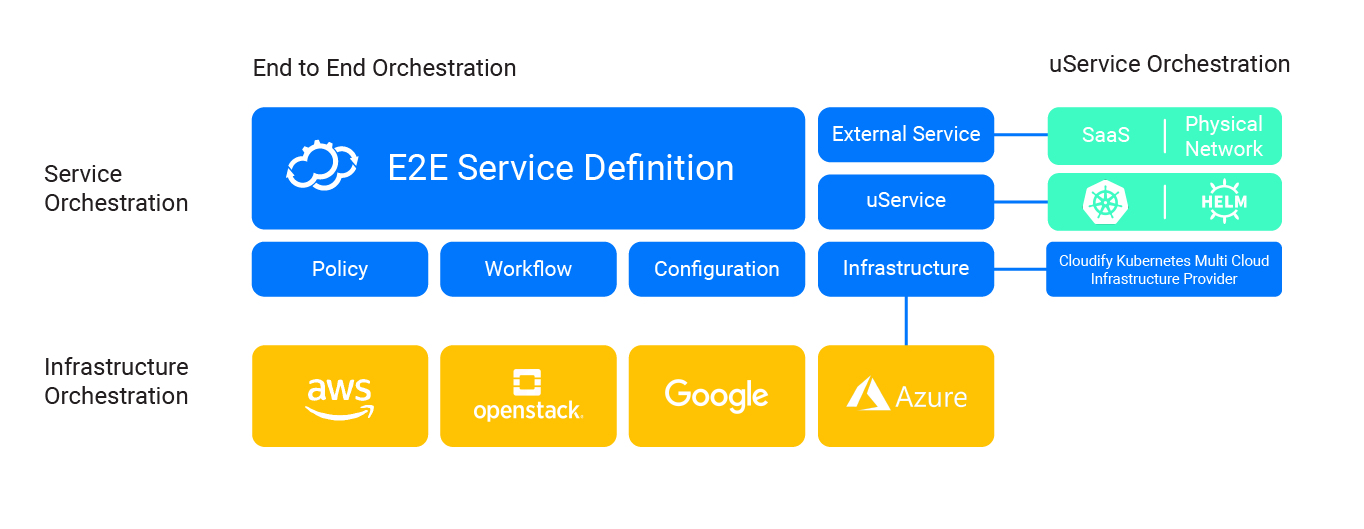
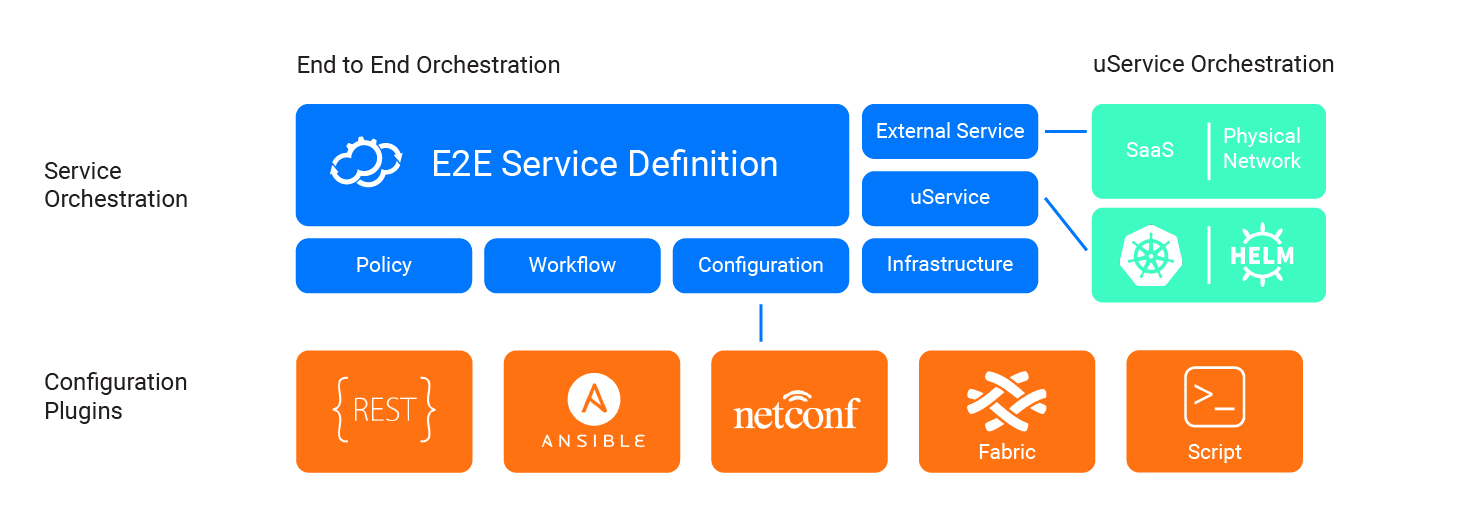
Cloudify Plugins are Python packages that do the work of communicating with external systems. Primarily:
For example:
- If you want to create a VM in Azure, you will need the Azure plugin.
- If you want to configure a server with an Ansible playbook, you will use the Ansible plugin.
- If you have existing scripts, you may simply use the built-in Script plugin.
Background
Blueprints use the Cloudify DSL to model an application. The model, or node_templates section, describes a topology which includes: * Node Templates * Relationships between node templates.
Workflows actualize the topology by defining the order of operations that will be performed. For example, the built-in Install Workflow calls, among other things, the create, configure, and start operations defined for a particular node type.
Plugins contain the Python code that each workflow operation calls.
Usage
In your blueprint, use the Import statement to import plugins, for example:
imports:
  - plugin: cloudify-azure-plugin
You can then map node template and relationship operations to plugin code, or if your plugin’s plugin.yaml has custom node types, these operations may already be mapped for you.
Example Blueprint with REST Call
The following example illustrates configuration step. In it, we create a user via some REST API.
In the blueprint, we define the lifecycle steps, along with the inputs for the plugin operation:
- endpoint information
- reference to a template file containing the REST request itself.
- parameters
tosca_definitions_version: cloudify_dsl_1_3
imports:
  - http://cloudify.co/spec/cloudify/4.5.5/types.yaml
  - plugin:cloudify-utilities-plugin
inputs:
  rest_endpoint:
    description: >
      REST API endpoint of the pfSense instance
node_templates:
  user-post:
    type: cloudify.rest.Requests
    properties:
      hosts: [{ get_input: rest_endpoint }]
      port: 443
      ssl: true
      verify: false
    interfaces:
      cloudify.interfaces.lifecycle:
        start:
          inputs:
            template_file: templates/create-user-post-template.yaml
            params:
              USER_ID: {get_attribute: [user-details, user, id]}
              USERNAME: { get_attribute: [user-details, user, username] }
              WEBSITE: { get_attribute: [user-details, user, website] }
              POST_ID: "1"
Let’s break down each section:
tosca_definitions_version: This is the version of Cloudify’s DSL. You should not need to change this value.imports: This is a list of URLs or paths to more Cloudify DSL files. These definenode_typesandrelationships, among other things, that will be used in your blueprint.inputs: These are parameters that you should know before running your blueprint, such as API endpoints.node_templates: These are the nodes that you will handle throughout your deployment, such as VMs, applications, or network components.
Now, let’s talk about our node_template:
- The name of our node template is
user-post, and it is of node typecloudify.rest.Requests, which is defined in theplugin:cloudify-utilities-pluginimport. - The node type
cloudify.rest.Requestsdefines endpoint information in thepropertiessection. - The
interfacessection defines how we map our operation. The install workflow calls astartoperation. So that is the only operation that will be executed in this blueprint. - We provide
inputsto the operation which are basically Python function parameters.template_file: This is a Jinja2 template file, which contains a list of REST requests (see below).params: These are params to the Jinja2 template, which define the user we will create.
create-user-post-template.yaml
This is the template file, which contains a list of requests. We define the path, the payload, and define the expected responses.
rest_calls:
 # create user post
  - path: /posts/{{POST_ID}}
    method: PUT
    headers:
      Content-type: application/json
    payload:
      title: '{{ USERNAME }}'
      body: '{{ WEBSITE }}'
      userId: '{{ USER_ID }}'
    response_format: json
    recoverable_codes: [400]
    response_expectation:
      - ['id', '{{POST_ID}}']
Only one request is defined here, but you can define bunch requests as well as successful and failure responses.
For more information on modeling REST request sequences, see the REST Plugin.
Example Blueprint with Example Script
A another way to understand using Cloudify plugins is to use Cloudify with existing scripts.
For example, let’s say that you have a BASH script like this:
scripts/hello.sh
#!/bin/bash
# myblueprint/scripts/hello.sh
ctx logger info "Hello World"
All this script does right now is log a “Hello World” message message to Cloudify. However, you can put just about any valid BASH script here.
To run the following, you will need the following for a real VM:
ip: A routeable IP to the VM with a responsive SSH server.username: The SSH user for that VM.private_key: The content of the private key for that SSH user.
tosca_definitions_version: cloudify_dsl_1_3
imports:
  - http://cloudify.co/spec/cloudify/4.5.5/types.yaml
inputs:
  username:
    type: string
  private_key:
    type: string
  ip_address:
    type: string
node_templates:
  node:
    type: cloudify.nodes.Compute
    properties:
      ip: { get_input: ip_address }
      agent_config:
        install_method: remote
        user: { get_input: username }
        key: { get_input: private_key }
    interfaces:
      cloudify.lifecycle.interface:
        start:
          implementation: scripts/hello.sh
Let’s review:
* In the properties, we define the method for installing and configuring a Cloudify Agent on the VM. We provide the IP and authentication information.
* We define the start operation as the execution of our hello.sh script from above.
For more information, see the Script Plugin.
Example Blueprint with Blueprint Mapped Operations
The following example describes configuring one or more hosts with Ansible.
Just like last example, you will need the following for a real VM:
ip: A routeable IP to the VM with a responsive SSH server.username: The SSH user for that VM.private_key: The content of the private key for that SSH user.
tosca_definitions_version: cloudify_dsl_1_3
imports:
  - http://cloudify.co/spec/cloudify/4.5.5/types.yaml
  - plugin:cloudify-ansible-plugin
inputs:
  ip:
    type: string
  username:
    type: string
  private_key:
    type: string
node_templates:
  kubespray:
    type: cloudify.nodes.Root
    interfaces:
      cloudify.interfaces.lifecycle:
        configure:
          implementation: ansible.cloudify_ansible.tasks.run
          inputs:
            playbook_path: myplaybook.yml
            sources:
              webservers:
                hosts:
                  web:
                    ansible_host: { get_input: ip }
                    ansible_user: { get_input: username }
                    ansible_ssh_private_key_file: { get_input: private_key }
                    ansible_become: True
                    ansible_ssh_common_args: -o StrictHostKeyChecking=no
In this blueprint, we don’t define any properties. Instead, we map everything as an operation.
ansible.cloudify_ansible.tasks.runis a task defined in the Ansible Plugin. All it does is run theansible-playbookcommand against the provided playbook and inventory.playbook_path: this parameter is the path to the Playbook YAML file. (This parameter was previously calledsite_yaml_path.)sources: this parameter is an Ansible Inventory structure in YAML format.
For more information, see the Ansible Plugin.
Example Blueprint with Custom Node Types
The following example describes the creation of a connected AWS EC2 Internet Gateway and VPC. The cloudify-aws-plugin’s plugin.yaml already defines the node types cloudify.nodes.aws.ec2.InternetGateway and cloudify.nodes.aws.ec2.Vpc, and maps their lifecycle operations to plugin tasks.
You will need the following secrets:
* aws_access_key_id: The AWS Access Key.
* aws_secret_access_key: The AWS Secret Key.
You will also need to provide the following inputs:
* region_name: The AWS region name.
tosca_definitions_version: cloudify_dsl_1_3
imports:
  - http://cloudify.co/spec/cloudify/4.5.5/types.yaml
  - plugin:cloudify-aws-plugin
inputs:
  region_name:
    type: string
dsl_definitions:
  _: &client_config
    aws_access_key_id: { get_secret: aws_access_key_id }
    aws_secret_access_key: { get_secret: aws_secret_access_key }
    region_name: { get_input: region_name }
node_templates:
  internet_gateway:
    type: cloudify.nodes.aws.ec2.InternetGateway
    properties:
      client_config: *client_config
    relationships:
    - type: cloudify.relationships.connected_to
      target: vpc
  vpc:
    type: cloudify.nodes.aws.ec2.Vpc
    properties:
      resource_config:
        CidrBlock: { get_input: vpc_cidr }
      client_config: *client_config
Let’s review:
We have the following nodes:
* internet_gateway: This is an internet gateway. We use a cloudify.relationships.connected_to relationship to define dependency on vpc.
* vpc: This is a VPC.
Properties:
* We provide to both resources their configuration in the resource_config property.
* Authentication is defined in the client_config property.
For more information, see the AWS Plugin.
Distribution
Cloudify plugins are distributed as Wagons format. Wagons are archives of Python Wheels. The latest official Cloudify Plugins are available for download at Plugins Download.
Installation
You may upload a plugin to your Cloudify Manager via either the UI or the CLI:
- For UI usage, see managing system resources.
- For CLI usage, see cfy plugins upload.
Contributing
See our community Contribution Guide.
Further Reading
For more information on creating your own plugin, see creating your own plugin. For a plugin template, see plugin template.
For information on packaging a plugin in wagon format, see creating wagons.
For an overview on working with CM systems, see Configuration Management.
For information on working with Docker and other container systems, see Containers.