Local Blueprints Page
Local Blueprints page displays Blueprints widget and Cloudify Composer link button.
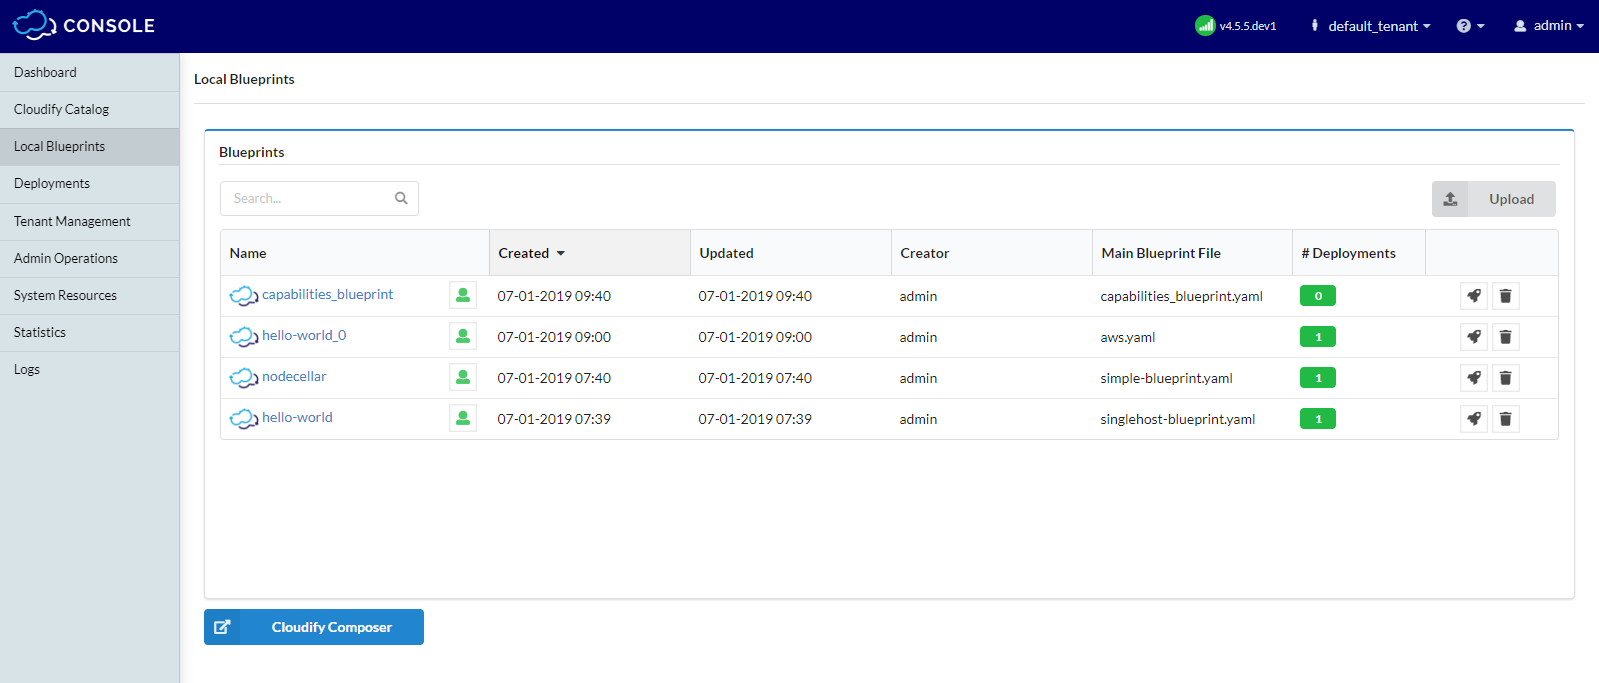
By default, Blueprints widget is displayed in table format and provides a list of all the blueprints in this Cloudify Manager instance. You can change the display format from table to catalog view in the widget’s configuration options.
The table presents the name and icon of each blueprint, its visibility level, creation date, update date, creator, name of main blueprint .yaml file, the number of deployments created from it and action buttons to create deployment or delete blueprint.

Uploading a Blueprint
- Click the Upload button in the Blueprints List widget to upload a blueprint.
- In the Upload Blueprint dialog, provide the URL of the remote archive in which the blueprint is located or select a local blueprint archive.
- Enter the
Blueprint nameandBlueprint YAML file.
Blueprint nameis the name with which you want to identify this blueprint on the Cloudify Manager instance.
Blueprint YAML fileis the name of the YAML file in the archive that you want to upload as the main blueprint - as there can be multiple files in the archive. If a blueprint filename field is omitted, the defaultblueprint.yamlfilename is used, but if a file under that name does not exist in the archive, an error message will appear. - (Optional) Provide a .png file URL or select a local one, to appear as an icon in the catalog or table view next to the blueprint name.
- Choose the blueprint’s visibility by clicking on the icon in the top right corner:
 .
.
The default visibility is “Tenant”, and according to the logged-in user’s permissions you can also choose other levels of resource visibilities. - Click Upload.
You can also upload blueprints from the Blueprints Catalog page, by clicking on the Upload button next to the wanted blueprint.
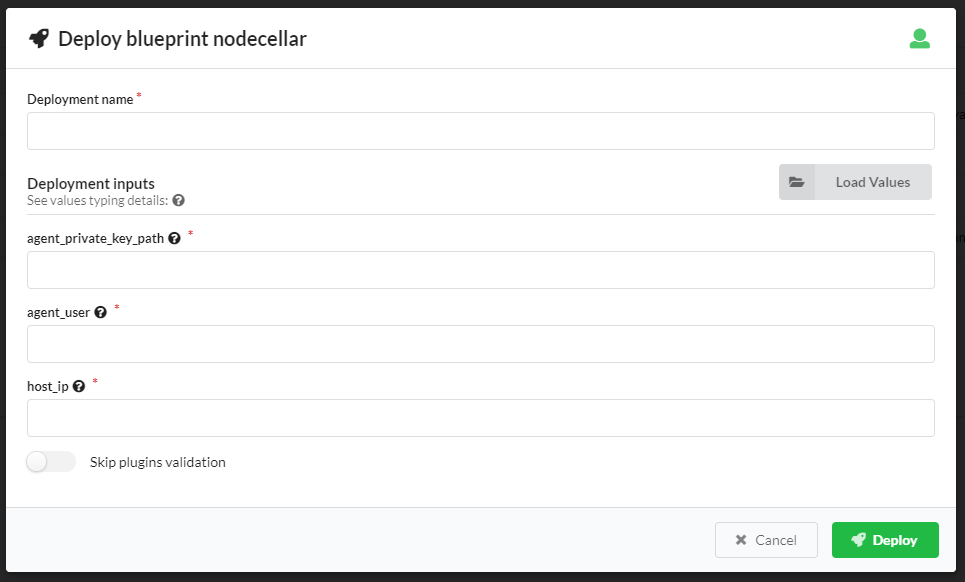
Deploying a Blueprint
- Click the deploy icon
 .
. - In the Deploy Blueprint dialog, specify a name for your deployment.
- Specify the required deployment inputs.
The names of the default input values appear in the inputs fields. You can leave these defaults or override them with new values. Input’s description (on hovering help icon ) might help you understand how to fill-in the proper value.
Another alternative for providing the inputs is by specifying a .yaml file containing the relevant values.
) might help you understand how to fill-in the proper value.
Another alternative for providing the inputs is by specifying a .yaml file containing the relevant values. - Click Deploy to deploy the blueprint.
Deleting a Blueprint
Click the delete icon ![]() or the Delete blueprint button in the blueprint’s drill-down page.
or the Delete blueprint button in the blueprint’s drill-down page.
Additional Information about Blueprints
When you click the name of a blueprint in the Blueprints List table, a blueprint-specific page opens (it’s also called blueprint’s drill-down page).
The page displays Create deployment and Delete blueprint buttons and the following widgets with details about the selected blueprint:
- Blueprint Topology
- Blueprint Deployments
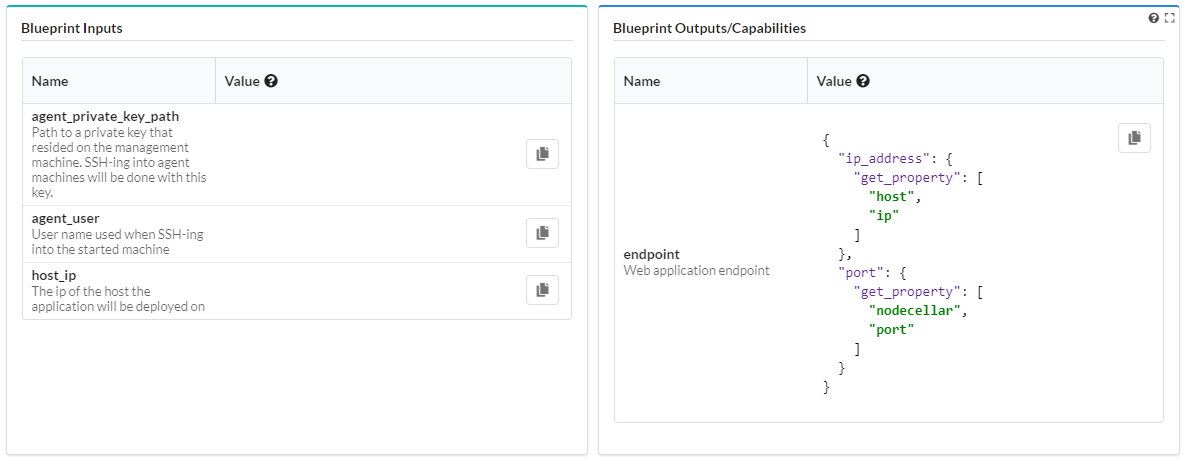
- Blueprint Inputs
- Blueprint Outputs/Capabilities
- Blueprint Sources
Topology
The Topology widget displays the application’s graph of nodes and their relationships.
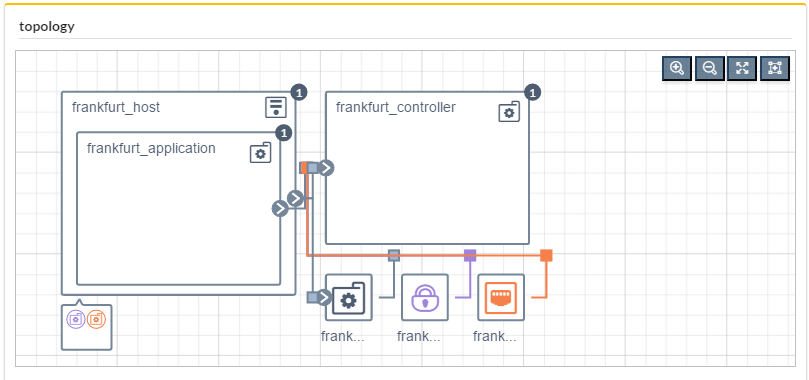
Each of the application’s nodes is displayed as a square container that can contain other nodes. Each node has a name, and an icon to indicate its node type.
Relationships between nodes are indicated with arrows that start at the connected node and end at the target node.
The number of node instances is marked in a bullet beside the node’s type icon.
Deployments
The Deployments widget displays a list of the deployment in the current tenant. The dispayed information is: Deployment name, the blueprint which the deployment is derived from, the deployments creation and last update dates, the name of the user who created the deployment, and the number of nodes per state (see Deployments page to learn more about nodes states).
Clicking on a deployement’s name will bring us to this deployment’s drill-down page, which provides additional data (see deployments page for more information) and displays buttons that enable you to update or delete the deployment, and to execute a workflow.
Blueprint Inputs and Blueprint Outputs/Capabilities
The Blueprint Inputs and Blueprints Outputs/Capabilities widgets display the values for these elements. If you hover over the outputs value, the code for the output appears.
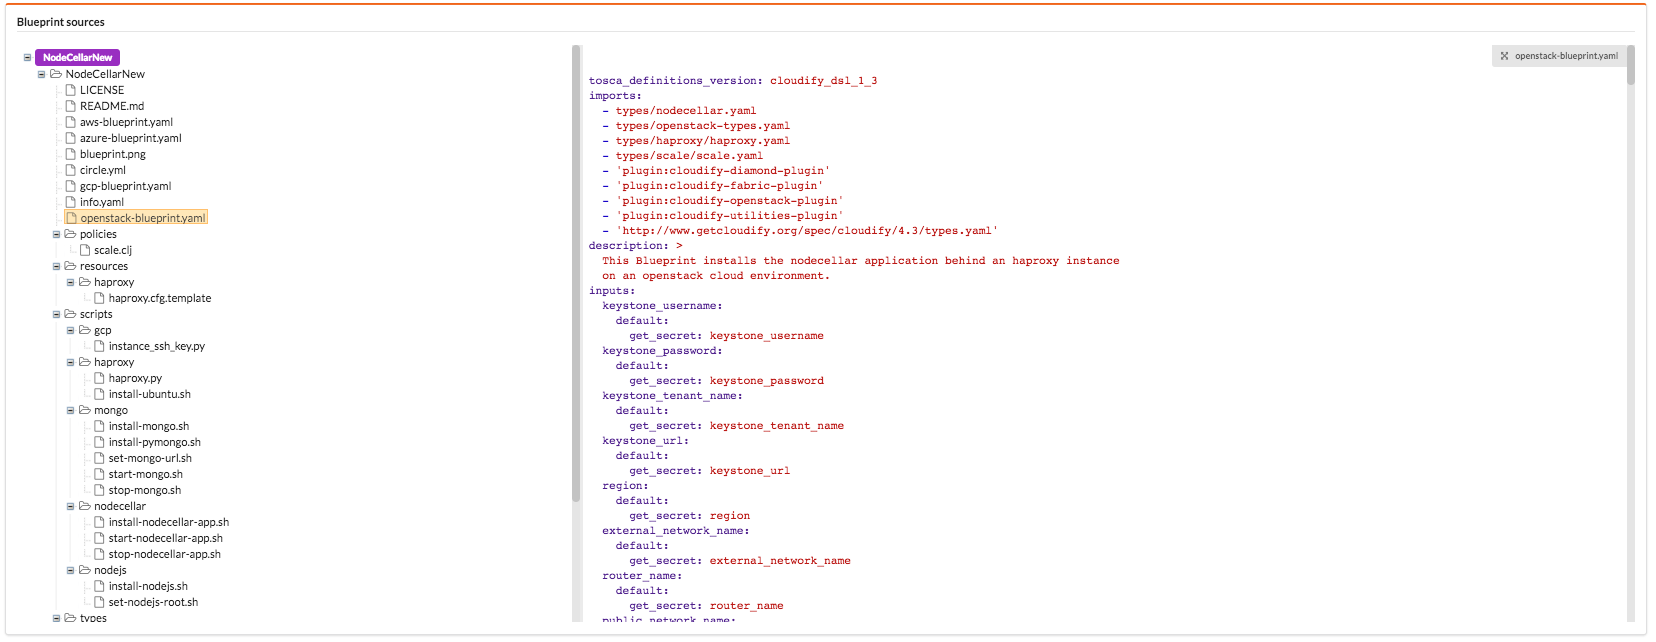
Blueprint Sources
The Blueprint sources widget displays all the sources in the Blueprint package.