Advanced Blueprint Example
In this tutorial we will create a blueprint that describes
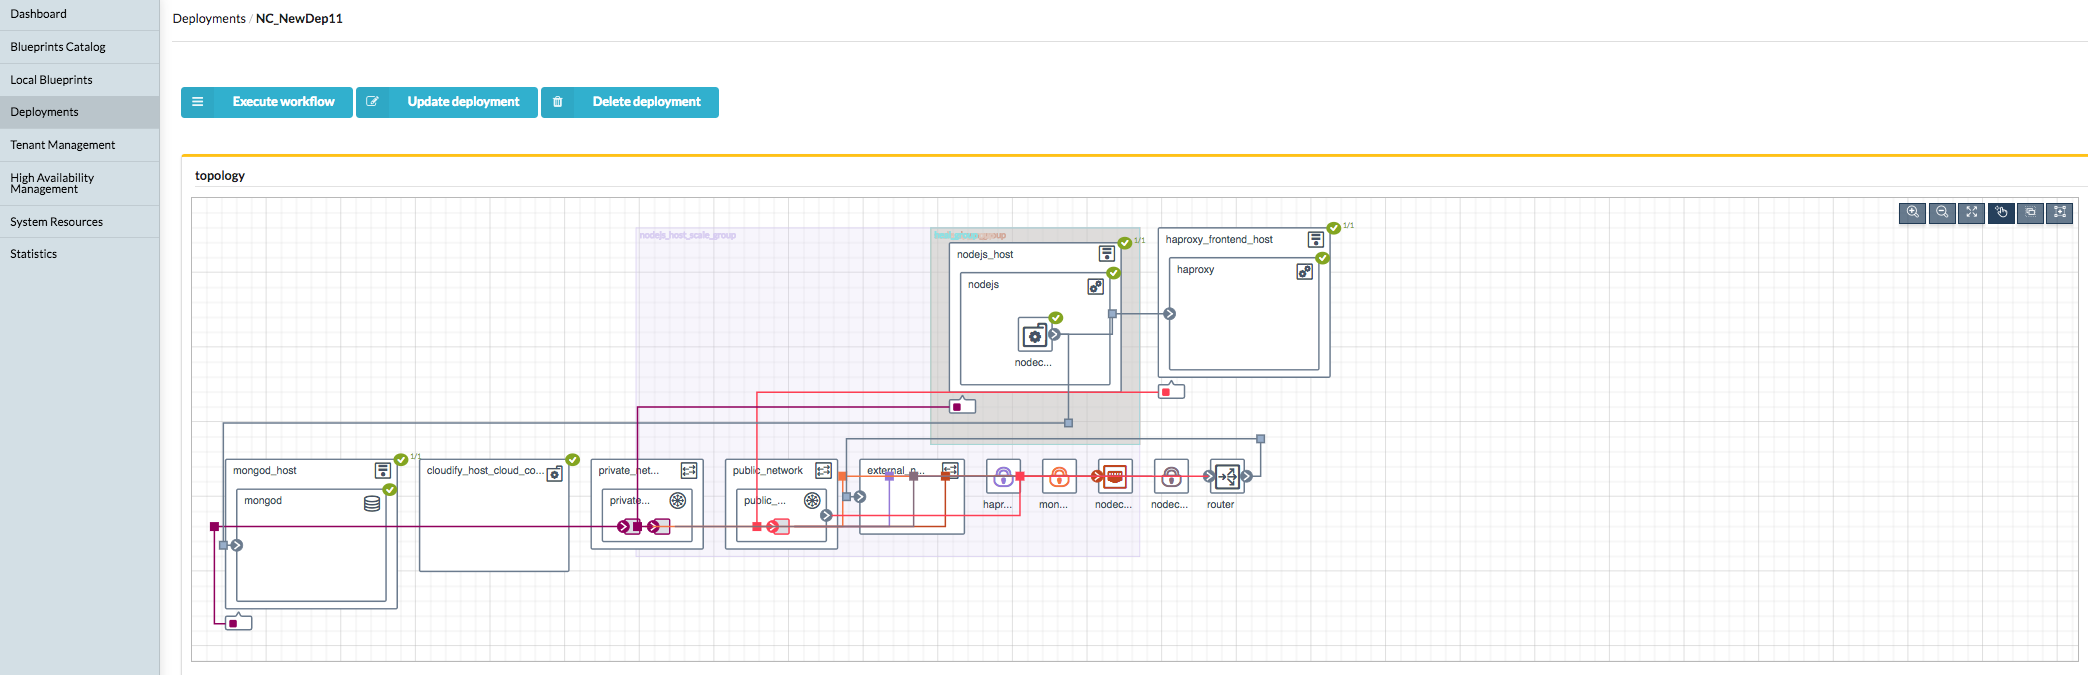
the topology of the Nodecellar application.
We will write, step by step, a simplified version of the Single Host Nodecellar blueprint.
It includes the following components:
Infrastructure:
- One host that will contain both MongoDB and NodeJS.
Middleware:
Node.JS - This is a javascript based application server that serves this web application - It is contained within our host.
MongoDB - This is a JSON document store that serves as the application database - It is contained within our host.
Application:
- Nodecellar - This is the application business logic packed as a Node.JS application.
The topology looks like this:
Cloudify YAML DSL
Cloudify’s Domain Specific Language (DSL) is written in YAML. If you are not familiar with yaml you may want to read the YAML Documentation first.
Step by Step Walk-through
Step 1: Creating the Blueprint
First lets create a folder with the name nodecellar and create a blueprint.yaml file within it. This file is the blueprint file.
Lets also give our blueprint a version:
tosca_definitions_version: cloudify_dsl_1_2To learn more about blueprint versioning, refer to Versions.
Step 2: Adding imports
The imports section is usually the first statement in our blueprint.
It defines references to external YAML files that may hold definitions of various constructs:
For a complete reference of these constructs refer to the DSL Specification section.
In our case, we need to import Cloudify’s built-in types definitions since our custom node_types will derive from some of these types.
This will become clearer as we go along, don’t worry :)
To learn more about imports, please refer to Imports Specification.
So, basically, our blueprint file now looks like:
imports:
  -
Step 3: Adding blueprint inputs
The inputs section is where you define which blueprint parameters will be configurable without the need to edit the blueprint file.
To learn more about inputs, please refer to Inputs Specification.
In our case, we declare the connection details to our host as inputs, Like so:
inputs:
  host_ip:
    description: >
      The ip of the host the application will be deployed on
  agent_user:
    description: >
      User name used when SSH-ing into the started machine
  agent_private_key_path:
    description: >
      Path to a private key that resides on the management machine.
      SSH-ing into agent machines will be done with this key.
We do not supply any default values for these inputs, this means that users will be obliged to enter values when deploying this blueprint. If you do want to supply default values, you can do so like this:
inputs:
  host_ip:
    description: >
      The ip of the host the application will be deployed on
    default: localhost
Our blueprint now looks like:
imports:
  -


inputs:
  host_ip:
    description: >
      The ip of the host the application will be deployed on
  agent_user:
    description: >
      User name used when SSH-ing into the started machine
  agent_private_key_path:
    description: >
      Path to a private key that resided on the management machine.
      SSH-ing into agent machines will be done with this key.
Step 4: Adding node_types
Next up is adding the application specific types. We will have 3 new types:
nodecellar.nodes.MongoDatabasenodecellar.nodes.NodeJSServernodecellar.nodes.NodecellarApplicationModule
node_types usage is two-fold:
- Define a properties schema that node_templates must adhere to.
- Define interface operation mappings.
To learn more about node_types, please refer to Node Types Specification.
Lets see an example and things will make more sense.
nodecellar.nodes.MongoDatabase:
  derived_from: cloudify.nodes.DBMS
  properties:
    port:
      description: MongoDB port
      type: integer
  interfaces:
    cloudify.interfaces.lifecycle:
      create: scripts/mongo/install-mongo.sh
      start: scripts/mongo/start-mongo.sh
      stop: scripts/mongo/stop-mongo.sh
So what do we have here?
- This node type derives from
cloudify.nodes.DBMS, which is a built-in cloudify type. This is why we needed theimportssection discussed above. - This node type defines a port property, which makes sense because we want this property to be configurable.
This means that every node template who’s type isnodecellar.nodes.MongoDatabasewill have to specify a value for this property. - It also maps its lifecycle operations to bash scripts. Remember, these operations are invoked when running the
installworkflow. The node properties are accessible in the bash scripts via the ctx utility. For example, to retrieve the port property you can do:
#!/bin/bash -e
...
PORT=$(ctx node properties port)
...
ctx logger info "The port is ${PORT}"
For more examples of using the ctx utility refer to Context Proxy Utility.
In this case, the start-mongo.sh script uses the port property to configure the data base port.
In the same manner, we define our additional types, to eventually get this blueprint:
imports:
  -


inputs:
  host_ip:
    description: >
      The ip of the host the application will be deployed on
  agent_user:
    description: >
      User name used when SSH-ing into the started machine
  agent_private_key_path:
    description: >
      Path to a private key that resided on the management machine.
      SSH-ing into agent machines will be done with this key.

node_types:

  nodecellar.nodes.MongoDatabase:
    derived_from: cloudify.nodes.DBMS
    properties:
      port:
        description: MongoDB port
        type: integer
    interfaces:
      cloudify.interfaces.lifecycle:
        create: scripts/mongo/install-mongo.sh
        start: scripts/mongo/start-mongo.sh
        stop: scripts/mongo/stop-mongo.sh

  nodecellar.nodes.NodeJSServer:
    derived_from: cloudify.nodes.ApplicationServer
    interfaces:
      cloudify.interfaces.lifecycle:
        create: scripts/nodejs/install-nodejs.sh

  nodecellar.nodes.NodecellarApplicationModule:
    derived_from: cloudify.nodes.ApplicationModule
    properties:
      port:
        description: Web application port
        type: integer
      application_url:
        description: >
          URL to an archive containing the application source.
          The archive must contain one top level directory.
        default: https://github.com/cloudify-cosmo/nodecellar/archive/master.tar.gz
      startup_script:
        description: >
          This script will be used to start the nodejs application.
          The path is relative to the top level single directory inside
          the archive
        type: string
        default: server.js
    interfaces:
      cloudify.interfaces.lifecycle:
        configure: scripts/nodecellar/install-nodecellar-app.sh
        start: scripts/nodecellar/start-nodecellar-app.sh
        stop: scripts/nodecellar/stop-nodecellar-app.sh
**All of the paths specified are relative to the blueprint file directory. You can find the scripts [here](
)**
Also, two points are worth mentioning regarding the scripts:
- Should be written in an idempotent manner. As is it possible they will be executed several times per execution, on account of retires due to failures.
- Should be synchronous and wait for processes to start before exiting. For example, in the start-mongo.sh script we wait for mongo to run:
COMMAND="${MONGO_BINARIES_PATH}/bin/mongod --port ${PORT} --dbpath ${MONGO_DATA_PATH} --rest --journal --shardsvr"

ctx logger info "${COMMAND}"
nohup ${COMMAND} > /dev/null 2>&1 &
PID=$!

MONGO_REST_PORT=`expr ${PORT} + 1000`
wait_for_server ${MONGO_REST_PORT} 'MongoDB'Think of node_types as a location to place shared interface implementations and properties.
When your blueprint contains only one node template of a node type, it may not make much sense in defining these types, because all of this can be defined in the node template as well.
However, node_types, as opposed to node_templates (see step 6), are importable.
This means that you can place node_types in a different file, and have various blueprints import that file and use them.
To learn more about this, have a look at the full blown [Nodecellar example](
)
Step 5: Adding relationships
The relationships section is where (as the name suggests) we define relationships to be later used by node_templates.
In this application we can think of 2 relationships, both of which are related to the nodecellar.nodes.NodecellarApplicationModule type:
- For the application to work properly, it must be aware of the location of its database, i.e, the URL of
nodecellar.nodes.MongoDatabase.
Cloudify’s built-in types definitions comes with a relationship of type cloudify.relationships.connected_to, which seems to fit into our case.
- The application also needs to know where
nodecellar.nodes.NodeJSServeris installed, because at the end of the day, this is the server who will be hosting our app.
Cloudify’s built-in types definitions comes with a relationship of type cloudify.relationships.contained_in, which also seems appropriate.
Note that these relationships do not currently define any implementation of the relationship, since this is of course application dependent. What it does is define the basic operations one can implement.
Similar to the lifecycle operation, relationship operations will also be invoked as part of the install workflow execution.
To learn more about relationships, please refer to Relationships Specification.
So, lets see how we use these relationships. First off, we will define our custom cloudify.relationships.connected_to relationship type:
relationships:
  node_connected_to_mongo:
    derived_from: cloudify.relationships.connected_to
    target_interfaces:
      cloudify.interfaces.relationship_lifecycle:
        postconfigure: scripts/mongo/set-mongo-url.sh
In this example, we create a new relationship type called node_connected_to_mongo.
It is derived from the base relationship type we talked about, the cloudify.relationships.connected_to type.
We map its target interface postconfigure operation to, you guessed it, a bash script.
Each relationship has two edges, a source node and a target node, The definition we used here answers two questions:
- When will the set-mongo-url.sh script be executed?
Immediately after the target node’s configure lifecycle operation.
- Where will the set-mongo-url.sh script be executed?
On the VM hosting that target node.
This script uses the Context API to set runtime properties that determine the MongoDB URL on the source node of this relationship.
In the same manner, we define the second relationship, this should now be clear:
node_contained_in_nodejs:
  derived_from: cloudify.relationships.contained_in
  target_interfaces:
    cloudify.interfaces.relationship_lifecycle:
      preconfigure: scripts/nodejs/set-nodejs-root.sh
Our full blueprint now looks like:
imports:
  -


inputs:
  host_ip:
    description: >
      The ip of the host the application will be deployed on
  agent_user:
    description: >
      User name used when SSH-ing into the started machine
  agent_private_key_path:
    description: >
      Path to a private key that resided on the management machine.
      SSH-ing into agent machines will be done with this key.

node_types:

  nodecellar.nodes.MongoDatabase:
    derived_from: cloudify.nodes.DBMS
    properties:
      port:
        description: MongoDB port
        type: integer
    interfaces:
      cloudify.interfaces.lifecycle:
        create: scripts/mongo/install-mongo.sh
        start: scripts/mongo/start-mongo.sh
        stop: scripts/mongo/stop-mongo.sh

  nodecellar.nodes.NodeJSServer:
    derived_from: cloudify.nodes.ApplicationServer
    interfaces:
      cloudify.interfaces.lifecycle:
        create: scripts/nodejs/install-nodejs.sh

  nodecellar.nodes.NodecellarApplicationModule:
    derived_from: cloudify.nodes.ApplicationModule
    properties:
      port:
        description: Web application port
        type: integer
      application_url:
        description: >
          URL to an archive containing the application source.
          The archive must contain one top level directory.
        default: https://github.com/cloudify-cosmo/nodecellar/archive/master.tar.gz
      startup_script:
        description: >
          This script will be used to start the nodejs application.
          The path is relative to the top level single directory inside
          the archive
        type: string
        default: server.js
    interfaces:
      cloudify.interfaces.lifecycle:
        configure: scripts/nodecellar/install-nodecellar-app.sh
        start: scripts/nodecellar/start-nodecellar-app.sh
        stop: scripts/nodecellar/stop-nodecellar-app.sh

relationships:

  node_connected_to_mongo:
    derived_from: cloudify.relationships.connected_to
    target_interfaces:
      cloudify.interfaces.relationship_lifecycle:
        postconfigure: scripts/mongo/set-mongo-url.sh

  node_contained_in_nodejs:
    derived_from: cloudify.relationships.contained_in
    target_interfaces:
      cloudify.interfaces.relationship_lifecycle:
        preconfigure: scripts/nodejs/set-nodejs-root.sh
Step 6: Adding node_templates
So far, we have mainly defined types, be it node_types or relationship types. Types themselves do not constitute a valid blueprint,
they are meant to be used by node_templates, which are basically just occurrences of specific node_types.
To learn more about node_templates, please refer to Node Templates Specification.
Lets define our first node template.
Until now we have only dealt with the Middleware and Application parts of the topology, but what about the Infrastructure?
Remember that our infrastructure consists of just a single, pre-existing host. So we start by defining it.
host:
  type: cloudify.nodes.Compute
Just now, we defined a node template called host, and specified that its type is cloudify.nodes.Compute.
This type is one that is provided by Cloudify’s built-in types definitions.
We talked about node_types and the fact that they can define a properties schema. This is exactly what the cloudify.nodes.Compute does. Lets have a look:
cloudify.nodes.Compute:
  properties:
    install_agent:
      default: true
    cloudify_agent:
      default: {}
    ip:
      default: ''
so we have 3 properties defined here:
- install_agent - This tells cloudify whether or not to install a Cloudify Agent on this host. This defaults to true and you shouldn’t worry about this in this example.
- cloudify_agent - This is a dictionary that will contain agent configuration, among other things, its most important keys will be connection details to the host. This defaults to an empty dictionary because its auto-populated when running in a Cloud Environment, however, since we run this application on an existing vm, we will have to populate these values.
- ip - The host ip.
Again, this defaults to an empty string because it is auto-populated when running in a Cloud Environment, but we will have to enter a value here as well.
This is how we populate specific values for these properties:
host:
  type: cloudify.nodes.Compute
  properties:
    ip: localhost
    cloudify_agent:
      user: ubuntu
      key: /home/ubuntu/.ssh/agent_key.pem
We said earlier that properties defined in the node type, must be populated by the node template of this type, this is what makes the node type properties a properties schema. However, this is only true for properties without default values, in our case we see that actually every property has a default value, which means we are in fact disabling the properties schema validation. The consequence is that if the node template did not specify a certain property, the default ‘empty’ values will be passed, and in a non cloud environment, this will cause failures.
However, at the beginning of this tutorial we talked about the inputs section, and said that we want these connection details to be configurable by outside users.
We did so by adding several inputs, that map exactly to these details. But how do we use them?
This is where Intrinsic Functions come in to play.
We use the get_input function to retrieve inputs defined in the blueprint.
host:
  type: cloudify.nodes.Compute
  properties:
    ip: { get_input: host_ip }
    cloudify_agent:
      user: { get_input: agent_user }
      key: { get_input: agent_private_key_path }
So, lets have a look at our blueprint so far:
imports:
  -


inputs:
  host_ip:
    description: >
      The ip of the host the application will be deployed on
  agent_user:
    description: >
      User name used when SSH-ing into the started machine
  agent_private_key_path:
    description: >
      Path to a private key that resided on the management machine.
      SSH-ing into agent machines will be done with this key.

node_types:

  nodecellar.nodes.MongoDatabase:
    derived_from: cloudify.nodes.DBMS
    properties:
      port:
        description: MongoDB port
        type: integer
    interfaces:
      cloudify.interfaces.lifecycle:
        create: scripts/mongo/install-mongo.sh
        start: scripts/mongo/start-mongo.sh
        stop: scripts/mongo/stop-mongo.sh

  nodecellar.nodes.NodeJSServer:
    derived_from: cloudify.nodes.ApplicationServer
    interfaces:
      cloudify.interfaces.lifecycle:
        create: scripts/nodejs/install-nodejs.sh

  nodecellar.nodes.NodecellarApplicationModule:
    derived_from: cloudify.nodes.ApplicationModule
    properties:
      port:
        description: Web application port
        type: integer
      application_url:
        description: >
          URL to an archive containing the application source.
          The archive must contain one top level directory.
        default: https://github.com/cloudify-cosmo/nodecellar/archive/master.tar.gz
      startup_script:
        description: >
          This script will be used to start the nodejs application.
          The path is relative to the top level single directory inside
          the archive
        type: string
        default: server.js
    interfaces:
      cloudify.interfaces.lifecycle:
        configure: scripts/nodecellar/install-nodecellar-app.sh
        start: scripts/nodecellar/start-nodecellar-app.sh
        stop: scripts/nodecellar/stop-nodecellar-app.sh

relationships:

  node_connected_to_mongo:
    derived_from: cloudify.relationships.connected_to
    target_interfaces:
      cloudify.interfaces.relationship_lifecycle:
        postconfigure: scripts/mongo/set-mongo-url.sh

  node_contained_in_nodejs:
    derived_from: cloudify.relationships.contained_in
    target_interfaces:
      cloudify.interfaces.relationship_lifecycle:
        preconfigure: scripts/nodejs/set-nodejs-root.sh

node_templates:
  host:
    type: cloudify.nodes.Compute
    properties:
      ip: { get_input: host_ip }
      cloudify_agent:
        user: { get_input: agent_user }
        key: { get_input: agent_private_key_path }
Now we can add the rest of our application node_templates. We start with the Mongo database:
mongod:
  type: nodecellar.nodes.MongoDatabase
  properties:
    port: 27017
  relationships:
    - type: cloudify.relationships.contained_in
      target: host
Notice that we defined a relationship of type cloudify.relationships.contained_in and declare that this node template is contained inside our host.
This relationship will ensure that the host node will be provisioned before the mongod node starts.
Also, this is where we use our node_types that we defined earlier. We can see that the mongod node is of type nodecellar.nodes.MongoDatabase.
The NodeJS node is very similar, and is actually even simpler:
nodejs:
  type: nodecellar.nodes.NodeJSServer
  relationships:
    - type: cloudify.relationships.contained_in
      target: host
The last node template we will define is our nodecellar application module:
nodecellar:
  type: nodecellar.nodes.NodecellarApplicationModule
  properties:
    port: 8080
  relationships:
    - type: node_connected_to_mongo
      target: mongod
    - type: node_contained_in_nodejs
      target: nodejs
The interesting part here is the relationships key. Notice we define two relationships, each one uses a relationship type we defined earlier, and stitches it to a specific node template.
So, we now have an almost complete blueprint:
imports:
  -


inputs:
  host_ip:
    description: >
      The ip of the host the application will be deployed on
  agent_user:
    description: >
      User name used when SSH-ing into the started machine
  agent_private_key_path:
    description: >
      Path to a private key that resided on the management machine.
      SSH-ing into agent machines will be done with this key.

node_types:

  nodecellar.nodes.MongoDatabase:
    derived_from: cloudify.nodes.DBMS
    properties:
      port:
        description: MongoDB port
        type: integer
    interfaces:
      cloudify.interfaces.lifecycle:
        create: scripts/mongo/install-mongo.sh
        start: scripts/mongo/start-mongo.sh
        stop: scripts/mongo/stop-mongo.sh

  nodecellar.nodes.NodeJSServer:
    derived_from: cloudify.nodes.ApplicationServer
    interfaces:
      cloudify.interfaces.lifecycle:
        create: scripts/nodejs/install-nodejs.sh

  nodecellar.nodes.NodecellarApplicationModule:
    derived_from: cloudify.nodes.ApplicationModule
    properties:
      port:
        description: Web application port
        type: integer
      application_url:
        description: >
          URL to an archive containing the application source.
          The archive must contain one top level directory.
        default: https://github.com/cloudify-cosmo/nodecellar/archive/master.tar.gz
      startup_script:
        description: >
          This script will be used to start the nodejs application.
          The path is relative to the top level single directory inside
          the archive
        type: string
        default: server.js
    interfaces:
      cloudify.interfaces.lifecycle:
        configure: scripts/nodecellar/install-nodecellar-app.sh
        start: scripts/nodecellar/start-nodecellar-app.sh
        stop: scripts/nodecellar/stop-nodecellar-app.sh

relationships:

  node_connected_to_mongo:
    derived_from: cloudify.relationships.connected_to
    target_interfaces:
      cloudify.interfaces.relationship_lifecycle:
        postconfigure: scripts/mongo/set-mongo-url.sh

  node_contained_in_nodejs:
    derived_from: cloudify.relationships.contained_in
    target_interfaces:
      cloudify.interfaces.relationship_lifecycle:
        preconfigure: scripts/nodejs/set-nodejs-root.sh

node_templates:

  host:
    type: cloudify.nodes.Compute
    properties:
      ip: { get_input: host_ip }
      cloudify_agent:
        user: { get_input: agent_user }
        key: { get_input: agent_private_key_path }

  mongod:
    type: nodecellar.nodes.MongoDatabase
    properties:
      port: 27017
    relationships:
      - type: cloudify.relationships.contained_in
        target: host

  nodejs:
    type: nodecellar.nodes.NodeJSServer
    relationships:
      - type: cloudify.relationships.contained_in
        target: host

  nodecellar:
    type: nodecellar.nodes.NodecellarApplicationModule
    properties:
      port: 8080
    relationships:
      - type: node_connected_to_mongo
        target: mongod
      - type: node_contained_in_nodejs
        target: nodejs
Step 7: Adding outputs
The outputs part of the blueprint is optional, but it is useful because outputs allow the blueprint to expose application characteristics via the REST API or the CLI.
In this blueprint we will use outputs to expose the application url endpoint, like so:
outputs:
  endpoint:
    description: Web application endpoint
    value:
      ip_address: { get_property: [host, ip] }
      port: { get_property: [nodecellar, port] }
We see that the outputs section defines one output called endpoint, this output in turn defines two keys:
- ip_address
- port
Both of these values are retrieved by using another intrinsic function called get_property, which can extract properties from different nodes in the blueprint.
After the install workflow has finished executing, we can run:
cfy deployments outputs -d <deployment_id> - "endpoint":
Description: Web application endpoint
Value: {u'ip_address': u'192.168.40.156', u'port': 8080}Final Result
Lets take a look at our full blueprint:
imports:
  -


inputs:
  host_ip:
    description: >
      The ip of the host the application will be deployed on
  agent_user:
    description: >
      User name used when SSH-ing into the started machine
  agent_private_key_path:
    description: >
      Path to a private key that resided on the management machine.
      SSH-ing into agent machines will be done with this key.

node_types:

  nodecellar.nodes.MongoDatabase:
    derived_from: cloudify.nodes.DBMS
    properties:
      port:
        description: MongoDB port
        type: integer
    interfaces:
      cloudify.interfaces.lifecycle:
        create: scripts/mongo/install-mongo.sh
        start: scripts/mongo/start-mongo.sh
        stop: scripts/mongo/stop-mongo.sh

  nodecellar.nodes.NodeJSServer:
    derived_from: cloudify.nodes.ApplicationServer
    interfaces:
      cloudify.interfaces.lifecycle:
        create: scripts/nodejs/install-nodejs.sh

  nodecellar.nodes.NodecellarApplicationModule:
    derived_from: cloudify.nodes.ApplicationModule
    properties:
      port:
        description: Web application port
        type: integer
      application_url:
        description: >
          URL to an archive containing the application source.
          The archive must contain one top level directory.
        default: https://github.com/cloudify-cosmo/nodecellar/archive/master.tar.gz
      startup_script:
        description: >
          This script will be used to start the nodejs application.
          The path is relative to the top level single directory inside
          the archive
        type: string
        default: server.js
    interfaces:
      cloudify.interfaces.lifecycle:
        configure: scripts/nodecellar/install-nodecellar-app.sh
        start: scripts/nodecellar/start-nodecellar-app.sh
        stop: scripts/nodecellar/stop-nodecellar-app.sh

relationships:

  node_connected_to_mongo:
    derived_from: cloudify.relationships.connected_to
    target_interfaces:
      cloudify.interfaces.relationship_lifecycle:
        postconfigure: scripts/mongo/set-mongo-url.sh

  node_contained_in_nodejs:
    derived_from: cloudify.relationships.contained_in
    target_interfaces:
      cloudify.interfaces.relationship_lifecycle:
        preconfigure: scripts/nodejs/set-nodejs-root.sh

node_templates:

  host:
    type: cloudify.nodes.Compute
    properties:
      ip: { get_input: host_ip }
      cloudify_agent:
        user: { get_input: agent_user }
        key: { get_input: agent_private_key_path }

  mongod:
    type: nodecellar.nodes.MongoDatabase
    properties:
      port: 27017
    relationships:
      - type: cloudify.relationships.contained_in
        target: host

  nodejs:
    type: nodecellar.nodes.NodeJSServer
    relationships:
      - type: cloudify.relationships.contained_in
        target: host

  nodecellar:
    type: nodecellar.nodes.NodecellarApplicationModule
    properties:
      port: 8080
    relationships:
      - type: node_connected_to_mongo
        target: mongod
      - type: node_contained_in_nodejs
        target: nodejs

outputs:
  endpoint:
    description: Web application endpoint
    value:
      ip_address: { get_property: [host, ip] }
      port: { get_property: [nodecellar, port] }
That’s it! This a fully functioning blueprint that can be used with a Cloudify Management Environment to install the nodecellar application on an existing host.