Snapshots List
Displays a list of snapshots of the Manager - both snapshots that were created on this manager, and snapshots uploaded to it.
- This widget is only available to users with the ‘admin’ role.
- Snapshots are always created with “private” visibility, which cannot be set to a different visibility level.
Features
Snapshot basic information
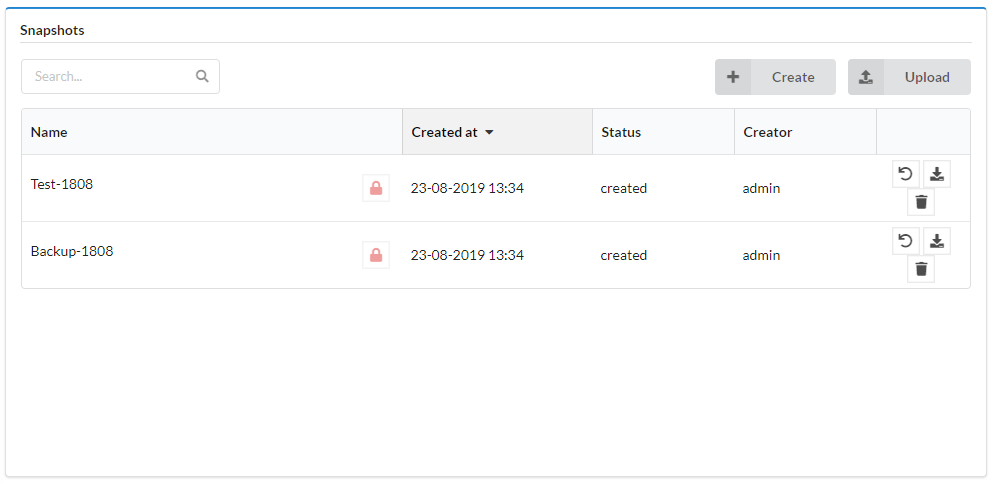
The widget exposes the following information on each snapshot:
- Id - the name given to the snapshot upon creation
- Visibility - always “private” for snapshots
- Creation time
- Status - one of: created/creating/failed/uploading/uploaded
- Creator
Snapshot actions
In the right column of every snapshot, the widget exposes the following action buttons:
- Restore snapshot
- Download snapshot
- Delete snapshot
The widget also exposes the following operations by the buttons on the top right corner:
- Create - Create a new snapshot on the current tenant
- Upload - Upload a snapshot to the current tenant
Creating a Snapshot
The snapshots creation process captures the data of the entire Cloudify Manager, not just that of a specific tenant. However, the snapshot is created in the context of the current tenant, and therefore must be restored from it.
- Click Create button above the Snapshots table.
- Specify a unique ID for the snapshot and click Create button.
It is good practice to use a name that will help you to easily identify the snapshot later.
The creation process begins. If there are active executions when you attempt to create the snapshot, the process waits until the executions are complete before creating the snapshot. You can see the status of executions in the Deployment executions widget.
The snapshot is saved as a ZIP file and appears in the Snapshots table, together with details of its creator, creation date and time, and current status.
Restoring a Snapshot
If you restore a snapshot to a Cloudify Manager instance that already contains data, that data is overwritten. To prevent inadvertent overwriting of existing data, you must explicitly state that you want to force data overwrite.
- Click Upload button in the widget.
- Either enter the URL of the snapshot or select the snapshot file from your file repository.
- Enter the Snapshot name.
- Click Upload button and see that snapshot was uploaded and is available in Snapshots table.
- Click Restore icon
 on the far right of newly uploaded snapshot’s row
- To restore a snapshot from a tenant-less (legacy) environment, toggle the relevant button.
- To overwrite all content in the existing Cloudify Manager, toggle the relevant button.
- Click Restore.
- The snapshot is restored and it no longer appears in the snapshots list.
Downloading a Snapshot
- Click Download icon
 for the snapshot entry that you want to download.
 - Wait for the snapshot to be downloaded.
Deleting a Snapshot
- Click Delete icon
 for the snapshot entry that you want to delete.
 - Click Yes to delete the snapshot from the Cloudify Manager.
Settings
Refresh time interval- The time interval in which the widget’s data will be refreshed, in seconds. Default: 30 seconds.