Blueprints
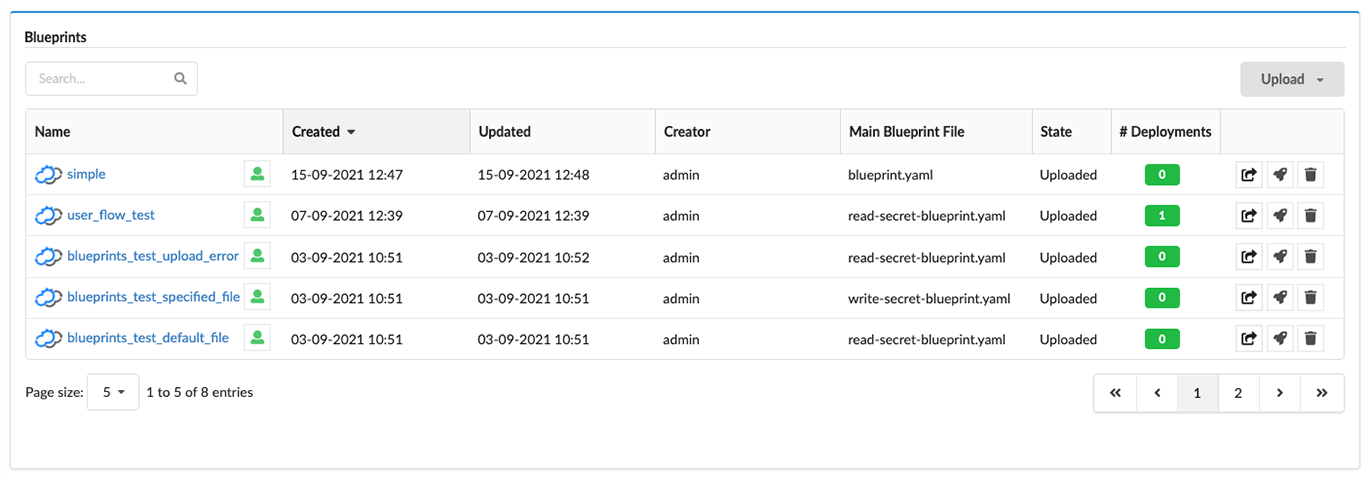
Displays all the blueprints on the tenant, according to the user’s permissions and the blueprints visibility levels. The data can be displayed as a table or a catalog.
Features
Blueprint basic information
The following information is displayed:
- Icon image file
- Name
- Visibility level
- Creation time
- Last update time
- Creator user-name
- Main blueprint file name (as the blueprint archive can contain multiple files)
- Number of deployments derived from the blueprint
Blueprint actions
There are also action buttons to upload a blueprint, create deployment, delete blueprint or edit blueprint copy in Cloudify Composer.
Uploading a Blueprint
Using marketplace
- Click the Upload button.
- In the menu, click Upload from Marketplace option.
- In the Blueprint Marketplace modal, click Upload button on one of the blueprints shown in a table.
Using blueprint package
- Click the Upload button.
- In the menu, click Upload a blueprint package option.
- In the Upload Blueprint dialog, provide the URL of the remote archive in which the blueprint is located or select a local blueprint archive.
- Enter the
Blueprint nameandBlueprint YAML file.
Blueprint nameis the name with which you want to identify this blueprint once uploaded.
Blueprint YAML fileis the name of the YAML file in the archive that you want to upload as the main blueprint - as there can be multiple files in the archive. If a blueprint filename field is omitted, the defaultblueprint.yamlfilename is used, but if a file under that name does not exist in the archive, an error message will appear. - (Optional) Provide a .png file URL or select a local one, to appear as an icon in the catalog or table view next to the blueprint name.
- Choose the blueprint’s visibility by clicking on the icon in the top right corner:
 .
.
The default visibility is “Tenant”, and according to the logged-in user’s permissions you can also choose other levels of resource visibilities. - Click Upload.
Using Terraform module
- Click the Upload button.
- In the menu, click Upload from Terraform module option.
- Create blueprint from Terraform modal will appear.
- Enter the
Blueprint name
Blueprint nameis the name with which you want to identify this blueprint once uploaded. - Select
Terraform version(by default, one of the Terraform versions will be selected). - Provide
Blueprint main information, which consists of:URL to a zip archive that contains the Terraform module.Terraform folder in the archive- selectable field from which you can select Terraform module contained in the zip file.
By default this field is disabled, until theURL to a zip archive that contains the Terraform moduleis provided.- (Optional) Credentials required for accessing
URL to a zip archive that contains the Terraform module.
- (Optional) To add
VariablesorEnvironment variables:
- Click the
VariablesorEnvironment variablessection. - Click the Add button.
- Fill the row fields:
Variable- name of the variable.Source- type of the variable, which may be selected from a dropdown.
Currently available values are:Secret,Input,Static.Value / Secret key / Input name- value of the variable (related to the selectedSource).
SelectingStaticas aSourceenables to type a value.
SelectingInputas aSourceenables to type a value.
SelectingSecretenables to select a value from one of the stored secrets.
- Click the
- (Optional) To add
Outputs:
- Click the
Outputssection. - Click the Add button.
- Fill the row fields:
Output- name of the output.Output type- type of the output, which may be selected from a dropdown.
Currently available values are:Output,Capability.Terraform output- value of the output, which will be added to the generated blueprint.
- Click the
- Click Upload.
Using Cloudify Composer
- Click the Upload button.
- In the menu, click Generate in the Composer option.
- Cloudify Composer will be opened in a new tab and there you can create a blueprint.
Deploying a Blueprint
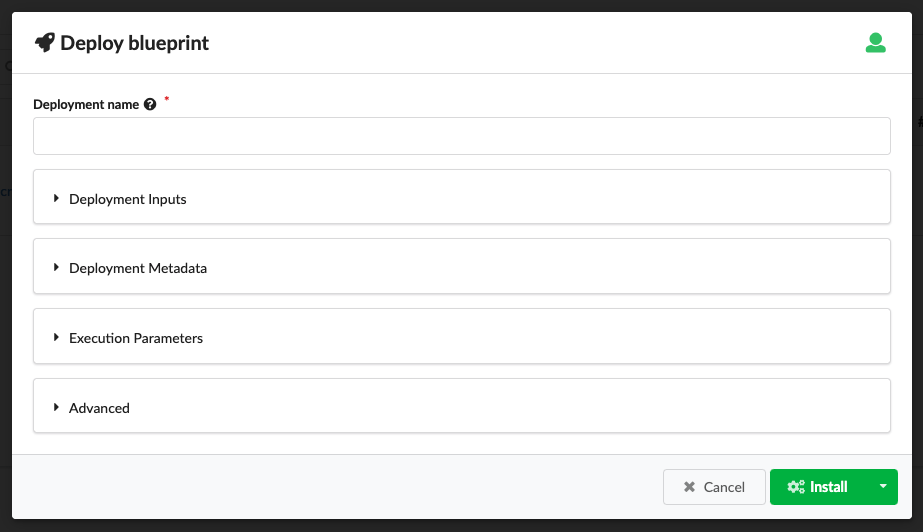
- Click the deploy icon
 .
. - In the Deploy Blueprint dialog, specify a name for your deployment.
- Specify the required deployment inputs.
The names of the default input values appear in the inputs fields. You can leave these defaults or override them with new values. Input’s description (on hovering help icon ) might help you understand how to fill-in the proper value.
An alternative for providing the inputs is to specify a .yaml file containing the relevant values.
) might help you understand how to fill-in the proper value.
An alternative for providing the inputs is to specify a .yaml file containing the relevant values. - Select Deploy in the drop-down to deploy the blueprint or click Install to deploy and execute
installworkflow on it.
Deleting a Blueprint
Click the delete icon ![]() and confirm deletion in the displayed dialog.
and confirm deletion in the displayed dialog.
Blueprint details
When you click the blueprint row (element) in the blueprints table (catalog), a blueprint-specific page opens (it’s also called blueprint’s drill-down page).
The page displays the following widgets with details about the selected blueprint:
- Blueprint Action Buttons
- Blueprint Topology
- Blueprint Deployments
- Blueprint Inputs
- Blueprint Outputs/Capabilities
- Blueprint Sources
See Settings section for details on how to turn on/off this feature.
Settings
Refresh time interval- The time interval in which the widget’s data will be refreshed, in seconds. Default: 10 secondsEnable click to drill down- Enables redirecting to the blueprint’s drill-down page upon clicking on a specific blueprint. Default: YesDisplay style- Defines how the blueprints list should be displayed. Can be either Catalog or Table. Default: TableHide failed blueprints- Allows to hide blueprints not uploaded successfully. Default: OffShow Composer options- Allows to show Cloudify Composer options in menu and in the blueprints list. Default: NoLabel filter rules- Allows to define blueprint labels’ filter rules. See blueprint filters for more details. Default: emptyMarketplace tabs- Allows to define multiple sources from which blueprints are taken to populate Blueprint Marketplace modal. User can define a name and URL for each tab.Marketplace display style- Defines how the Blueprints Marketplace modal should be displayed. Can be either Catalog or Table. Default: TableList of fields to show in the marketplace table- Allow to change the list of visible columns in the Blueprint Marketplace modal. Works only when Marketplace display style is set to Table. Default: Name, Description.