Azure AKS - Cluster provisioning
This example demonstrates provisioning a Azure Kubernetes Service (AKS) cluster on the Azure cloud. The deployment consists of:
- Azure AKS cluster
- Security Group
- Network
- All of the essential peripherals in Azure (IP address, NIC, etc…).
In this example we will deploy only the cluster. Later, in the more advanced examples (multi cloud examples) we will leverage this setup as the basis for deploying a containerized service.
Prerequisites
This example expects the following prerequisites:
- A Cloudify Manager installed and accessible.
- This can be either a Cloudify Hosted service trial account, a Cloudify Premium Manager, or a Cloudify Community Manager.
- Access to Azure infrastructure is required to demonstrate this example.
Cloudify CLI or Cloudify Management Console?
Cloudify allows for multiple user interfaces. Some users find the Cloudify Management Console (web based UI) more intuitive while others prefer the Cloudify CLI (Command Line Interface). This tutorial and all following ones will describe both methods.
Community version - Some of the options described in the guide are not available in the community version management console (web UI). An example would be setting up secrets. You can still perform all of the functionality using the Cloudify CLI.
Cloudify Management Console
This section explains how to run the above described steps using the Cloudify Management Console. The Cloudify Management Console and Cloudify CLI can be used interchangeably for all Cloudify activities.
Import Plugins and Secrets
To connect to Azure, credentials and Cloudify plugins are required. Cloudify recommends storing such sensitive information in a Cloudify secret. Secrets are kept encrypted in a secure way and used in run-time by the system. Learn more about Cloudify secrets here.
Azure credentials can be created by following the guide here.
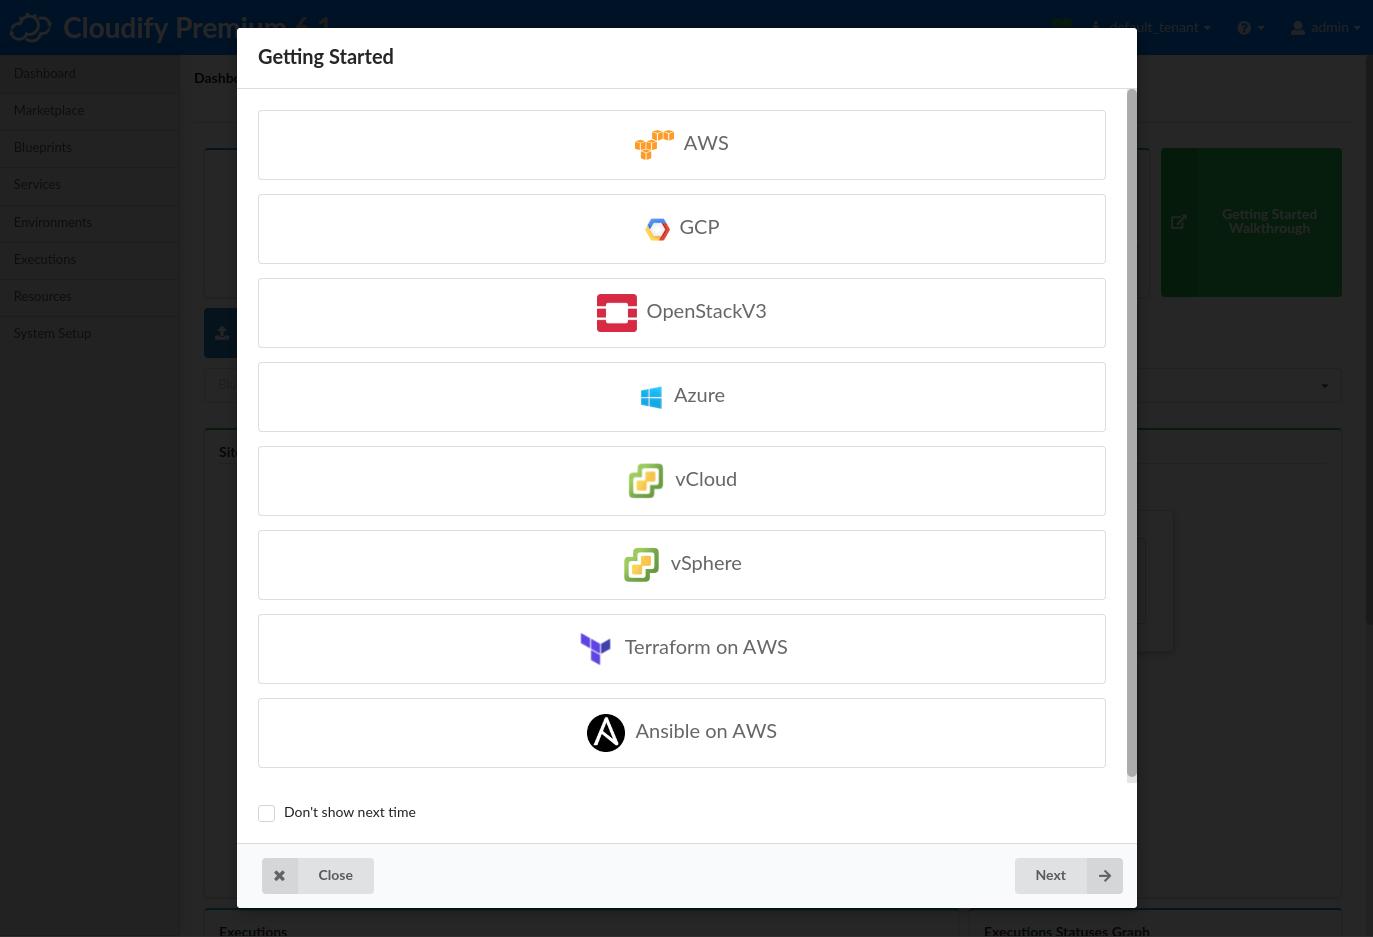
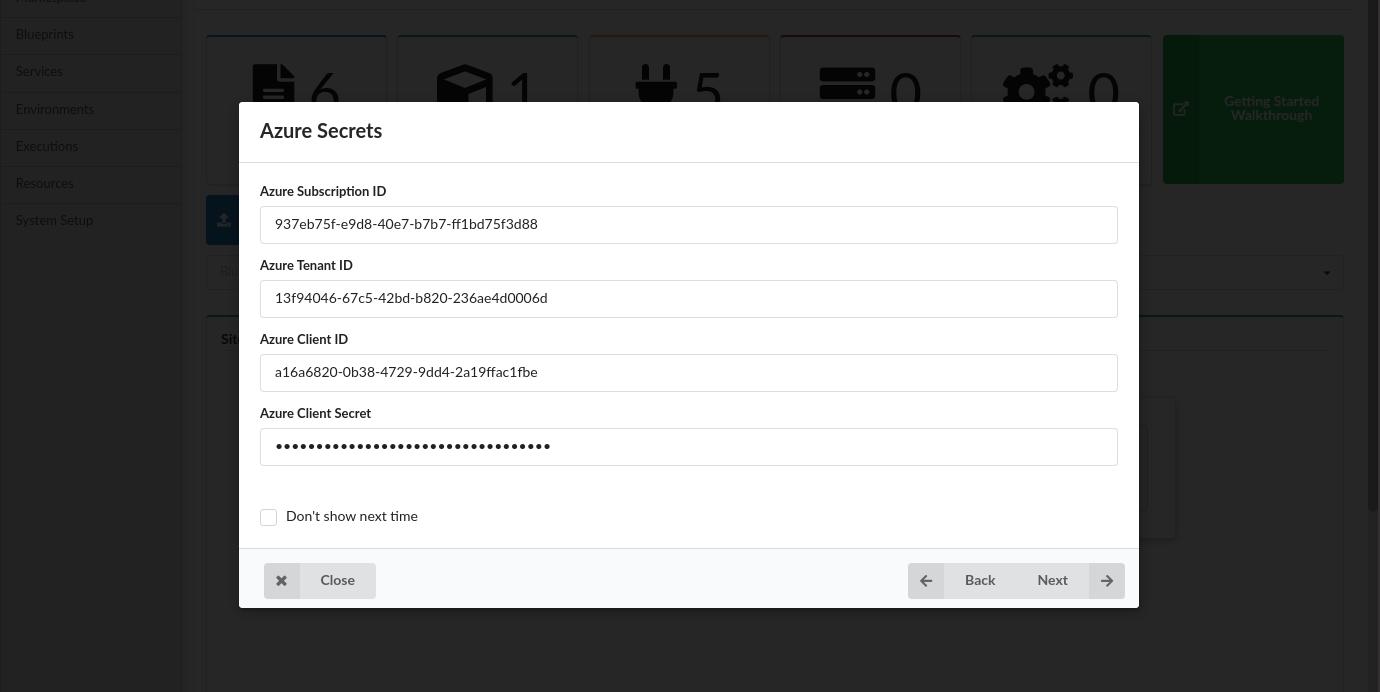
Cloudify version 6+ offers a fast-track process to import both credentials and all necessary plugins. As soon as the Cloudify Management Console loads, it will present several “getting started” options. Choose the Azure option and enter the requested credentials to automatically import the required secrets and plugins.
Validate Secrets
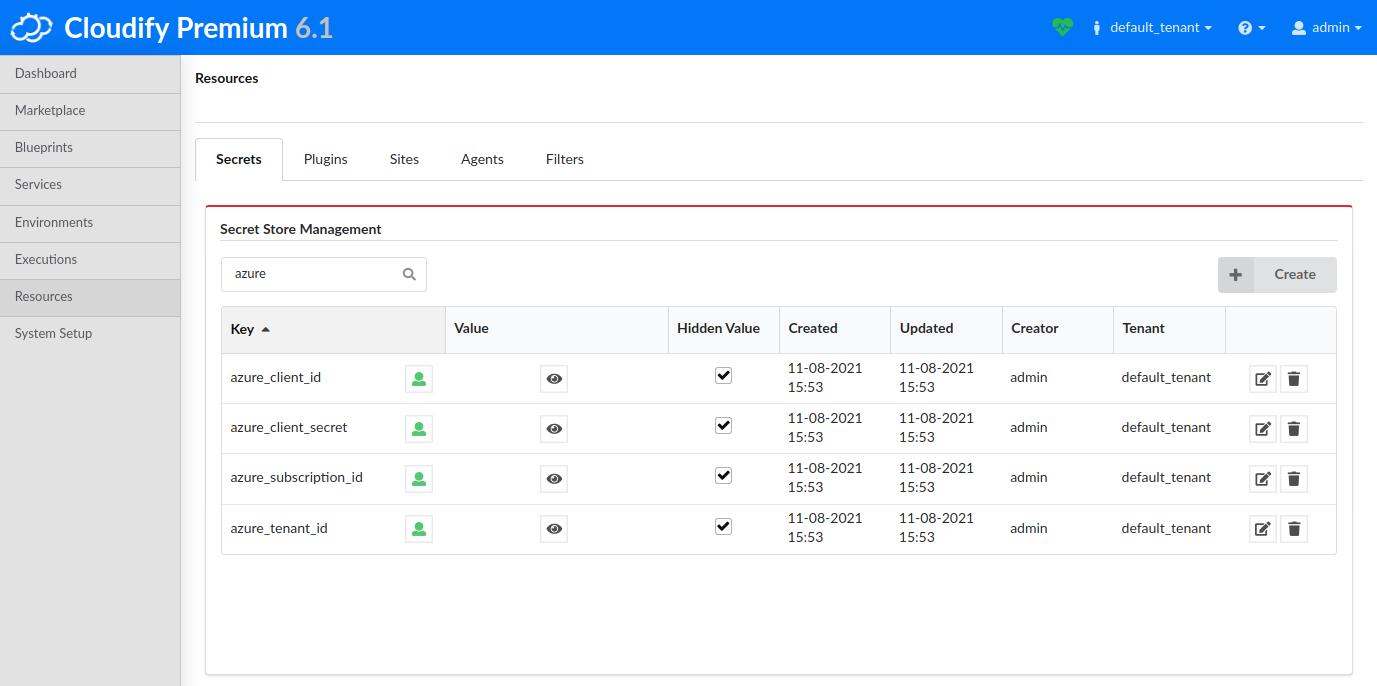
To view the imported secrets in the Cloudify Manager, login to the Cloudify Management Console and select the Resources page and navigate to the Secrets tab. The following secrets should exist after following the above steps:
- azure_subscription_id
- azure_tenant_id
- azure_client_id
- azure_client_secret
Notes
azure_subscription_id- the account subscription ID.azure_tenant_id- the Service Principaltenant.azure_client_id- the Service PrincipalappId.azure_client_secret- the Service Principalpassword.
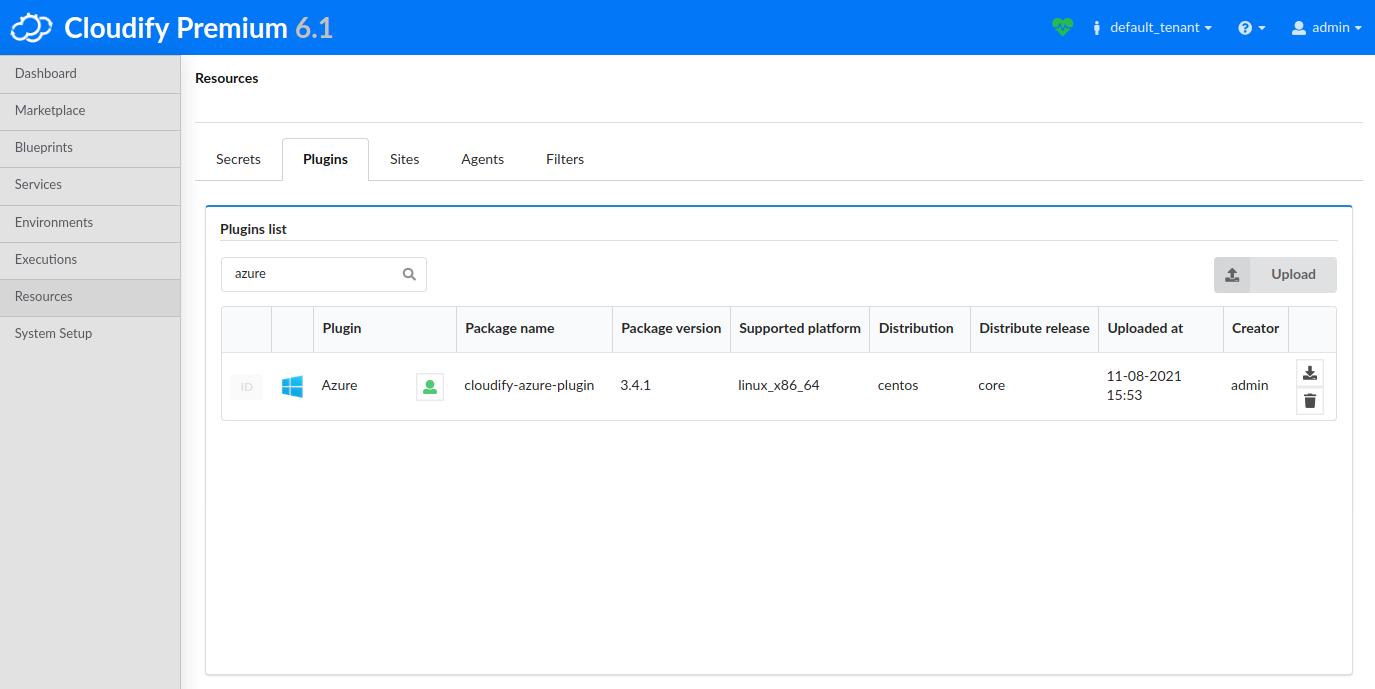
Validate Plugins
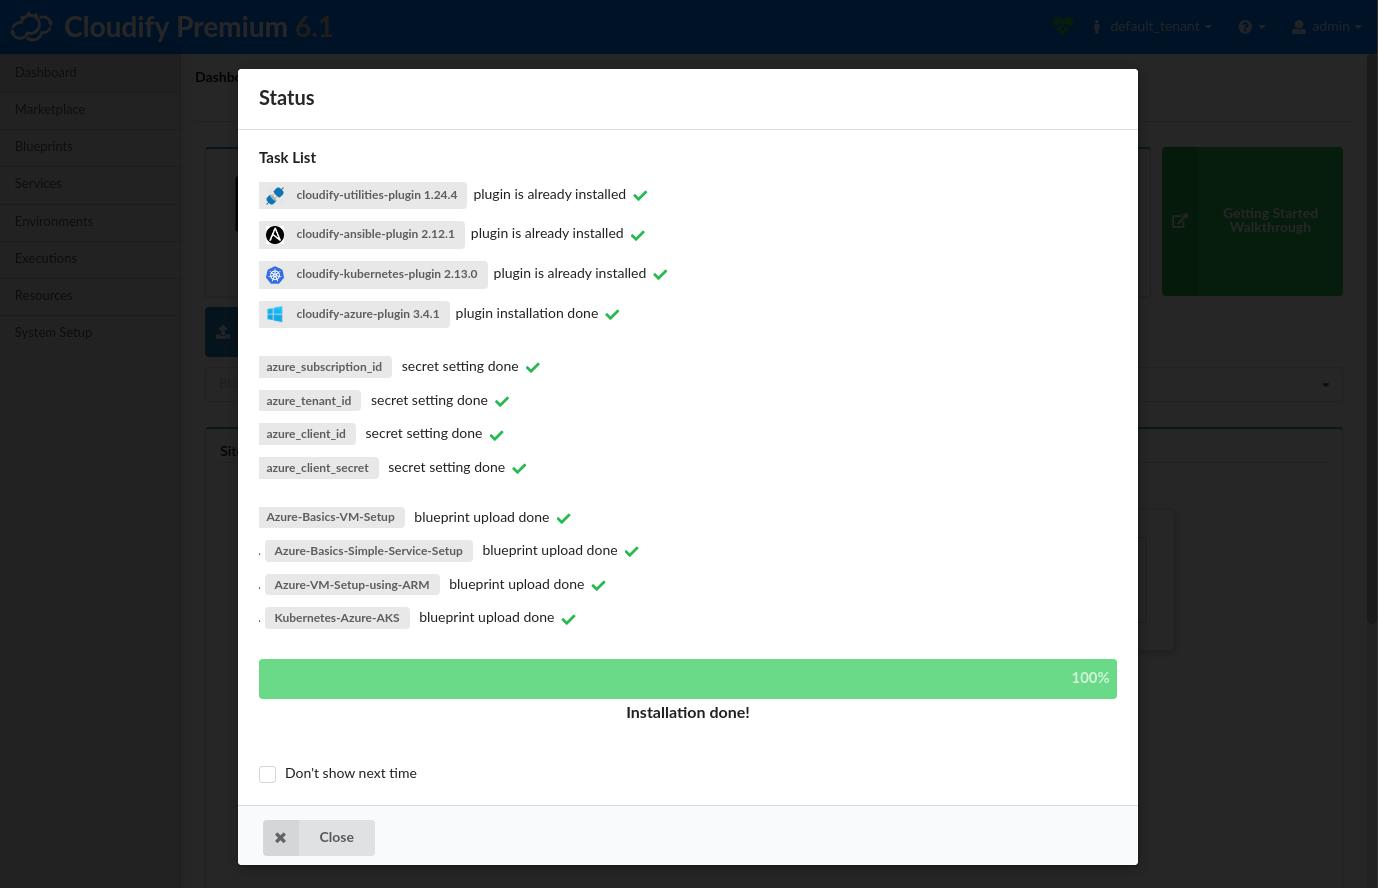
To view the imported plugins in the Cloudify Manager, login to the Cloudify Management Console and select the Resources page and navigate to the Plugins tab. The following plugins should exist after following the above steps:
- Azure
- Kubernetes
- Utilities
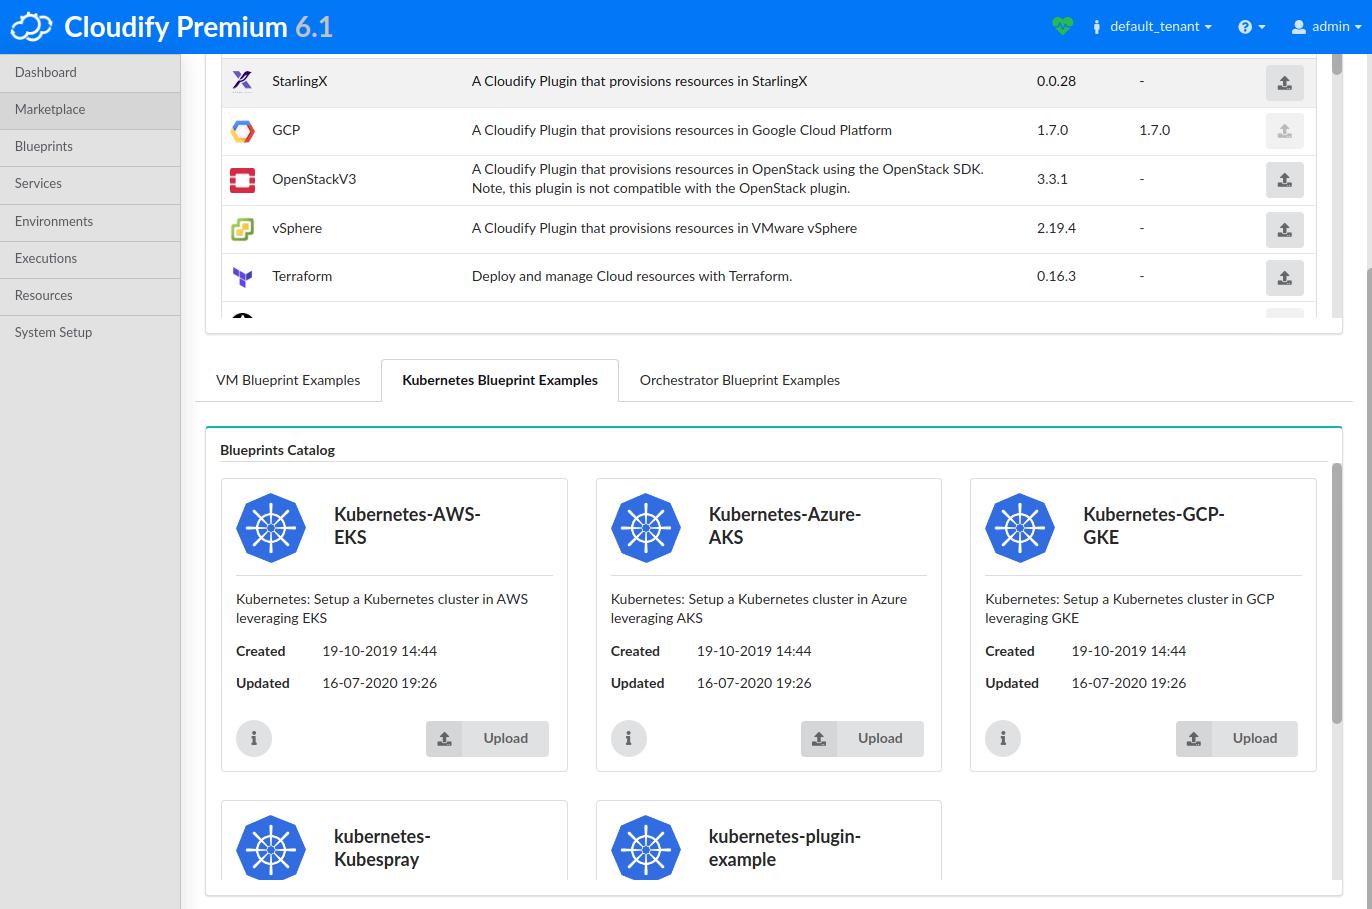
Import Kubernetes Blueprint
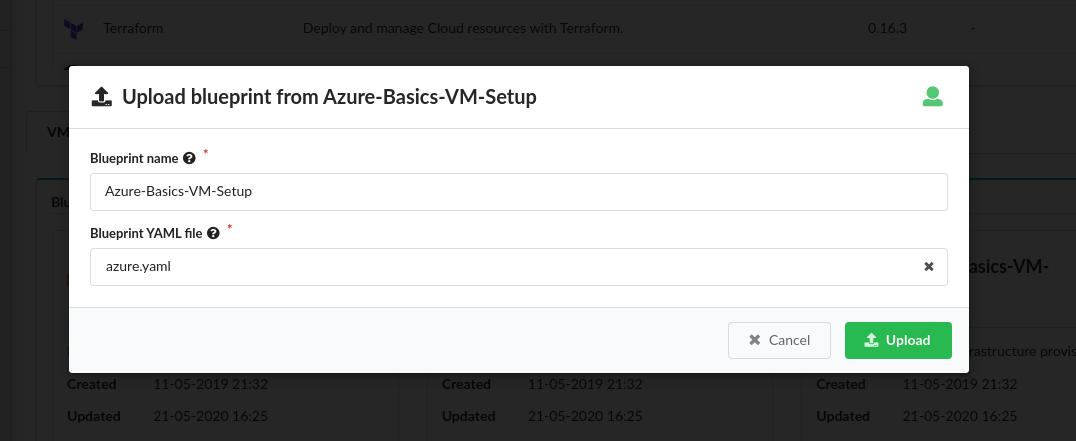
The Cloudify Manager provides an easy method of provisioning a Kuberenetes cluster on Azure AKS. On the Marketplace page, navigate to the Kubernetes Blueprint Examples tab and upload the Kubernetes-Azure-AKS blueprint.
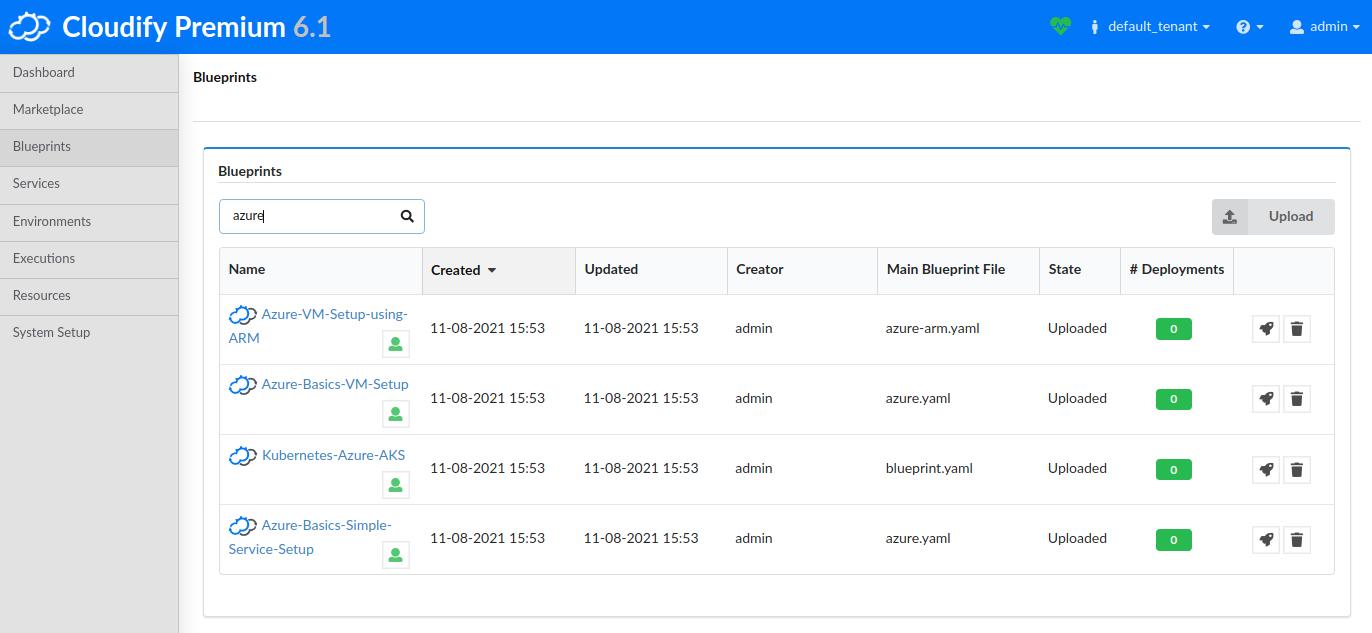
Once imported, you can find the resulting Kubernetes-Azure-AKS blueprint by clicking on the Blueprints page.
Deploy an Azure AKS Cluster
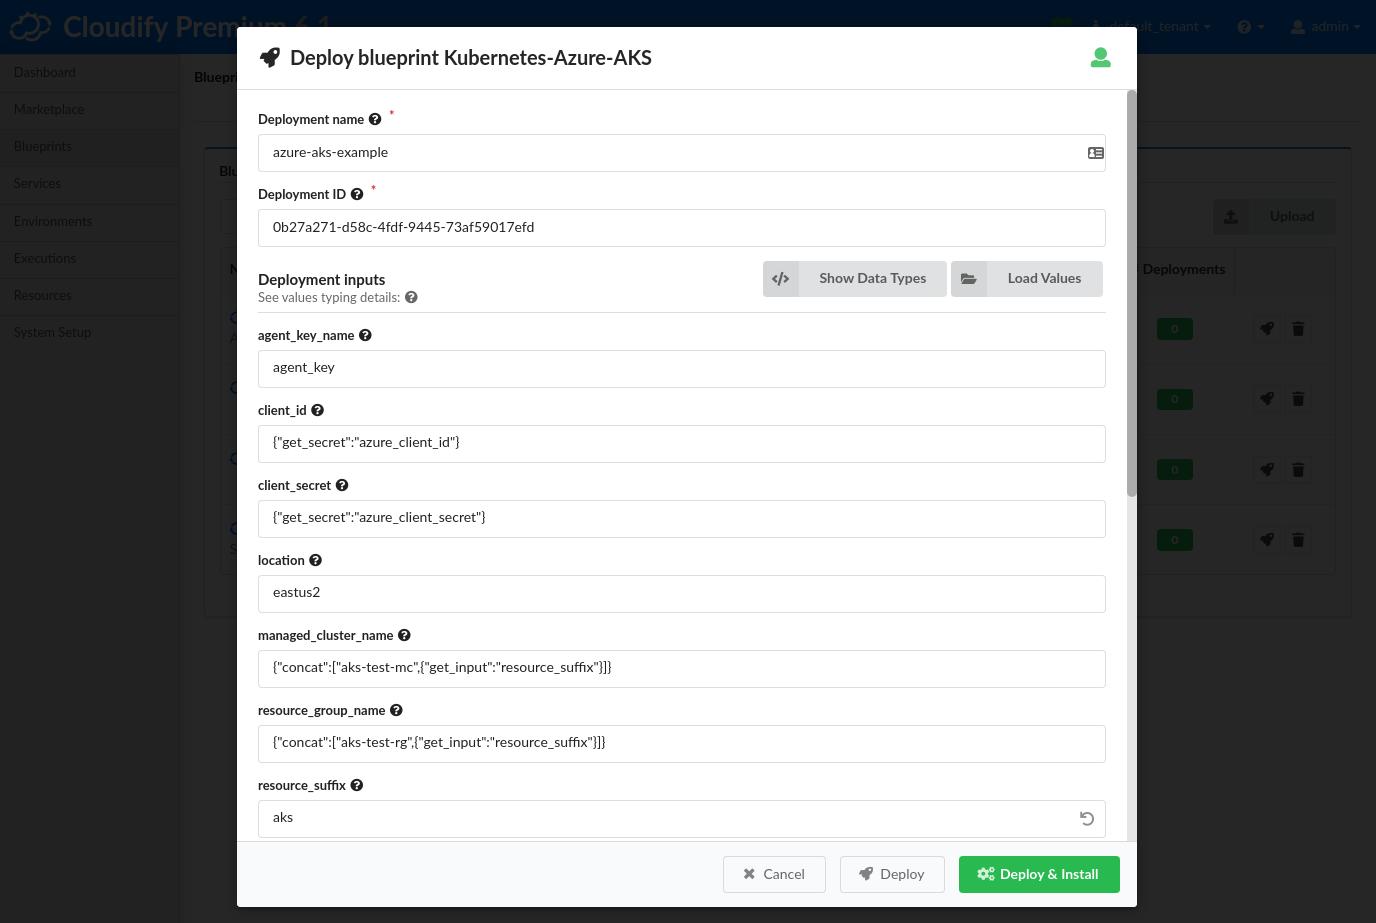
On the Blueprints page, click the Create deployment button for the Kubernetes-Azure-AKS blueprint.
- Create a Deployment name.
- Adjust the Zone input to match your preferences.
Click the Deploy & Install button at the bottom of the form to start the deployment. On the following page, click the Execute button.
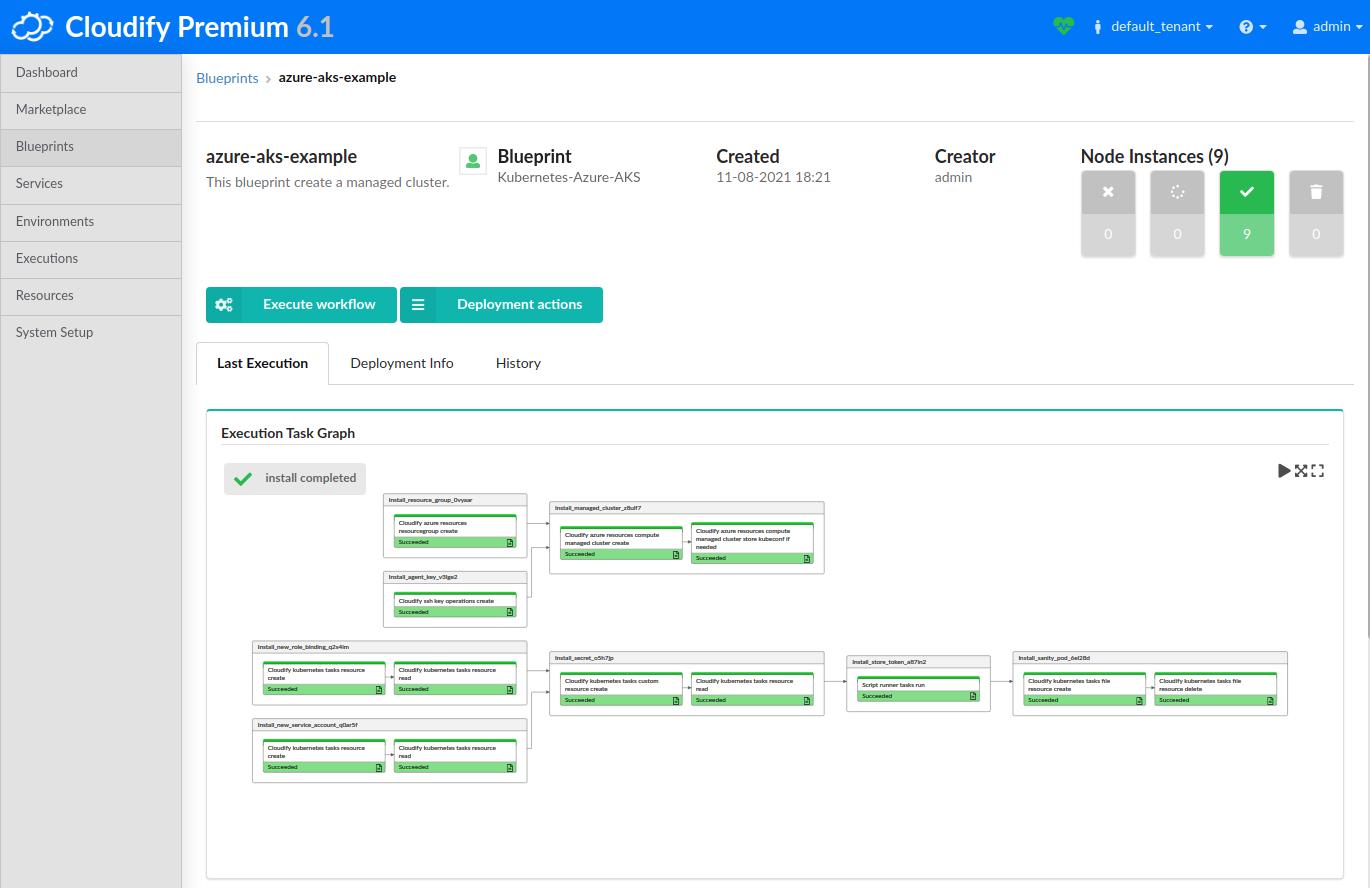
You now have a Cloudify Deployment running the default install workflow. Cloudify will begin actively interfacing with Azure to deploy a Azure AKS Kubernetes cluster. You can track the status of the Deployment in the Execution Task Graph panel in the Deployments page.
Cloudify CLI
.. todo
Using the Azure AKS Cluster
Install CLI tools
Kubectl
Azure documentation: https://docs.aws.amazon.com/eks/latest/userguide/install-kubectl.html
Azure CLI
Azure documentation: https://docs.microsoft.com/en-us/cli/azure/install-azure-cli
To initialize Kubectl, go to the Azure Console, navigate to the Kubernetes Service page, select your cluster, and click Connect. This will display a CLI command to use to setup the Kubectl config.
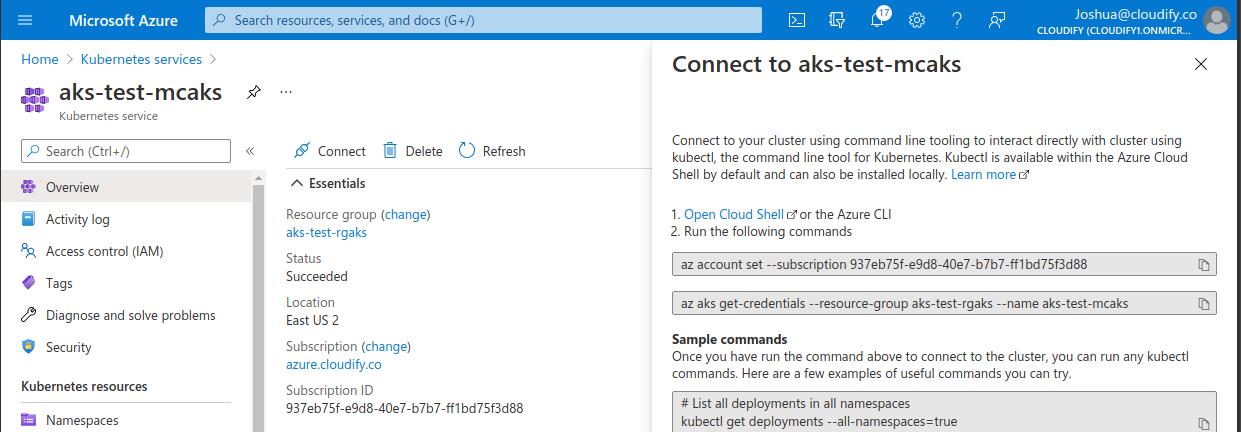
# Example GKE Kubectl init command
az aks get-credentials --resource-group aks-test-rgaks --name aks-test-mcaks
Verify access
# List version
kubectl version

# List namespaces
kubectl get ns

# List nodes
kubectl get nodes