Cloudify Console Guide
Cloudify Console for Service Orchestration
The Cloudify Console provides a graphical user interface for orchestration that lets the operator:
- Upload blueprints into the Cloudify Managers
- Deploy and install/uninstall new services
- Monitor the status and performance of services
- View service logs and events
All of the things that can be done in the Cloudify Console can also be done using the CLI and the REST API.
Logging into the Console
To login to the Cloudify Console you need to use a browser on your laptop or PC and enter in the URL of the Cloudify manager IP address or hostname, for example https://192.168.0.1/#/login. Then enter your username and password in order to login to the system.
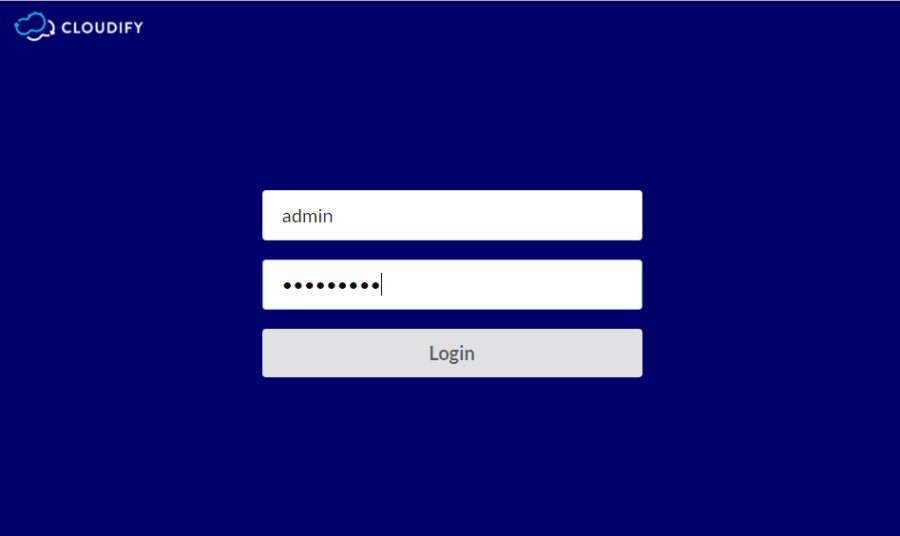
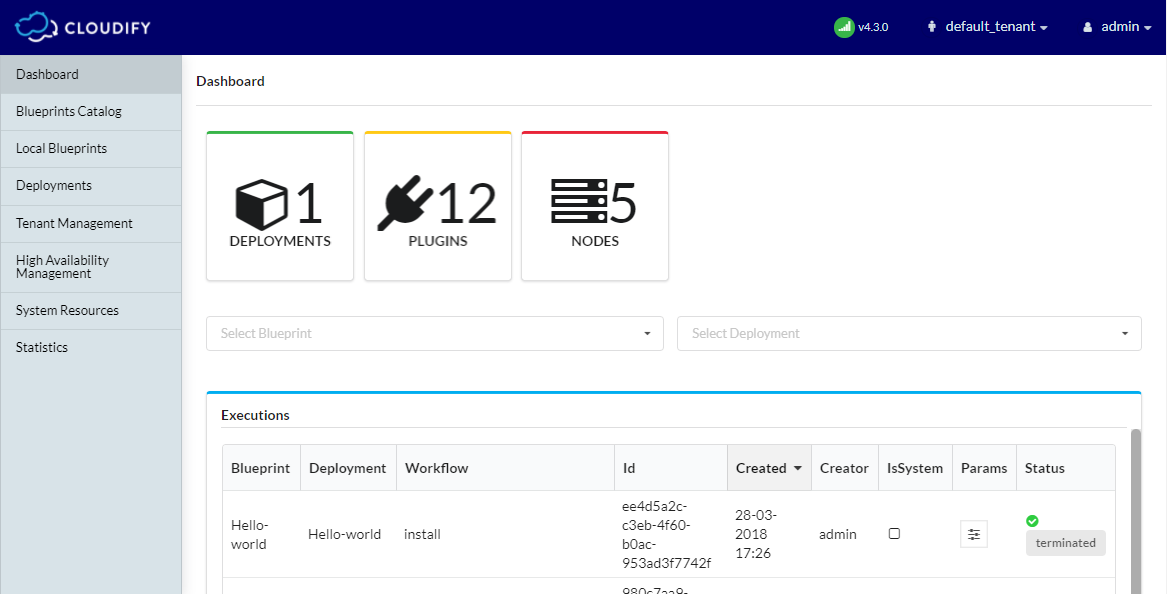
When you successfully login to the Cloudify Console, you see the Cloudify Console dashboard.
Uploading a Blueprint
From the blueprints catalog:
To upload a blueprint from the blueprints catalog:
Go to Blueprints Catalog, select the required blueprint, and click Upload.
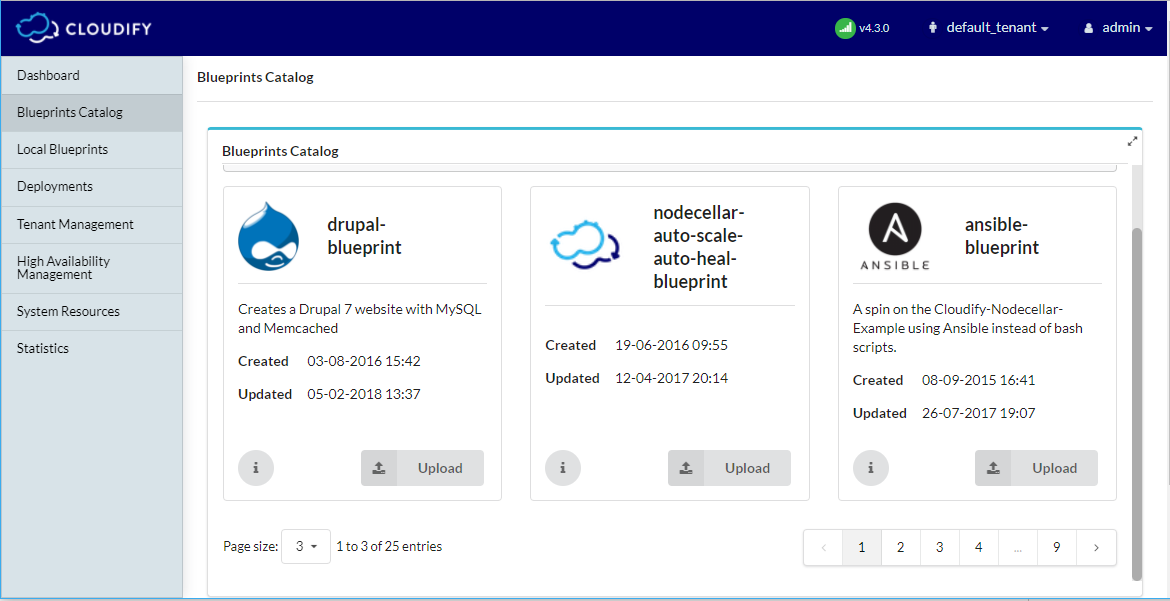
Enter the blueprint name and select filename of the blueprint:
Click Upload.
The blueprint is copied from Blueprints catalog to local blueprints.
From the local host:
To upload a blueprint from the local host:
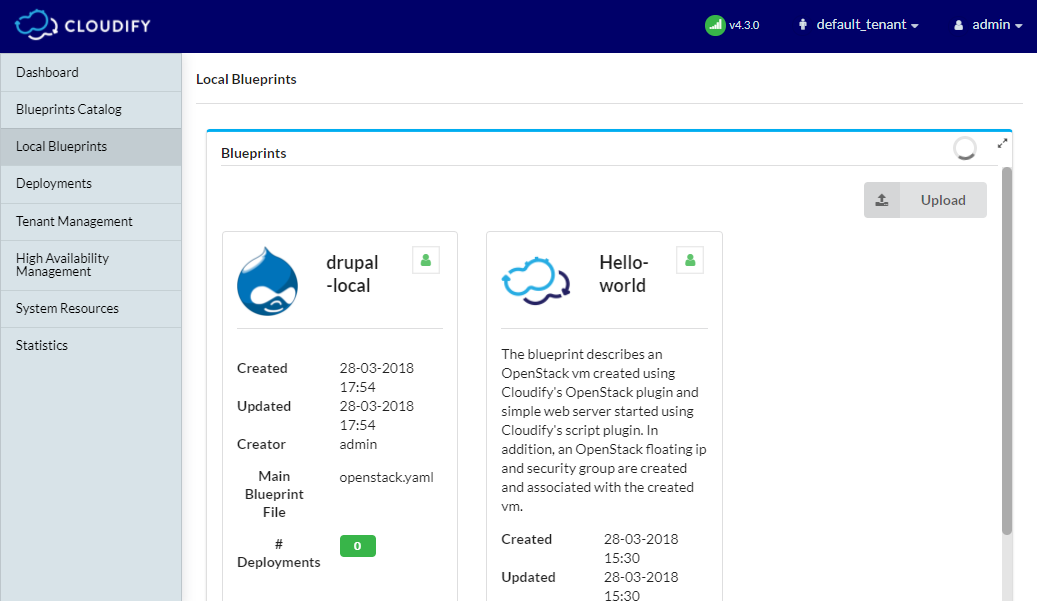
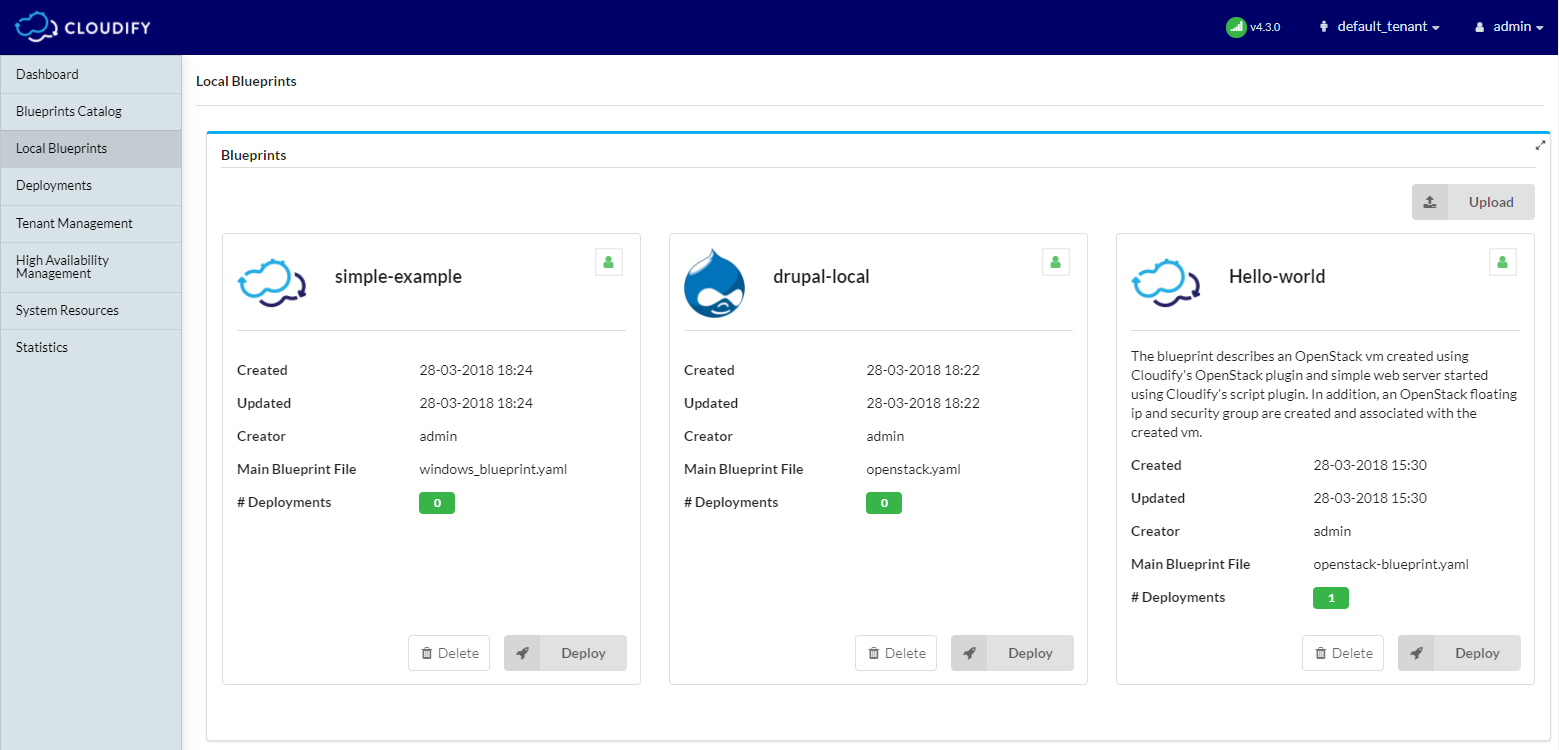
Go to Local Blueprints and click Upload.
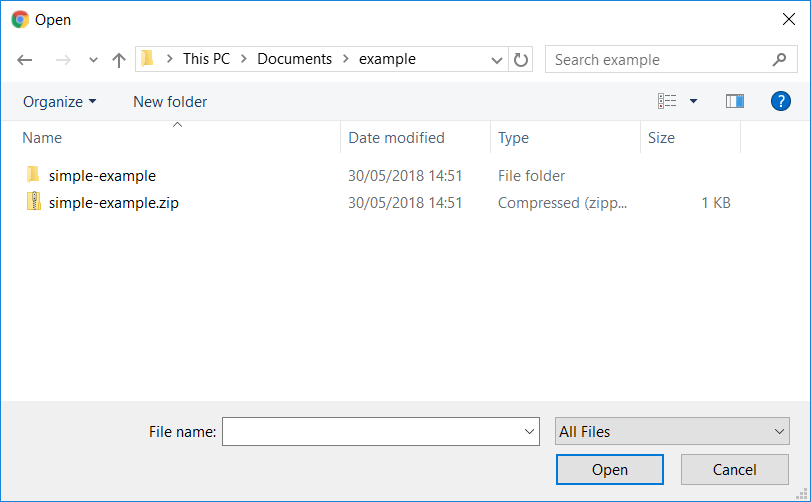
Click in the field to select a blueprint package file.
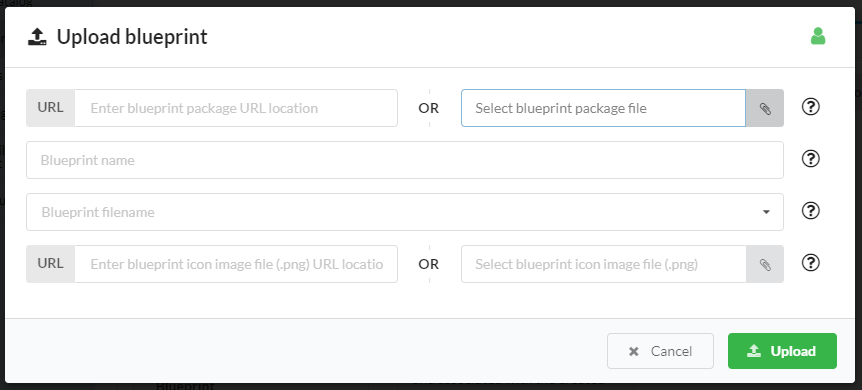
Browse to the blueprint archive.
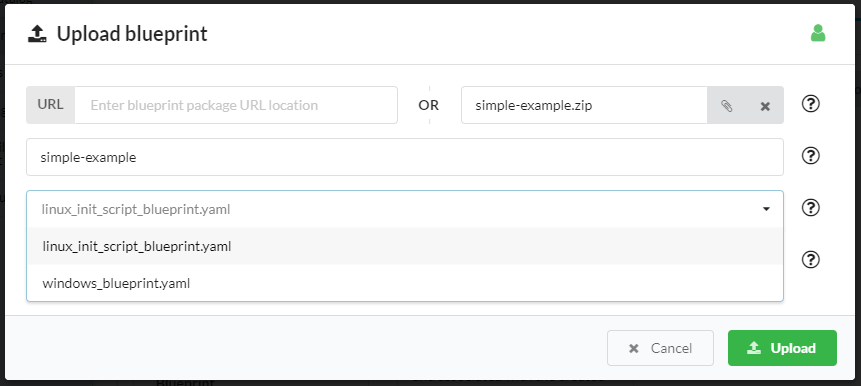
Enter the blueprint name and select filename of the blueprint:
Click Upload.
The blueprint is copied to local blueprints.
From a URL:
To upload a blueprint archive that is located in the Internet:
Go to Local Blueprints and click Upload.
Enter the URL of the blueprint archive.
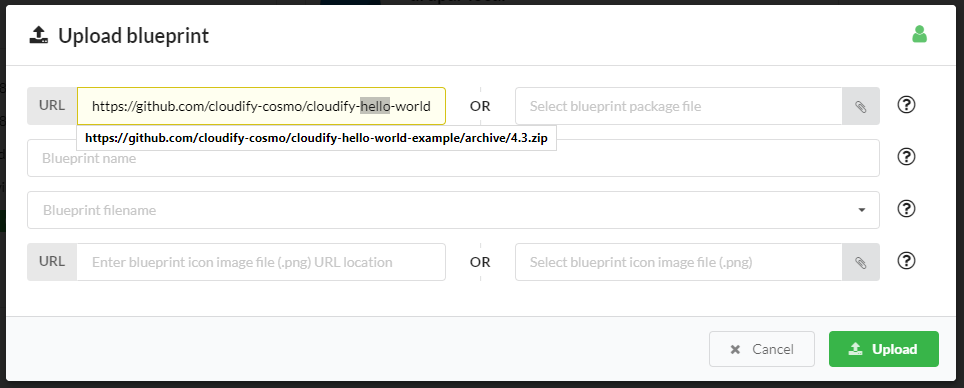
Enter the blueprint name and select filename of the blueprint:
Click Upload.
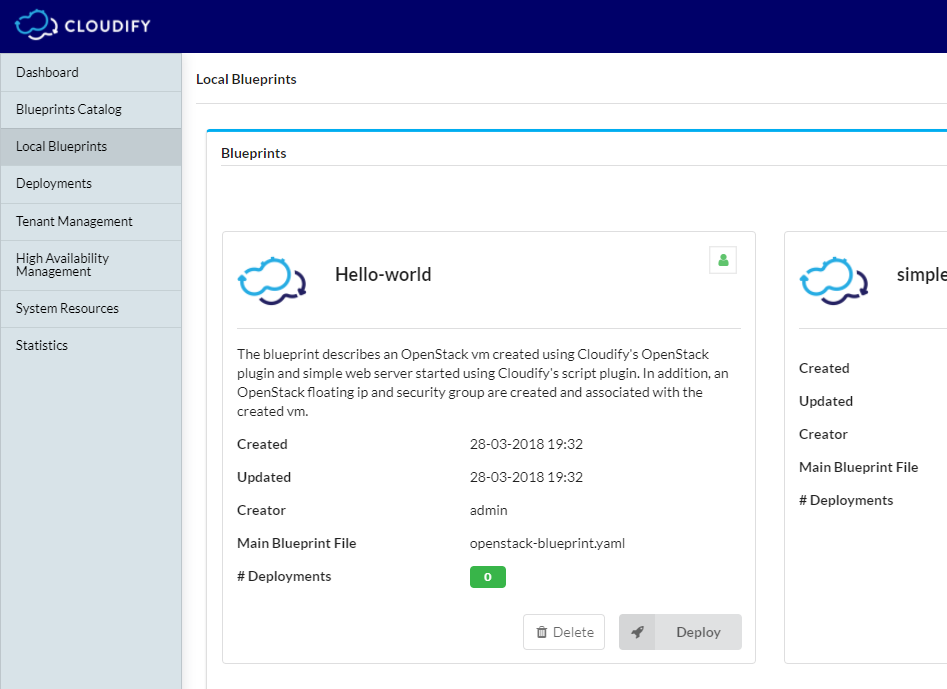
The blueprint is copied to local blueprints.
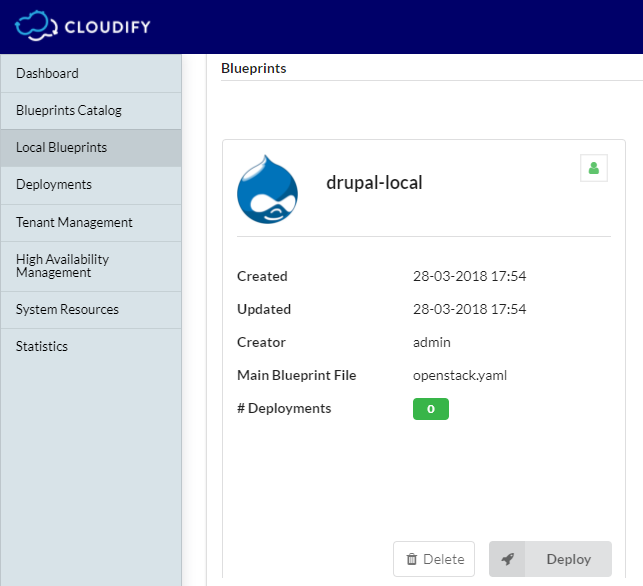
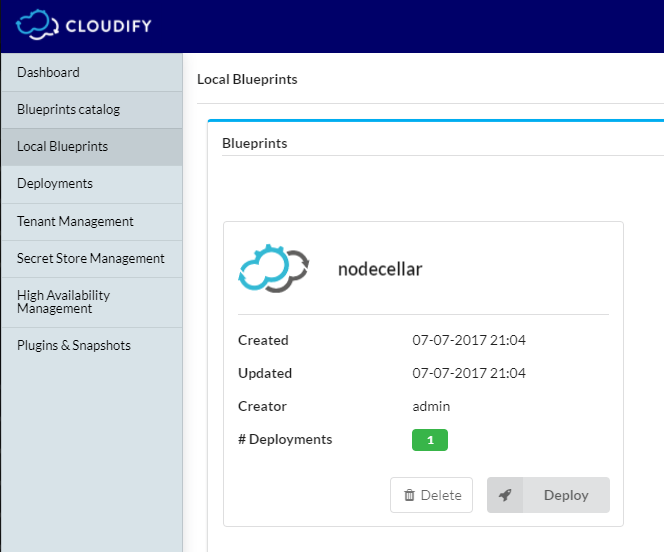
Deleting blueprint
Before deleting a blueprint all deployments based on the blueprint must be uninstalled and deleted.
To delete the blueprint, just click Delete on the blueprint.
Setting up Customer Deployments
To create a new deployment:
Go to Local Blueprints and click Deploy in the blueprint.
Fill in the inputs for the deployment and click Deploy.
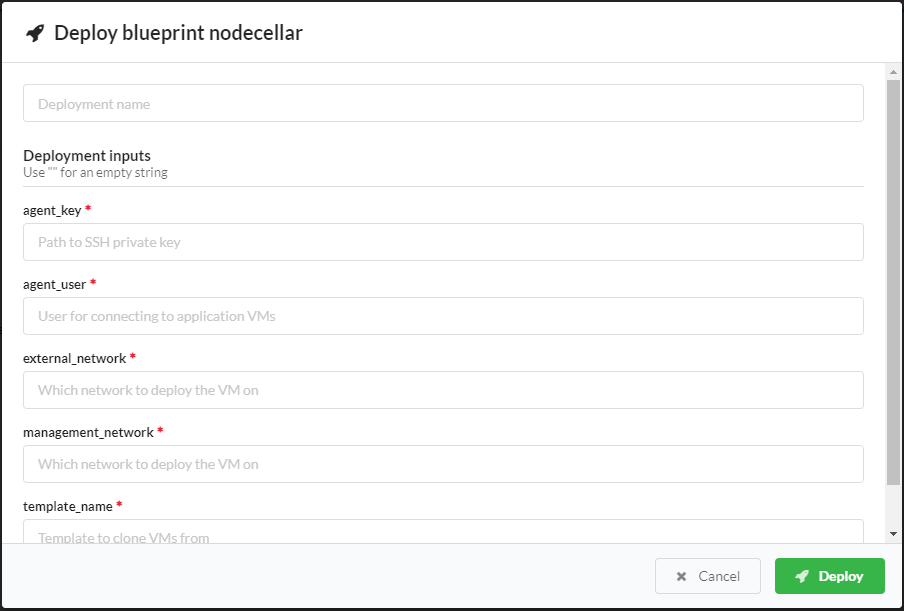
The first field is the name of the deployment and this needs to be a unique name given to this one deployment. It is usually something that includes the customer name and blueprint name (for example, radius-city-west). The other fields depend on the blueprint requirements and are automatically generated based on the inputs of the blueprint. For more about inputs, see blueprint inputs).
After the deployment is created it is shown as one of the deployments in Deployments.
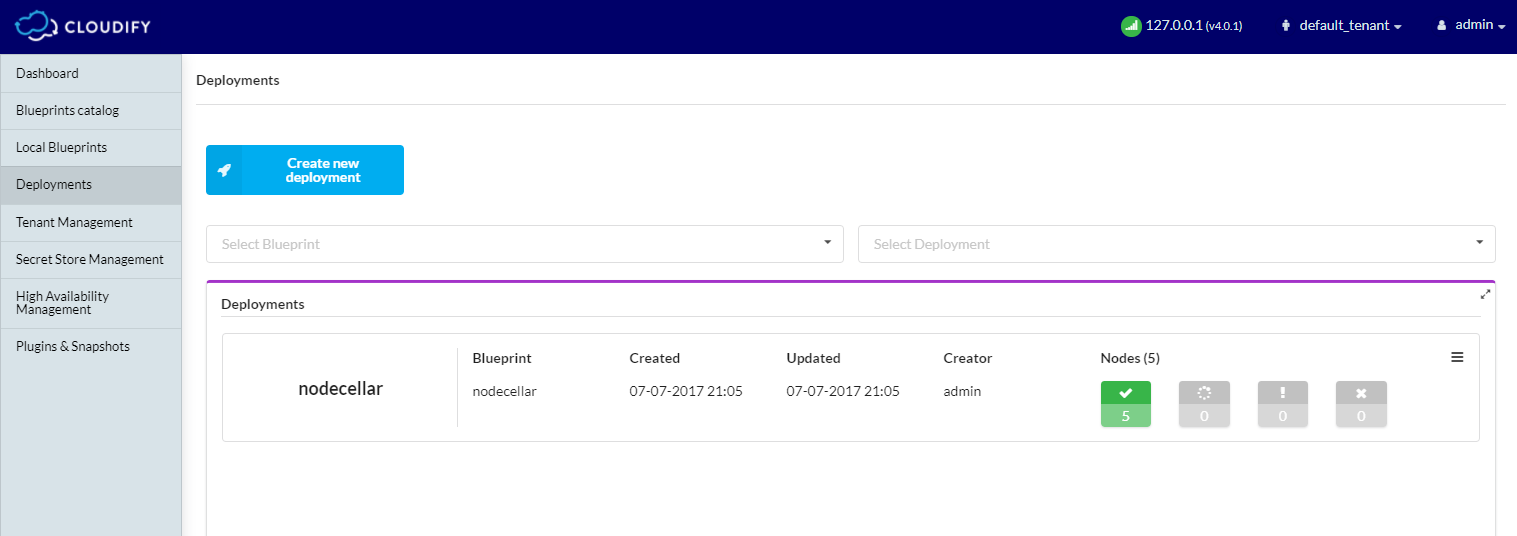
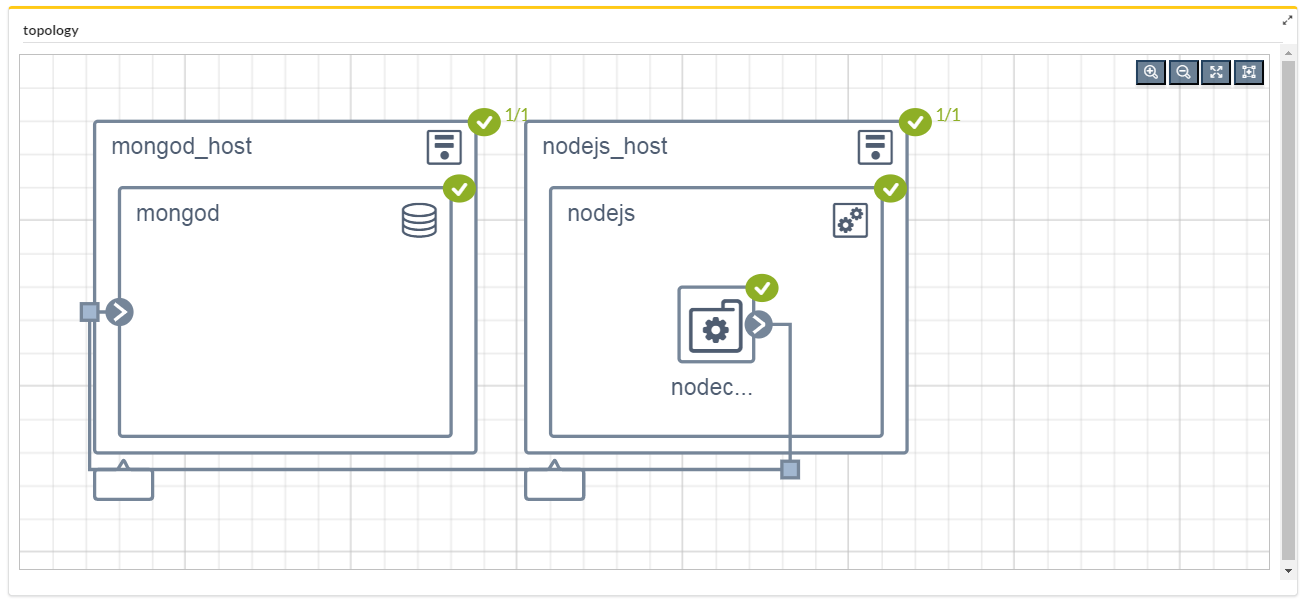
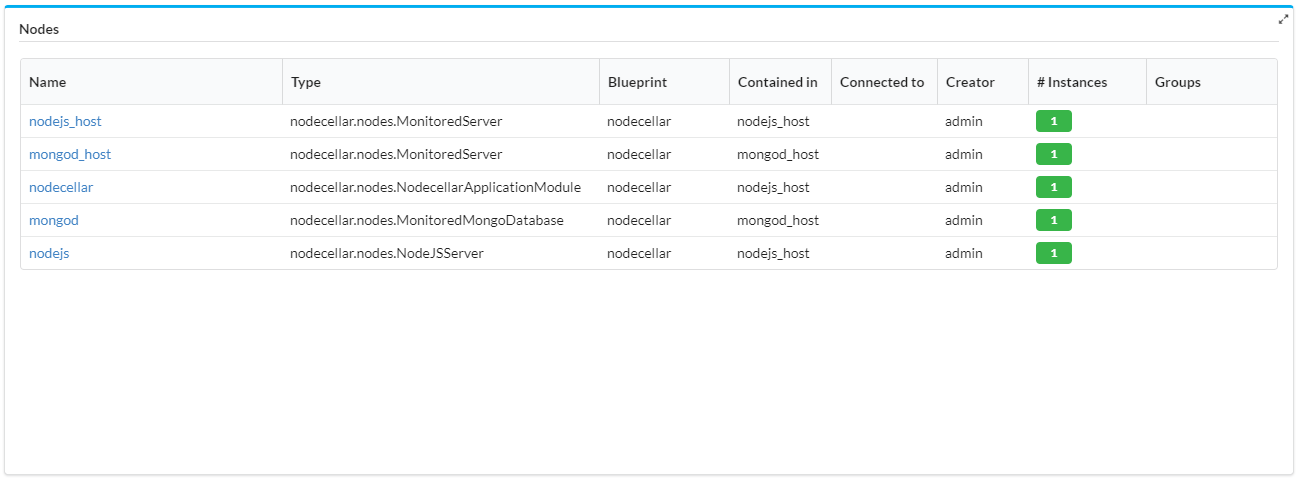
To get detailed information about the deployment click on it. The page contains a set of default widgets, but you can edit the page and add or remove widgets. The default widgets include:
- Topology: shows the graphical topology of the deployment
- Nodes: shows the nodes in the deployment
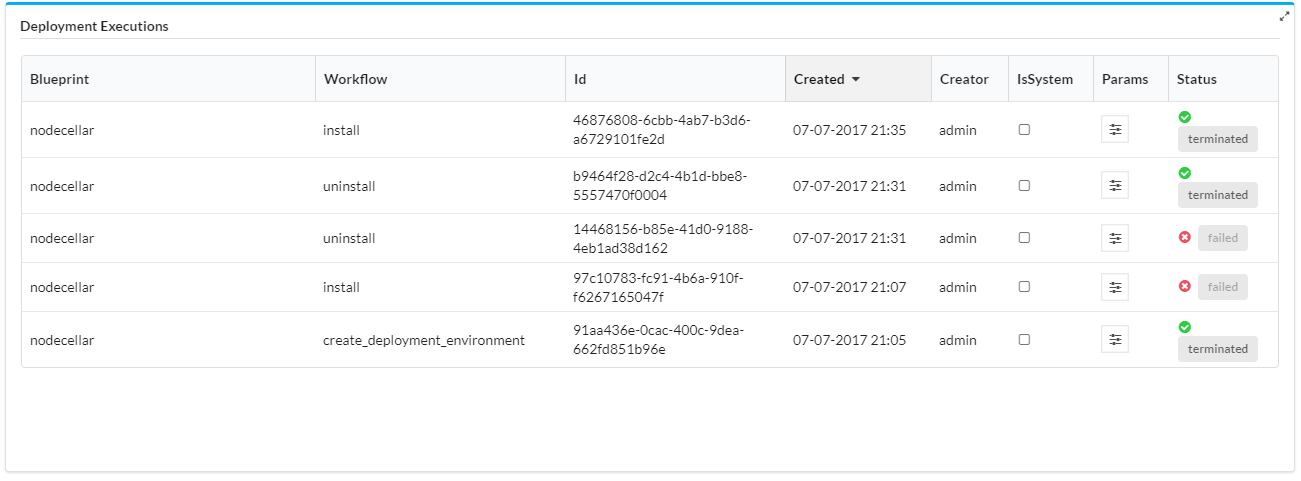
- Executions: shows what workflows were executed on the deployment
- Deployment Inputs & Outputs: shows the inputs given to the blueprint in order to create this deployment and any outputs that were created as a part of the install workflow

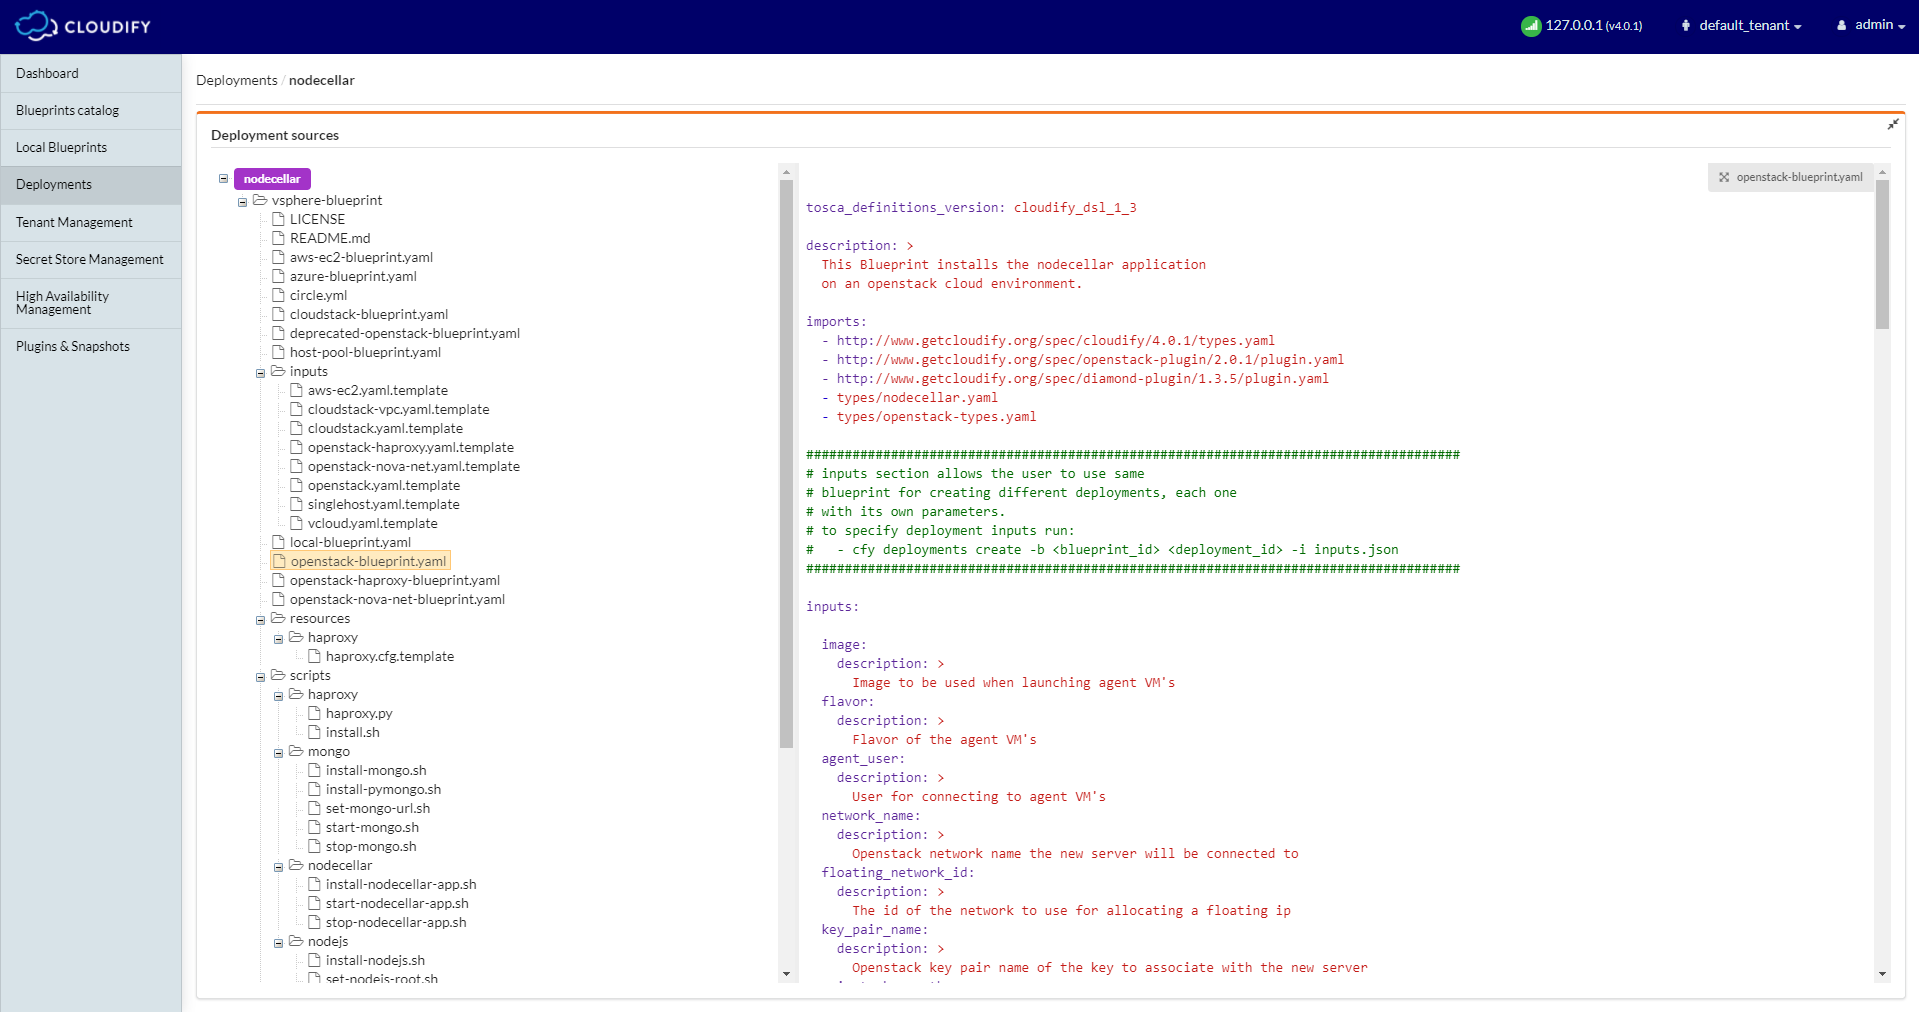
- Source: shows the source files of the blueprint
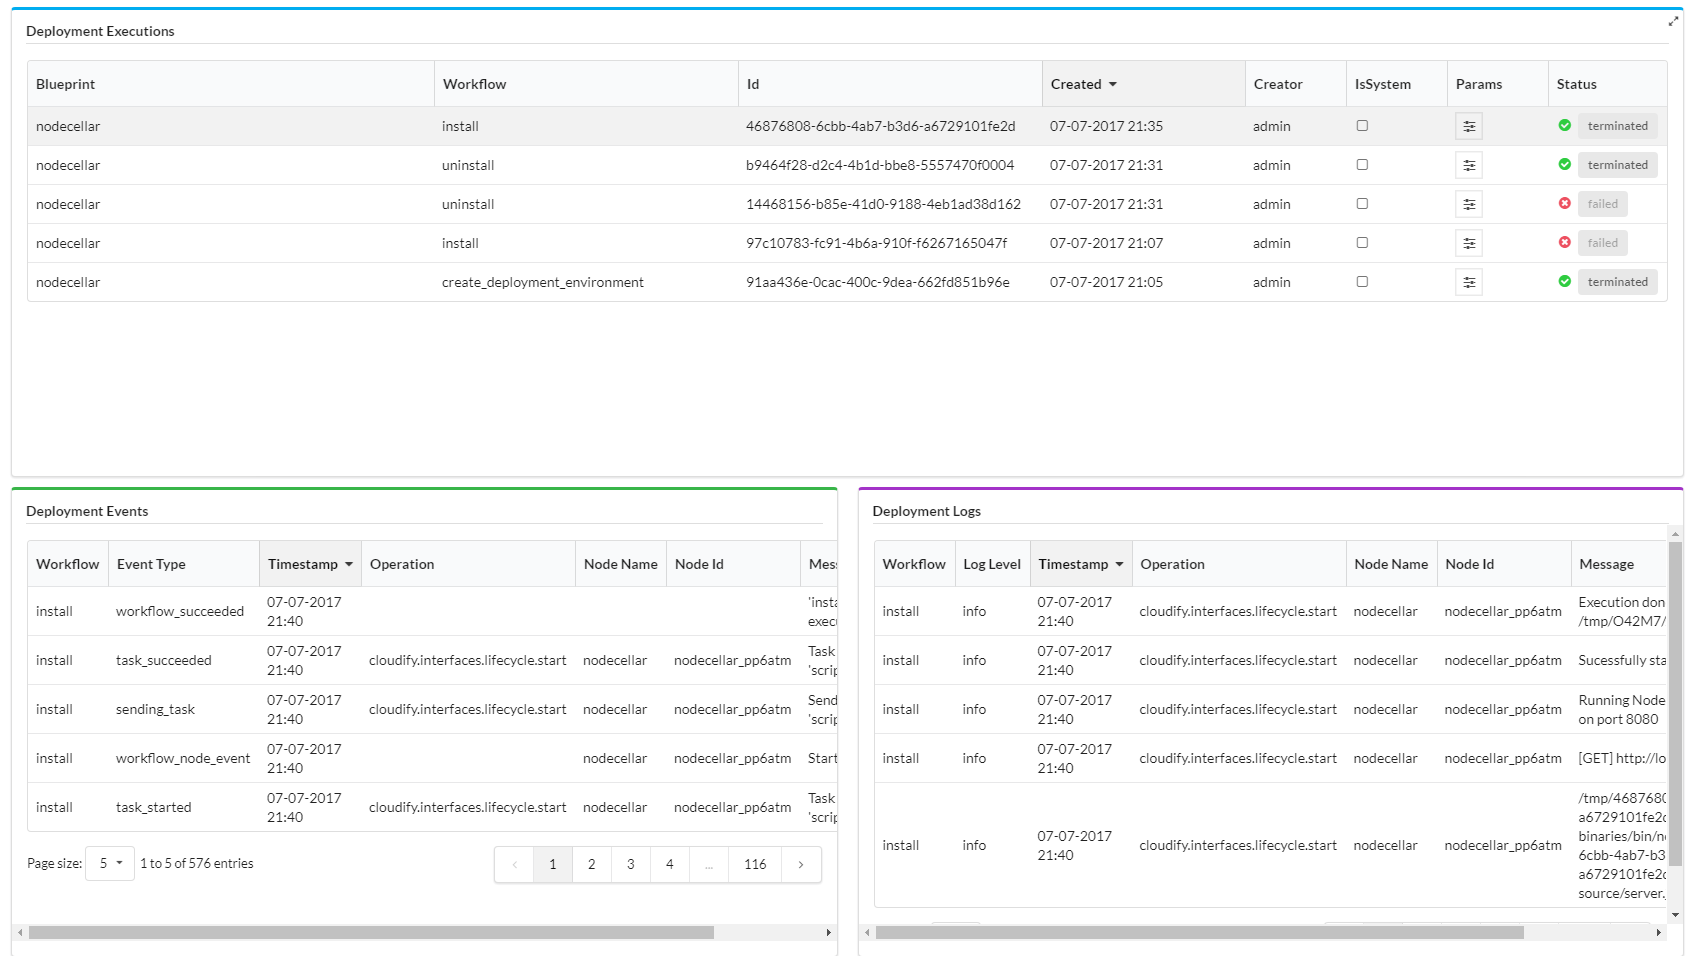
- Deployment Events & Logs: shows events and logs of executions
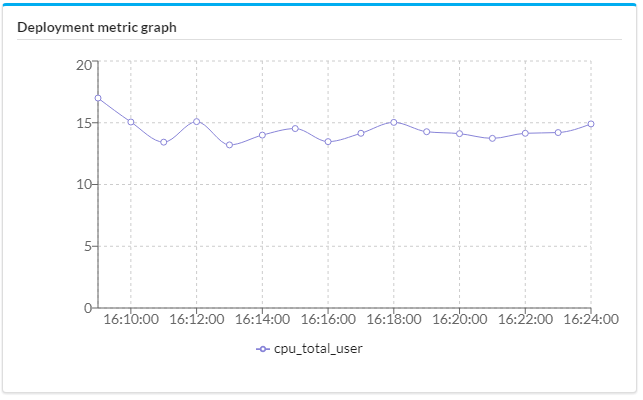
- Monitoring: shows the performance monitoring metrics if they have been configured for the deployment. See next section on setting up the dashboard for monitoring to work properly with your selected deployment.
To install a deployment:
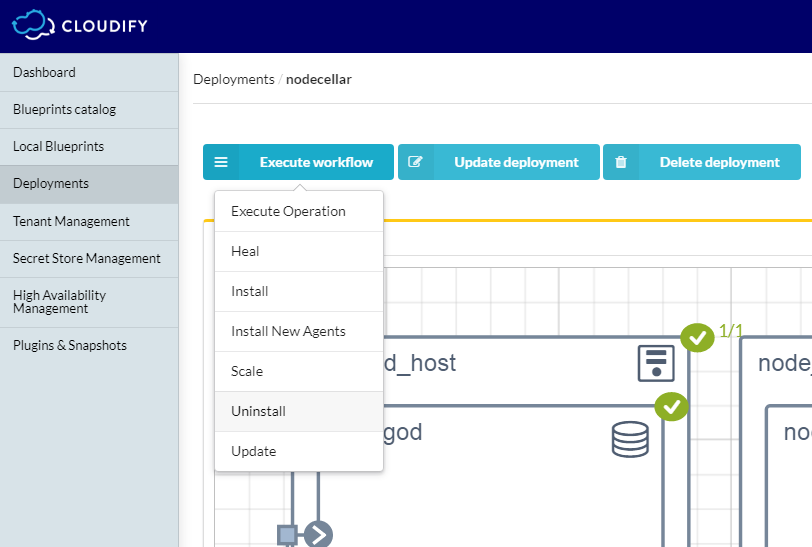
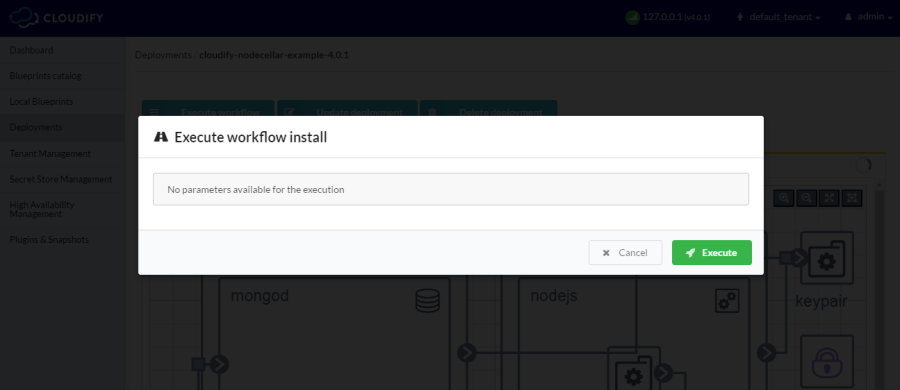
To actually install a deployment into the network, click Execute workflow in the deployment menu and then click Install.
After you review the parameters for the install workflow, click Execute.
The progress of the Install execution is shown in the Deployment Executions, Deployments Events and Deployments Logs widgets of the deployment page.
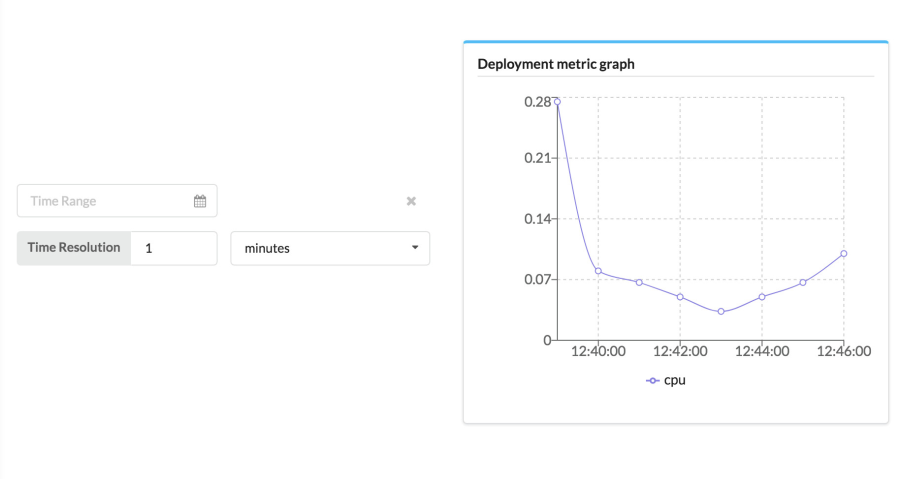
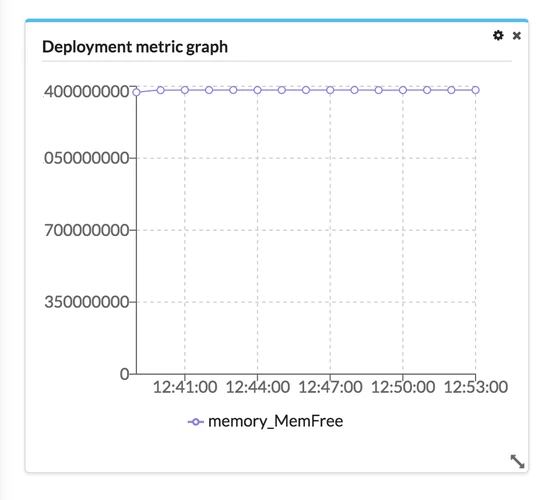
To configure the dashboard for deployment monitoring to load a customized deployment widget that displays the performance metrics properly for your deployment:
Note - The standard widget displays operating system metrics (CPU, Disk, Memory, Network IO). While this makes sense for a VNF deployment, it does not display the performance metrics of the SDN services, for example.
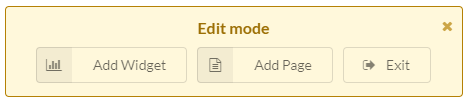
From the user menu, select edit mode:
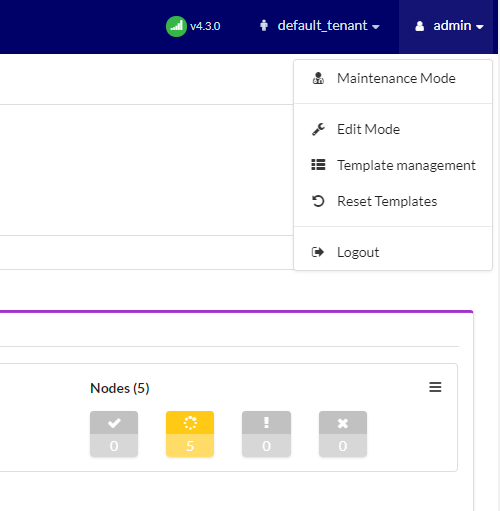
In the Edit mode box, click Add Widget:
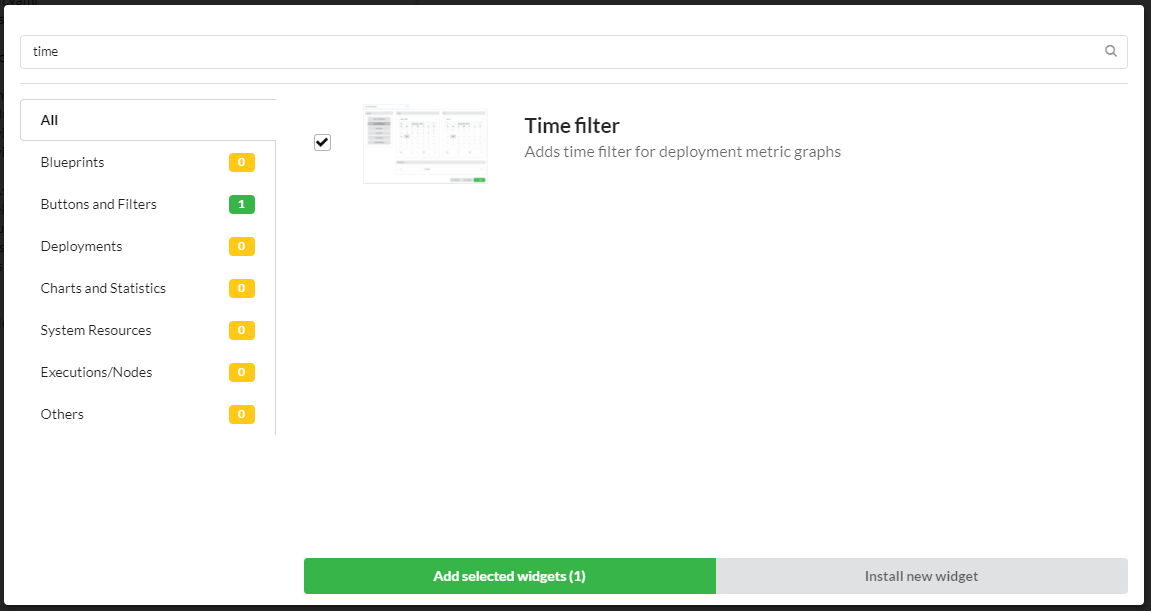
Add a time filter widget, which supports the metrics widgets):
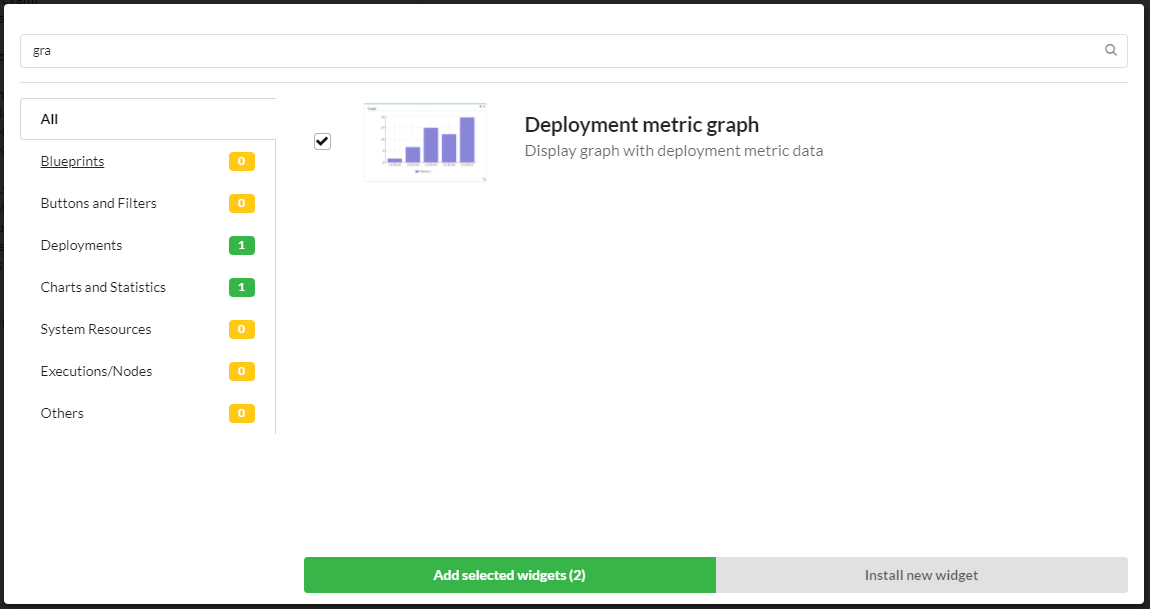
For every collector, add a deployment metric graph:
Select a metric from the list of metrics:
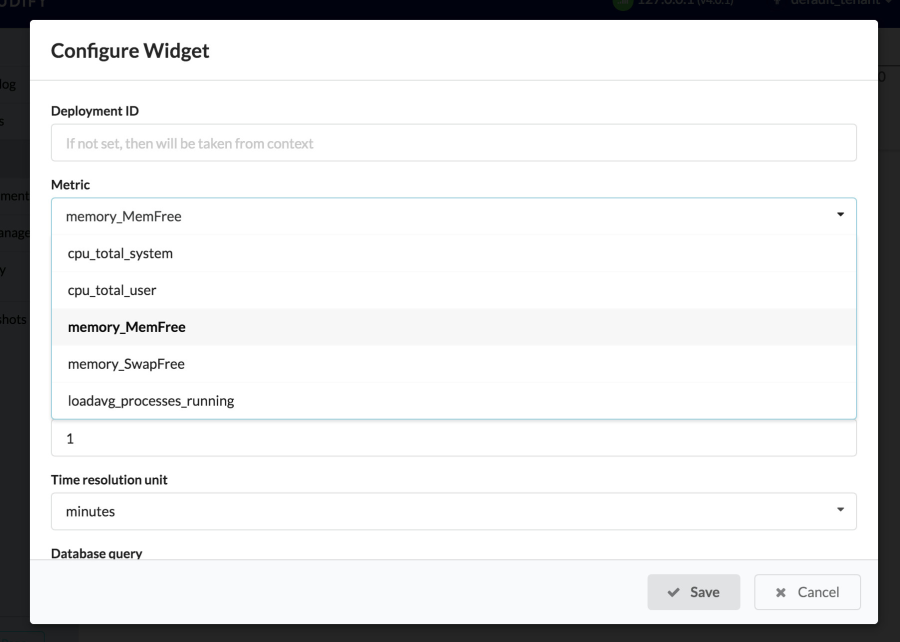
After the widget is loaded, the correct performance statistics display.
Managing Customer Deployments
To uninstall a deployment - Run the uninstall workflow on the deployment. Deployments must be uninstalled before deleting.
To scale, heal or run other executions - Run the workflow on the deployment.
Other workflows like Scale Up, Scale Down or Heal are shown in the Execute Workflow menu but can only run on deployments that are configured with those workflows in the deployment blueprint.
To delete a deployment - After you uninstall the deployment, you can click Delete deployment to delete it.
To monitor the logs and events on a deployment - Search for errors and debug services in the logs and events widgets.
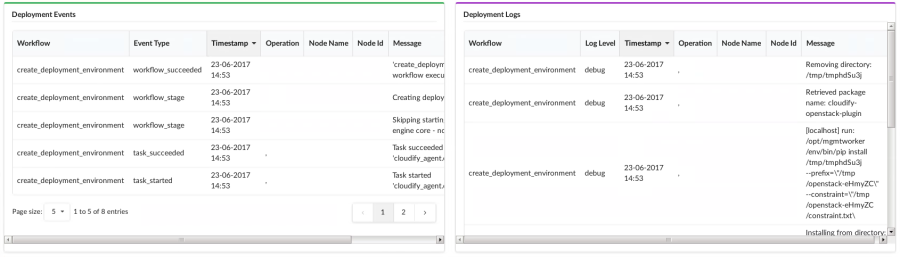
You click on a log or event message to see more details about it, including debugging information for error messages. The events and logs filter lets you filter for specific event and log content.

System resources
Plugins
By default, plugins are tenant-specific, meaning that a blueprint on one tenant cannot access a plugin on a different tenant. You can also set a plugin as global when you upload it to the manager. The Plugins table lists the plugins are available to the current tenant.

Uploading a Plugin
- Click Upload above the Plugins table.
- Either enter the URL of the wagon or select the wagon file from your file repository.
- Either enter the URL of the plugin yaml file or select the plugin yaml file from your file repository.
Click Upload.
The plugin details appear in the Plugins table.
Snapshots
The Snapshots table provides a list of all snapshots that have been uploaded or created. The Snapshots table is only available if you have admin credentials.
The snapshots creation process captures data in the entire Cloudify Manager, not just that of a specific tenant. However, the snapshot is created in the context of the current tenant, and therefore must be restored from it.
Snapshots are created as a private resource.
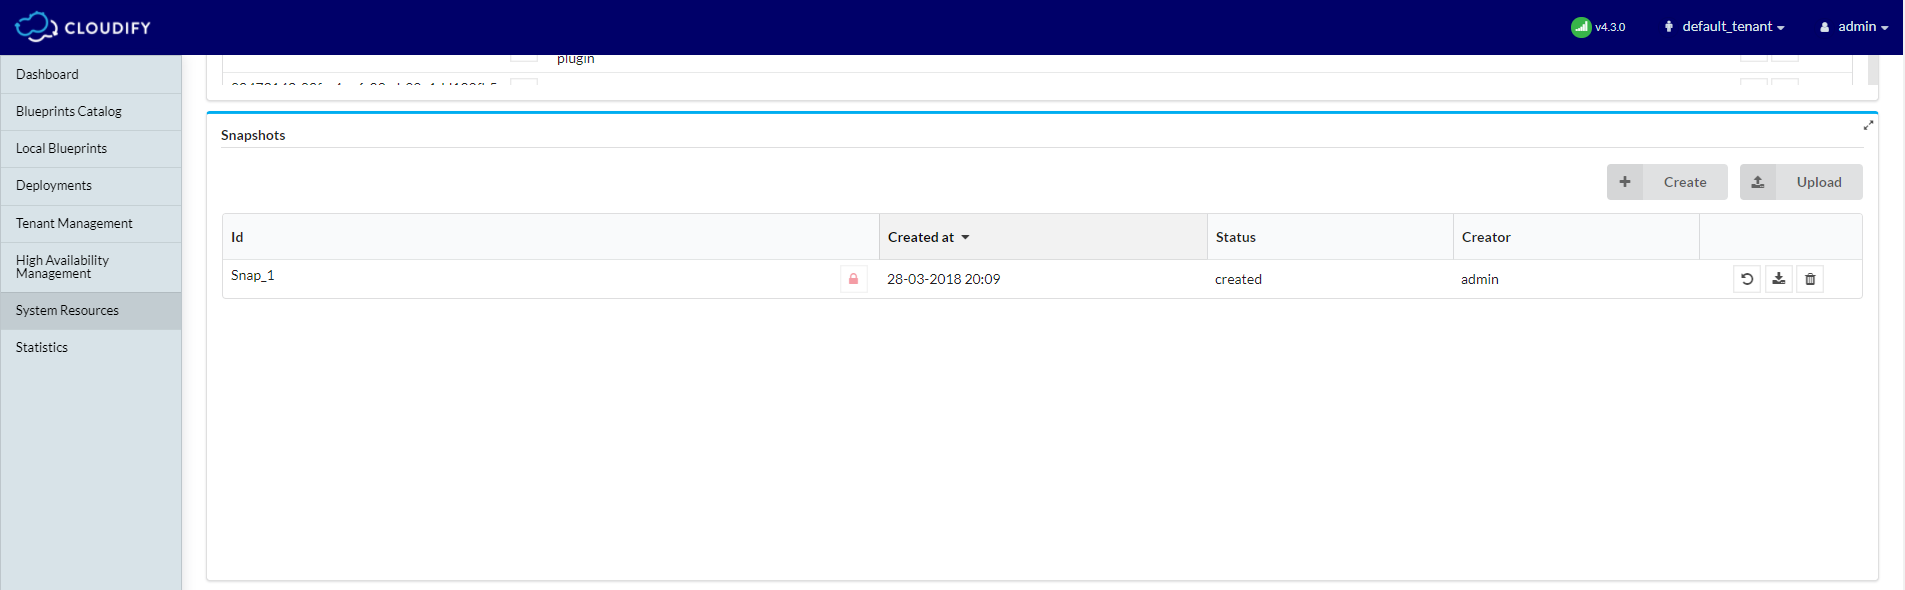
Creating a Snapshot
- Click Create above the Snapshots table.
Specify a unique ID for the snapshot and click Create.
It is good practice to use a name that will help you to easily identify the snapshot later.
The creation process begins. If there are active executions when you attempt to create the snapshot, the process waits until the executions are complete before creating the snapshot. You can see the status of executions in the Deployment executions widget.
The snapshot is saved as a ZIP file and is shown in the Snapshots table with details of its creator, creation date and time, and current status.
Restoring a Snapshot
If you are restoring a snapshot from a Cloudify Manager instance prior to version 4.0, refer to the Restoring Snapshots of Legacy Cloudify Manager Instances section below.
If you restore a snapshot to a Cloudify Manager instance that already contains data, that data is overwritten. To prevent inadvertent overwriting of existing data, you must explicity state that you want to force data overwrite.
- Click Upload in the Snapshots widget.
- Either enter the URL of the snapshot or select the snapshot file from your file repository.
- Enter the Snapshot ID.
- Click Upload.
- To restore a snapshot from a tenant-less (legacy) environment, toggle the relevant button.
- If your snapshot is from a Cloudify Manager instance that was created earlier than version 4.0, see Restoring Snapshots of Legacy Cloudify Manager Instances.
- To overwrite all content in the existing Cloudify Manager, toggle the relevant button.
- The snapshot is restored and its details appear in the Snapshots table.
Deleting a Snapshot
- In the Snapshots widget, click
 for the snapshot entry that you want to delete.
 - Click Yes to delete the snapshot from Cloudify Manager.
- In the Snapshots widget, click
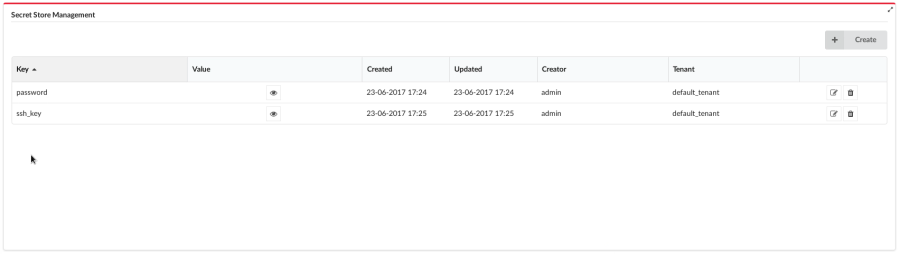
Secret Store Management
Secret storage provides a tenant-wide variable store for data that you do not want to expose in plain text in Cloudify blueprints, such as login credentials for a platform.
Role-Based Access Management
There are three widgets in this section: User management, Tenants Managements, User Groups Management.
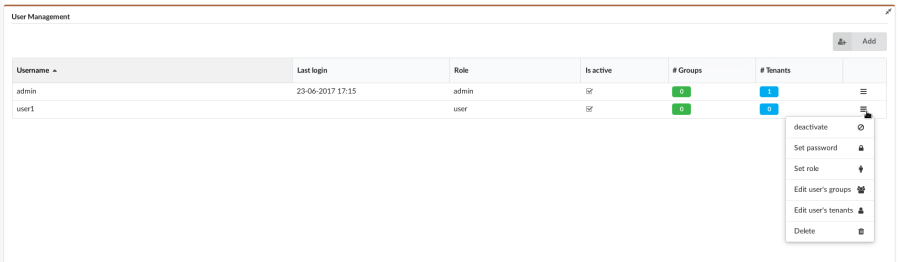
User management
Allows creating users and editing their profiles, set password, set roles, and edit user’s group and tenants.
Adding Users to a Tenant
- In the User Management widget, click the List icon on the far right of the user entry in the table that you want to add to a tenant.
- Click Add to tenant.
- Select one or more tenants from the dropdown list and click save…
- The user is added to the specified tenants.
Unless the user has a deactivated status, they can perform actions on the tenant according to their role and the configuration privileges specified by the admin.
Removing a User from a Group or Tenant
You can remove a user from a group or a tenant, without deleting them from the system. A user can be removed in two ways.
- In the User Management widget, click the List icon of the user that you want to remove and select Edit user’s groups and click Save.
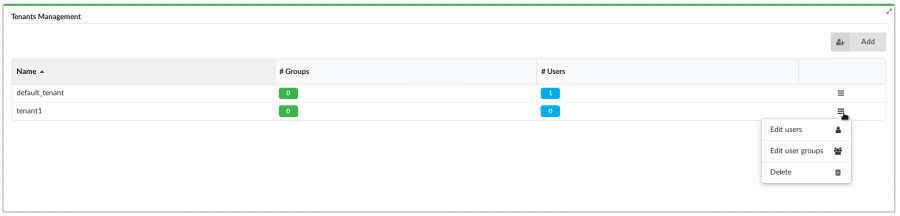
- In the Tenant’s Management widget, click the List icon of the tenant from which you want to remove a user and select Edit users. Select the user to remove and click Save.
The user is removed. If a user is a member of one or more user groups that are still assigned to a tenant, that user remains active on the tenant.
Tenant Management
Allows creating, editing and deleting tenants, add users and user groups to tenant.
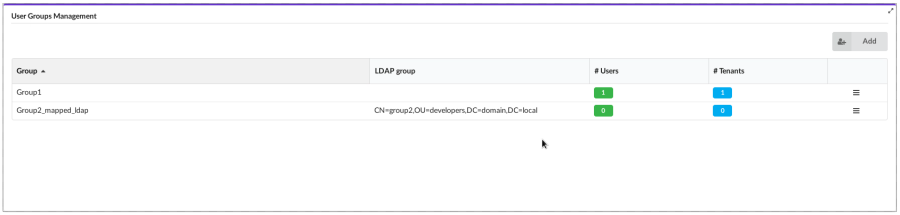
User Groups Management
Allows creating, editing and deleting user groups, add users and tenants to group.
- User Management via an LDAP System To integrate with an external user management system, you must first ensure that Cloudify Manager is configured accordingly. This can be achieved during the bootstrapping process, or you can run the following command on a Cloudify Manager instance on which no actions have been performed (a clean machine.)
Adding User Group to a Tenant
- In the User Groups Management widget, click the List icon on the far right of the user group entry in the table that you want to add to a tenant.
- Click Add group to tenant.
- Select one or more tenants from the dropdown list and click Save.
- The user group is added to the specified tenants.
All users within the group, unless they have a deactivated status, can perform actions on the tenant according to their role and the configuration privileges specified by the
admin.