Manage Terraform module
Getting Started guide to import a Terraform module and install it. In this example, we will use the existing Cloudify GitHub repo with several Terraform modules. Import public_vm Terraoform module. The module provisions EC2 with EIP on AWS.
Prerequisites
- Cloudify Manager Version 6.4
- Terraform module archive available from a URL
- Credentials to AWS. AWS credentials can be created by following the guide here.
Overview
In this guide we are going through following steps to upload a Terraform module and test it.
- Provide a URL to the GitHub Terraform module repo and chose the right module
- Define the Terraform variables for the Terraform modules
- Provision the Terraform modulde
Step 1: Open the upload the Terraform module dialog
Go to the Blueprints page and from the Upload dropdown select the Upload from Terraform module.
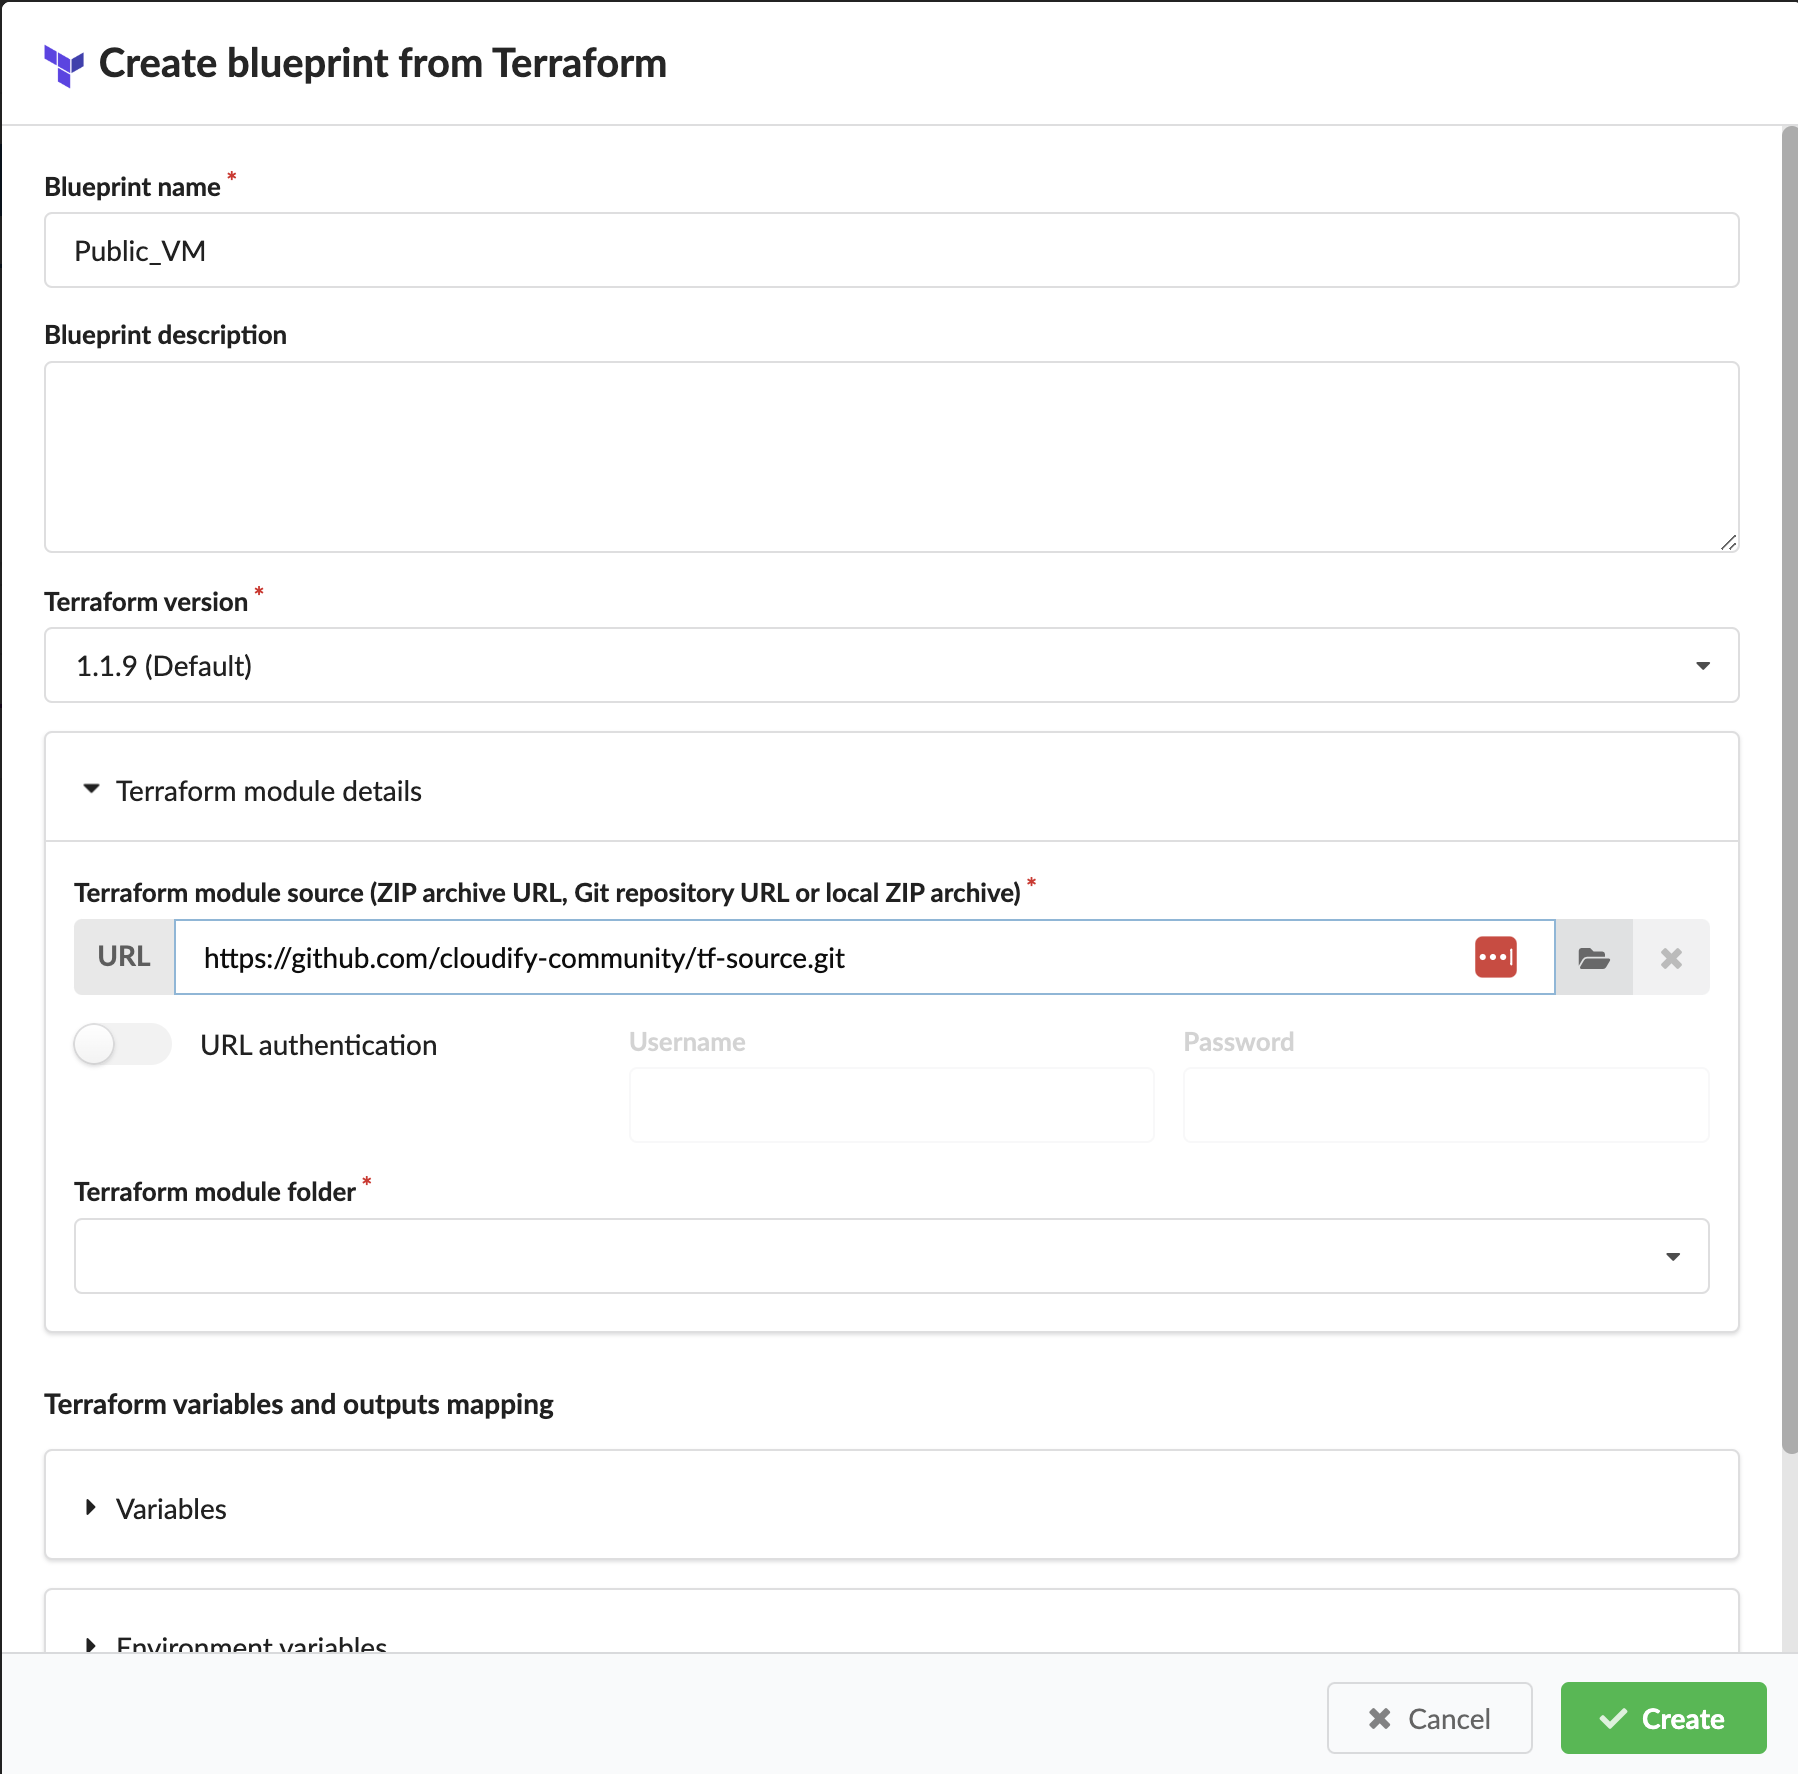
You should see the Create blueprint from the Terraform dialog.
- Type in that dialog the name.
- Select the Terraform version that you would like to use.
Step 2: Provide a URL to the GitHub Terraform modules repository
Provide a URL to the GitHub repository containing the Terraform module.
For this example, we will be using Cloudify repository https://github.com/cloudify-community/tf-source.git
- The folder structure of the archive should start with a single root folder, This root folder can contain the Terraform module, or subfolders with multiple modules.
- Other option is to provide a URL to a ZIP or upload a ZIP from a local drive.

Step 3: Select a module and autoupload variables
- Click on the Terraform module folder. The dropdown contains all the Terraform modules presented in the the git repository. Select template/modules/public_vm
- Once the template/modules/public_vm module is selected, the dialog will scan the module for Terraform variables and outputs and will sugest to populate them automatically.

Step 4: Define the varialbes
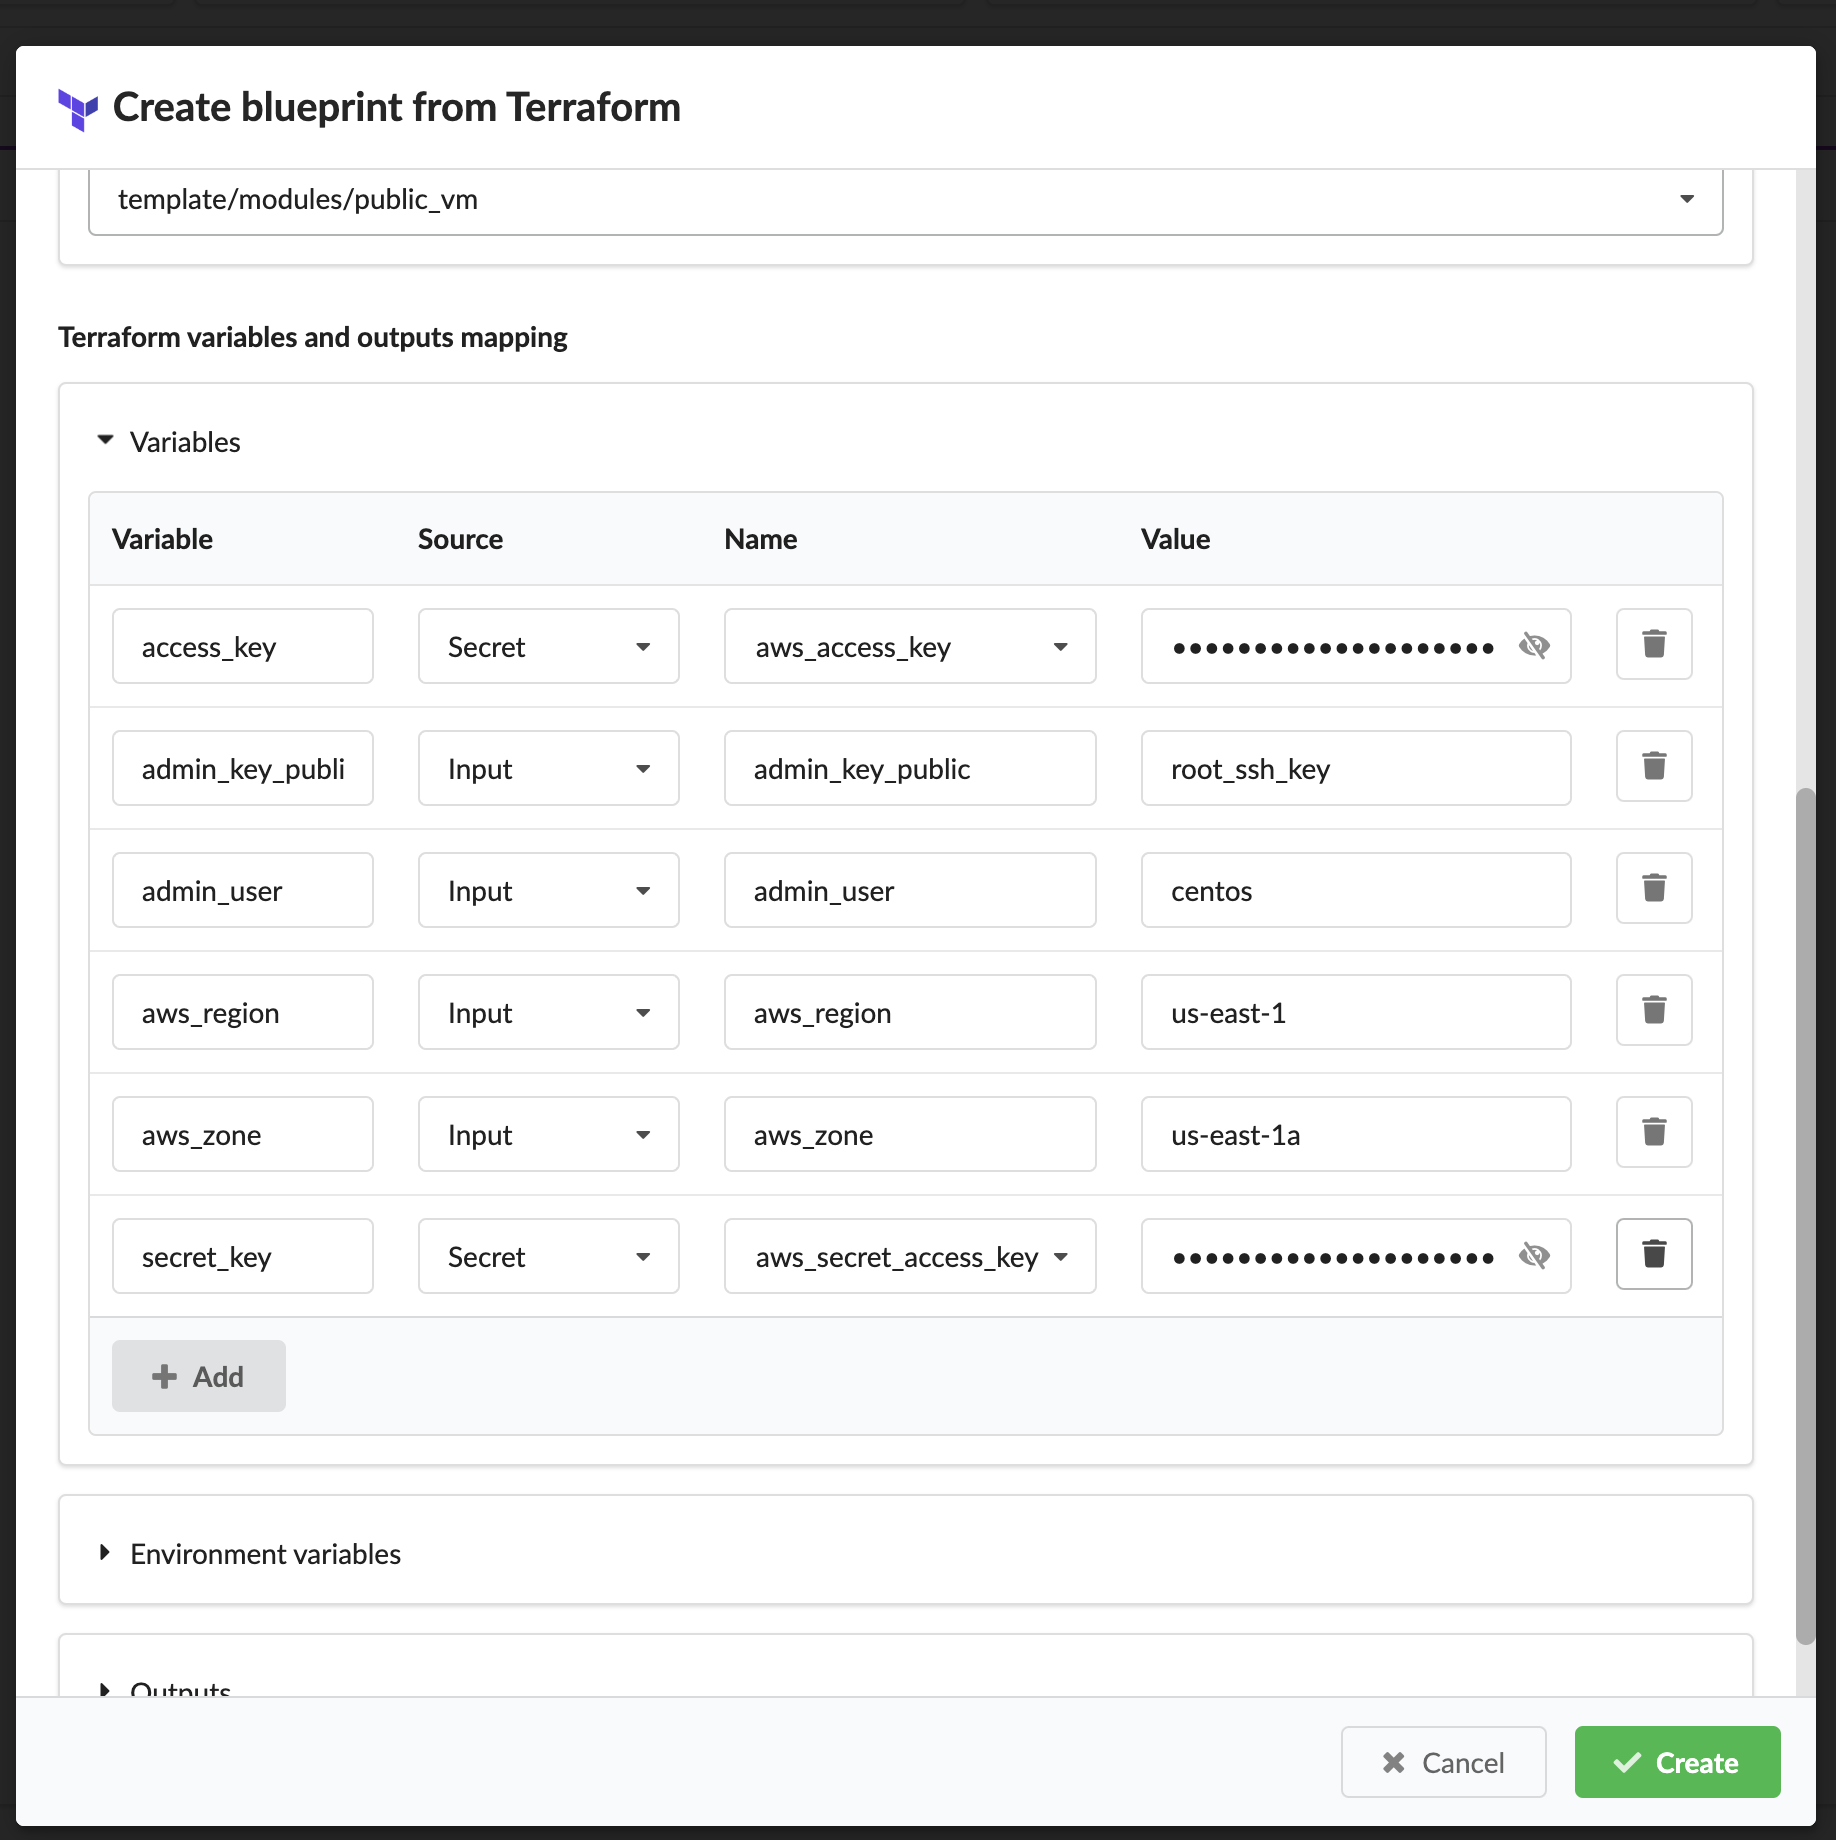
- Provide values for access_key & secret_key with aws_access_key_id, and aws_secret_access_key. AWS credentials can be created by following the guide here. As AWS credentials are sensitive data we would like to store them as encrypted data in the secret store.
- Select the Secret as source.
- Provide a name as it will be stored in the scret store.
- In the value put the secret value.
- For the rest variables leave the source as Input and provide the values as listed below.

Step 5: Define the outputs and capabilities of the blueprint
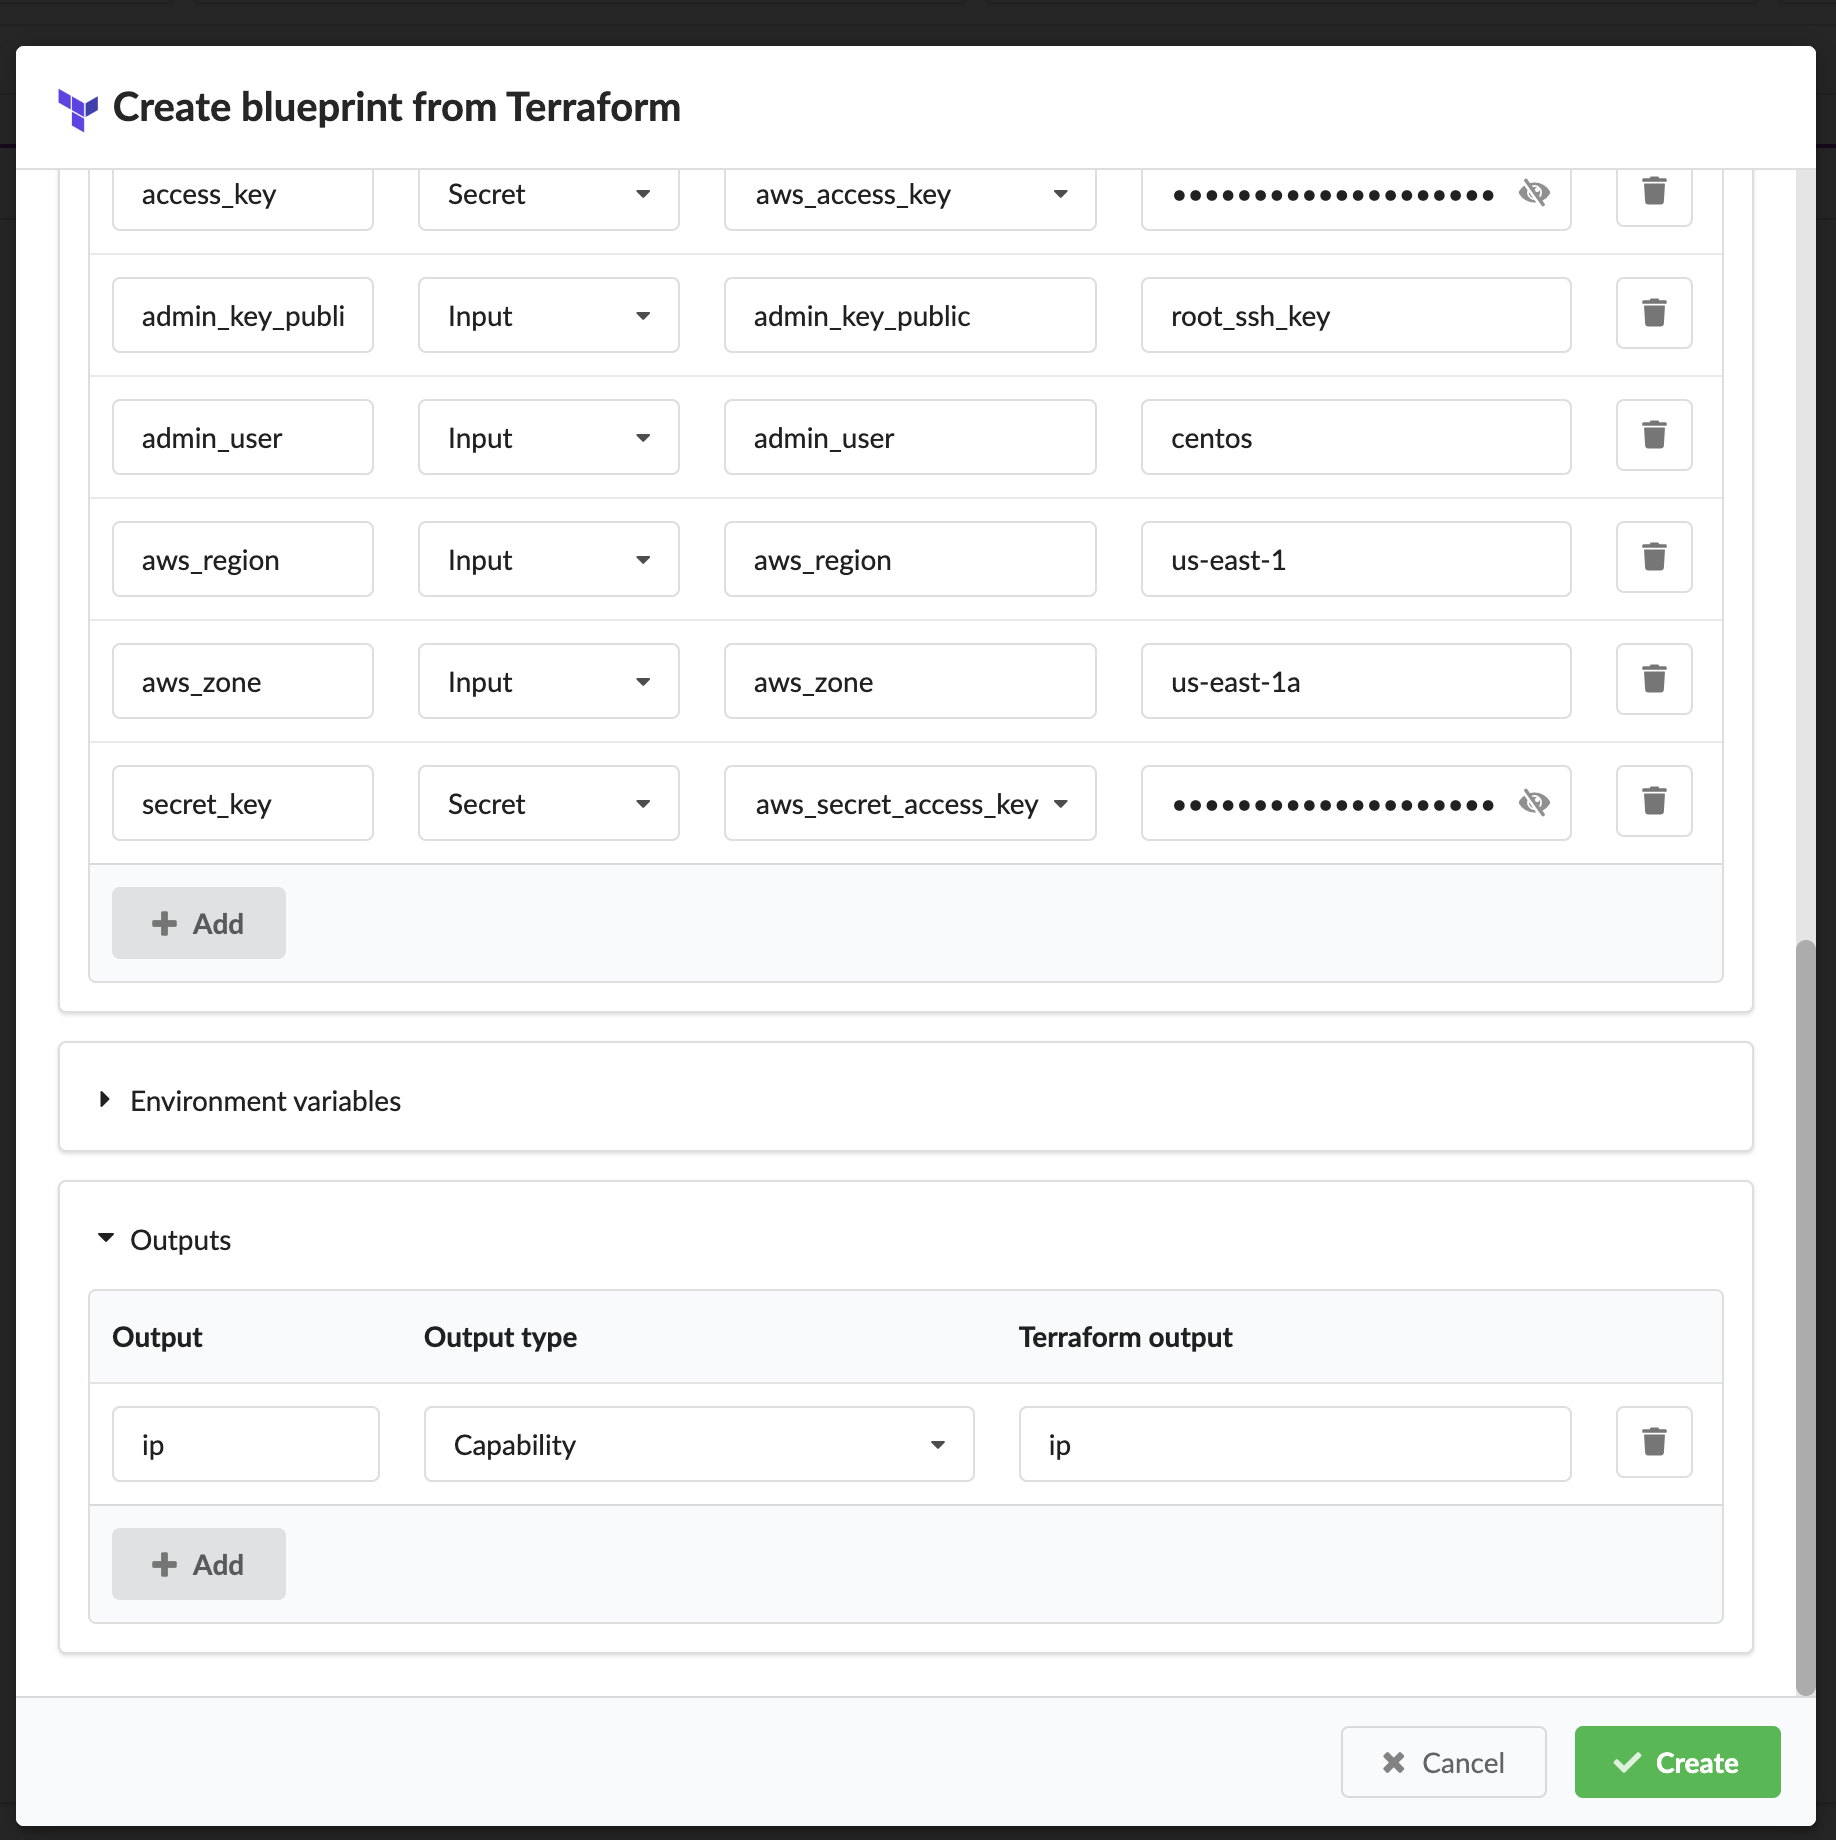
The outputs of the Terraform module can be made available in the outputs and capabilities in Cloudify.
- Expand the Outputs section and validate

Step 6: Create the blueprint
Submit the dialog, errors discovered will appear in the dialog. After successful submission you will be forwarded to the create deployment modal.
Step 7: Create a Deployment and Test the blueprint
- Provide a deployment name to be created
- Review the input values, you can change if needed.
- Click Install to provision the Terraform Modal. You’ll be forwarded to the deployment page.
Step 8: Explote the deployment
- In last execution tab, You can track the provisioning progress and see the logs.
- Deployment Info tab provides a general information about the provisioned resources and the deployments
